What You Need to Know Before DIYing Your Crawlspace
Spencer Turner • June 23, 2026

A Realistic Look at Crawlspace Repairs, Moisture Problems, and Common DIY Mistakes

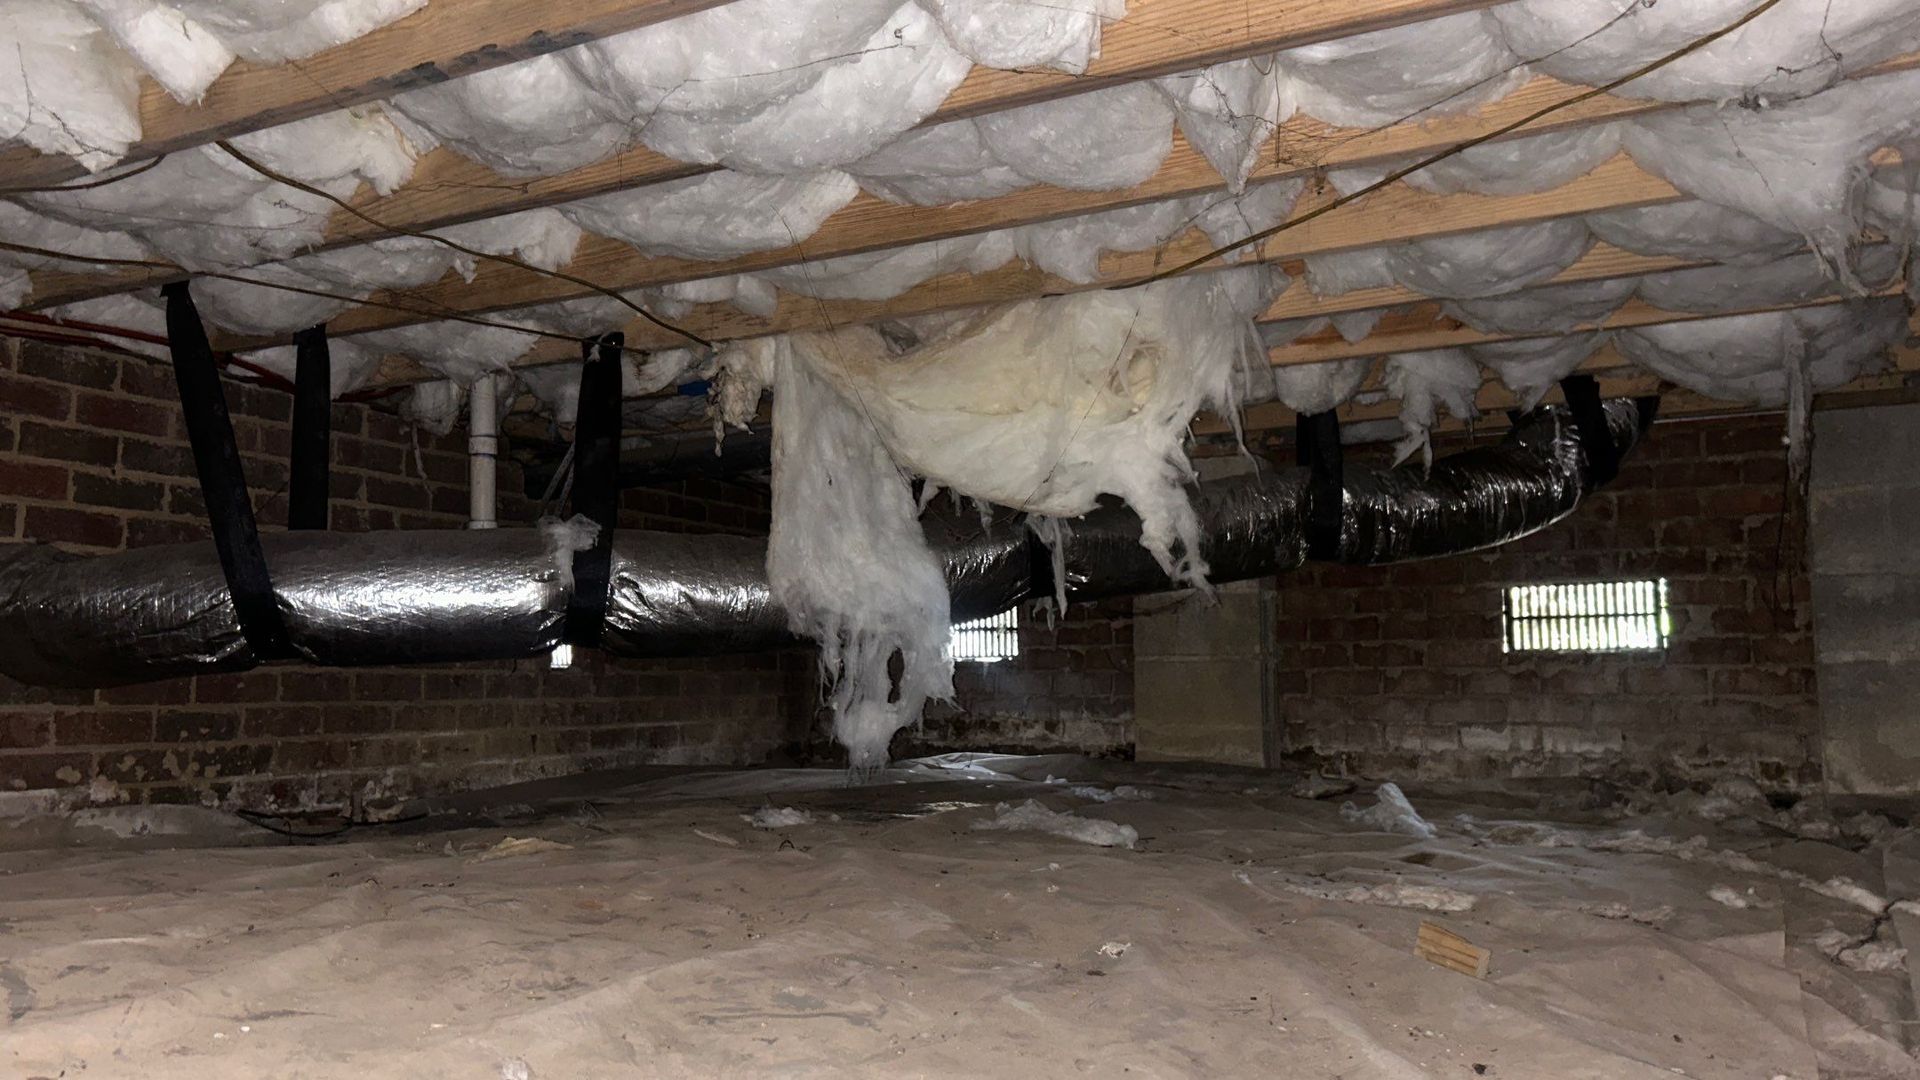
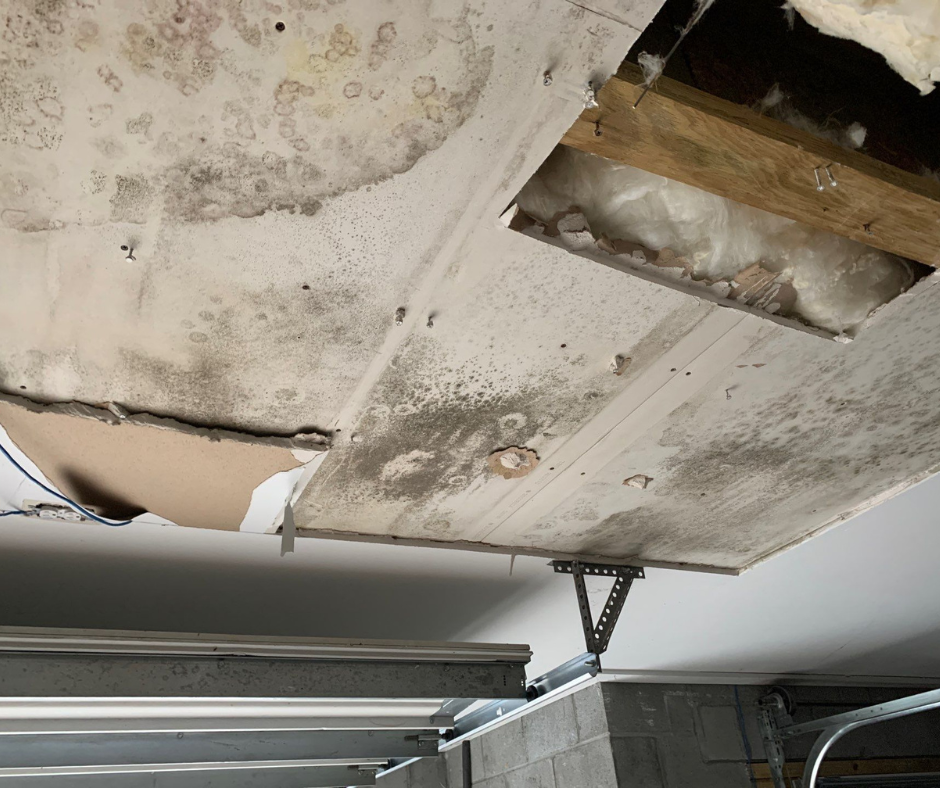
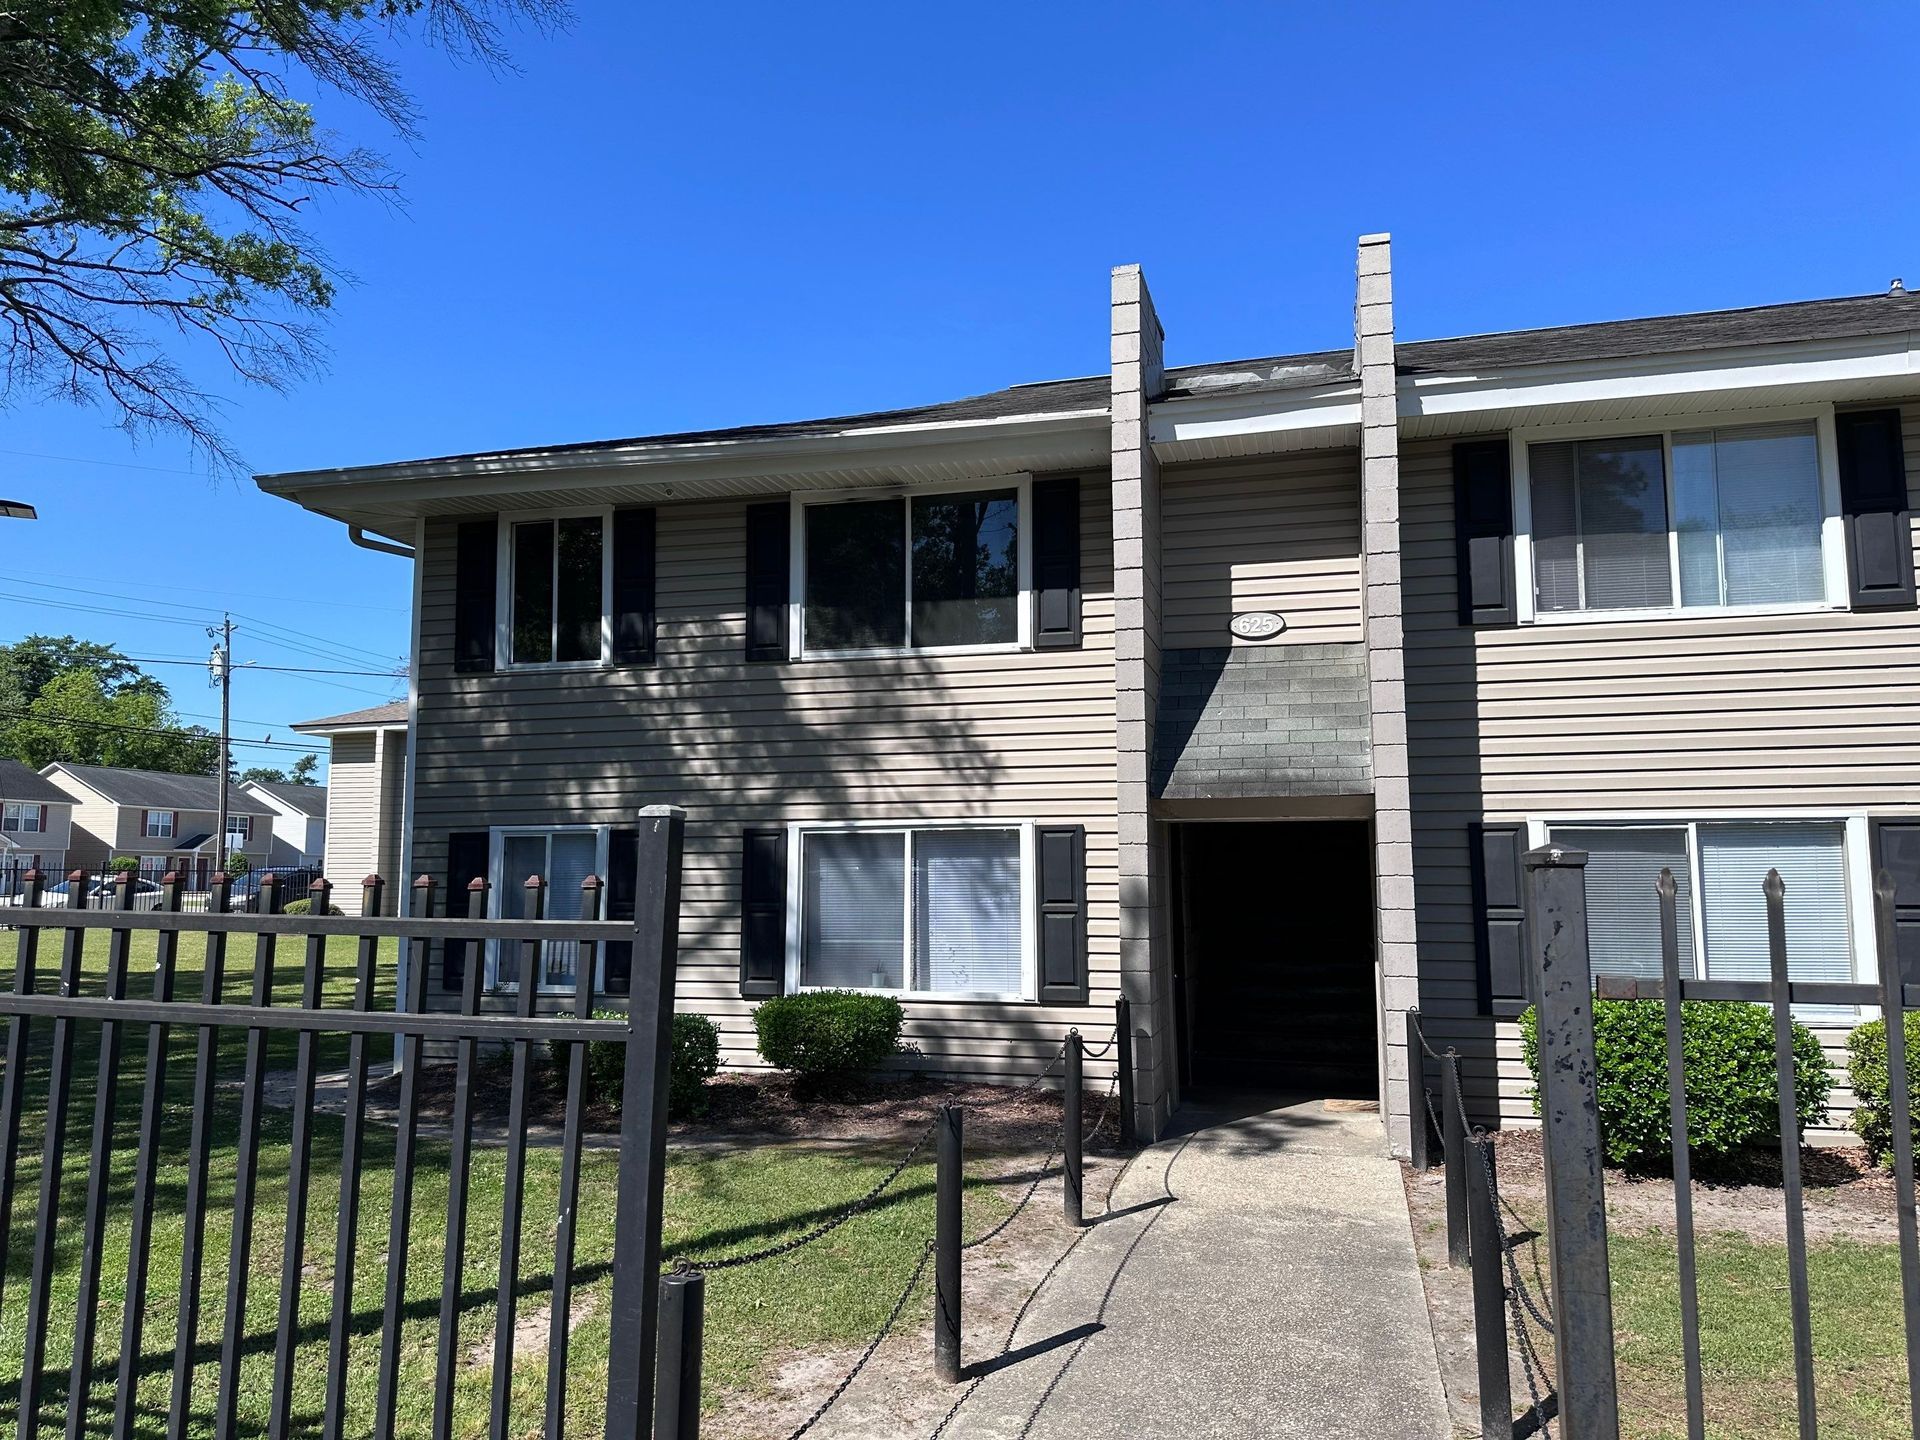
Crawlspaces are often ignored until problems appear, such as musty odors, soft floors, standing water, mold growth, or sagging insulation. Many homeowners turn to DIY solutions after seeing online videos that make repairs seem easy, but temporary fixes like adding plastic sheeting, fans, or support posts rarely address the root cause.

At EAS Environmental, we've seen how small crawlspace issues can turn into serious structural and environmental problems when moisture and damage are left untreated. While some basic maintenance can be handled by homeowners, it's important to understand the risks, common mistakes, and hidden hazards before working beneath your home. This guide will help you identify when a DIY approach is appropriate and when professional remediation is the safer and more effective solution.

Abstract

DIY crawlspace repairs are becoming more common, but many homeowners are unaware of the safety risks and hidden damage that can exist beneath their homes. Issues such as excess moisture, mold growth, poor air quality, sewer gas intrusion, and structural deterioration often require more than a simple DIY fix.

In this article, EAS Environmental explains common crawlspace repair mistakes, the limitations of temporary repairs, and the importance of proper moisture control and encapsulation. We also discuss when professional remediation and structural evaluation may be necessary to protect your home's health, safety, and long-term stability.


The Reality of Crawlspace Problems

  • Slide title

    Write your caption here
    Button
  • Slide title

    Write your caption here
    Button

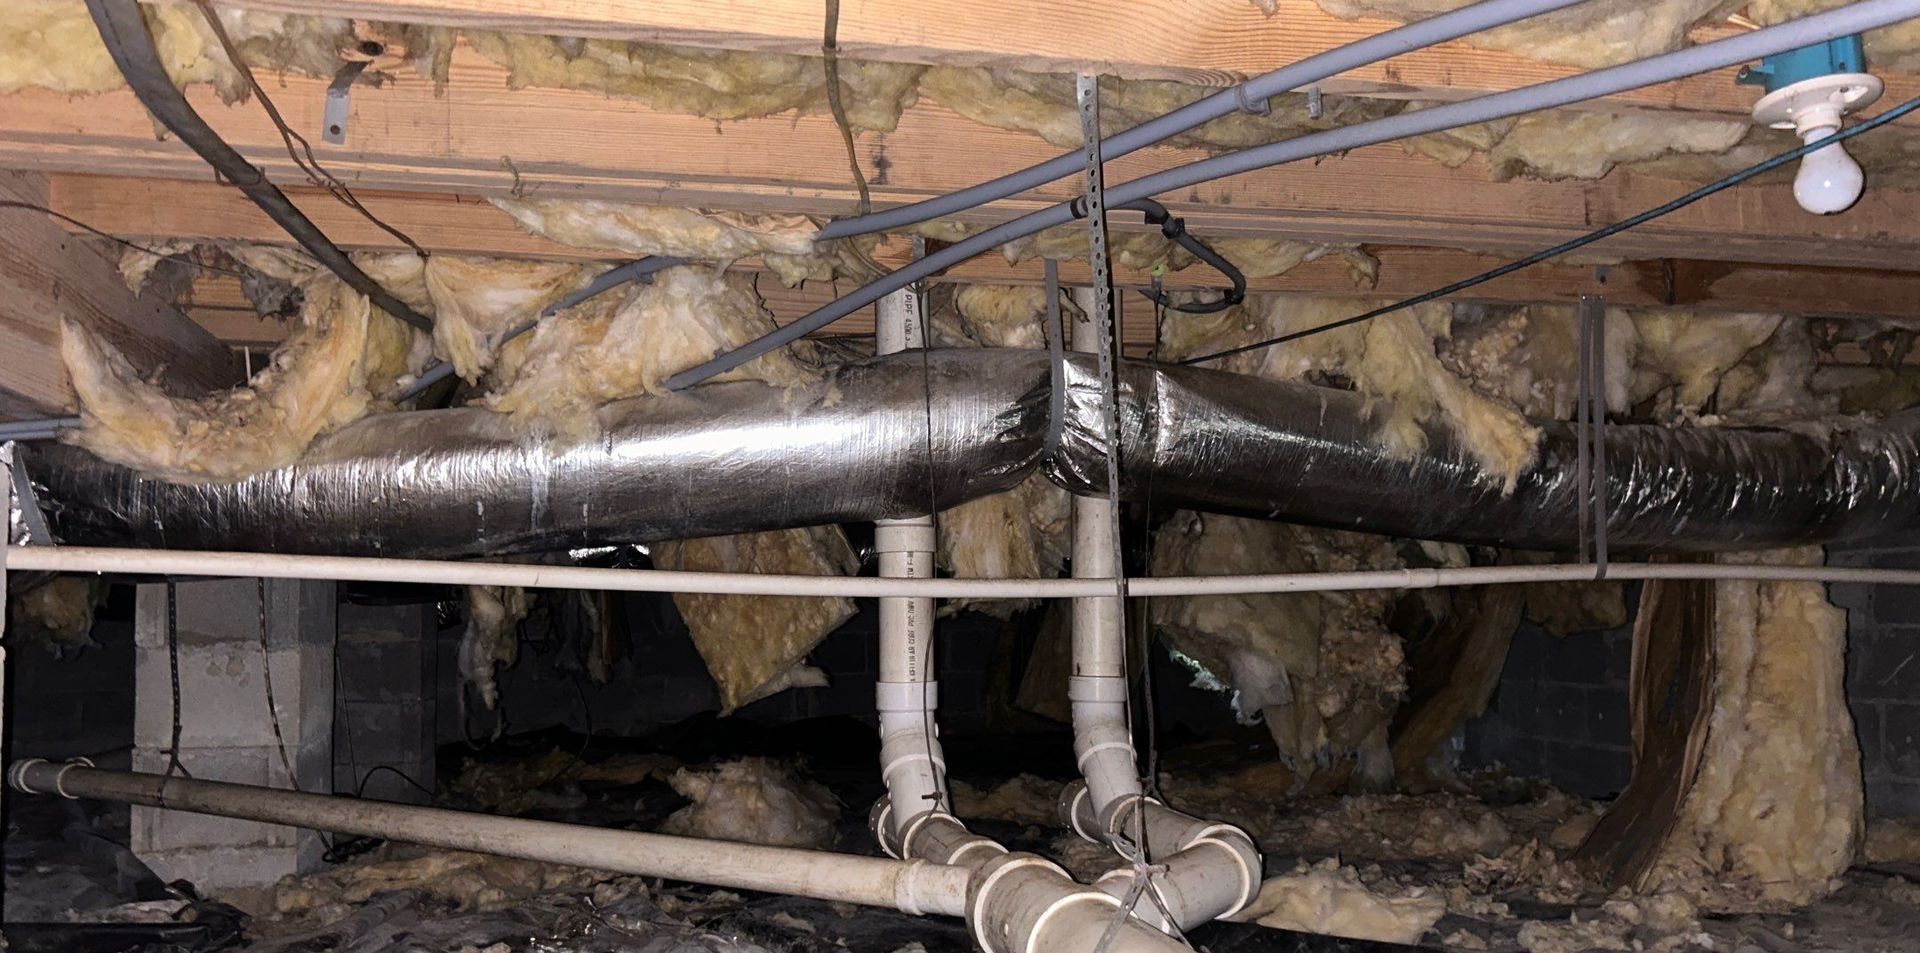
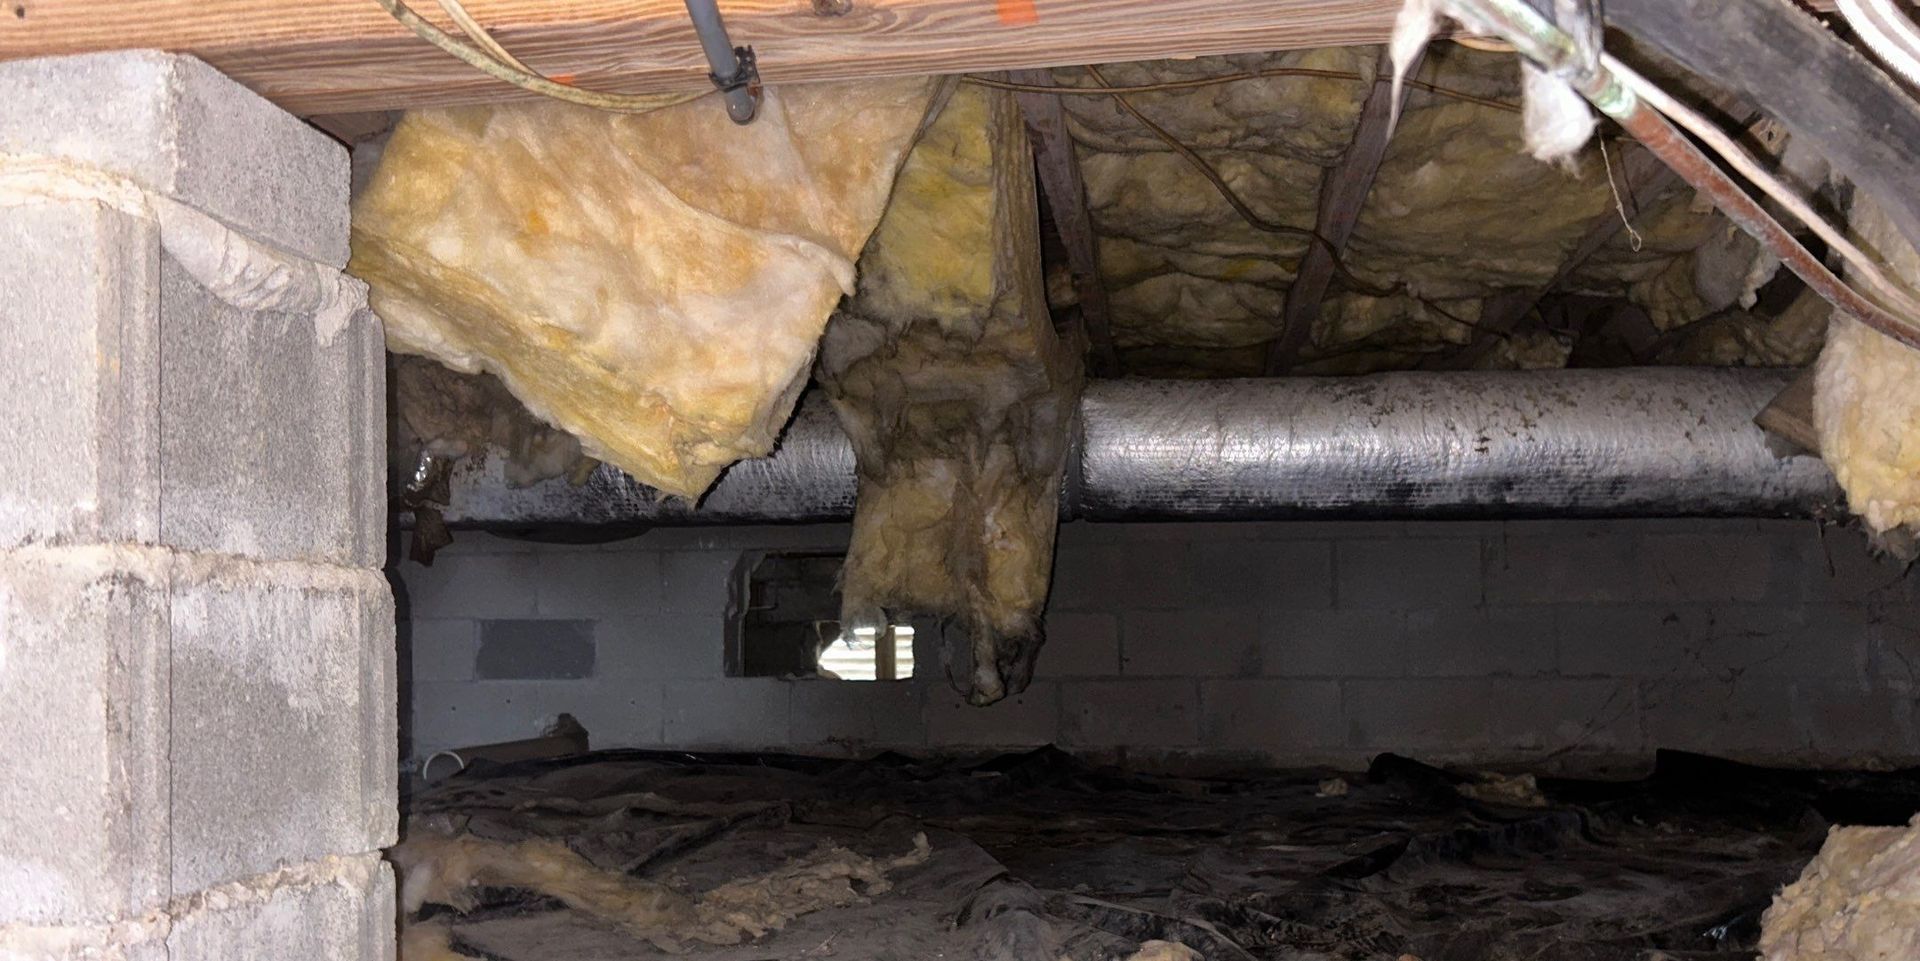
One of the biggest misconceptions we see is that crawlspace issues are isolated to the area under the home. In reality, crawlspaces directly affect your indoor air quality, flooring stability, humidity levels inside the home, mold growth, energy efficiency, and structural integrity. In many homes, air from the crawlspace naturally moves upward into the living space. That means moisture, odors, mold spores, and other contaminants can impact the entire home. This is why these crawlspace problems should never be ignored.


Step 1: Safety Comes First Before Entering a Crawlspace

Before attempting any DIY crawlspace work, safety needs to be your first consideration.

  • Slide title

    Write your caption here
    Button
  • Slide title

    Write your caption here
    Button
  • Slide title

    Write your caption here
    Button

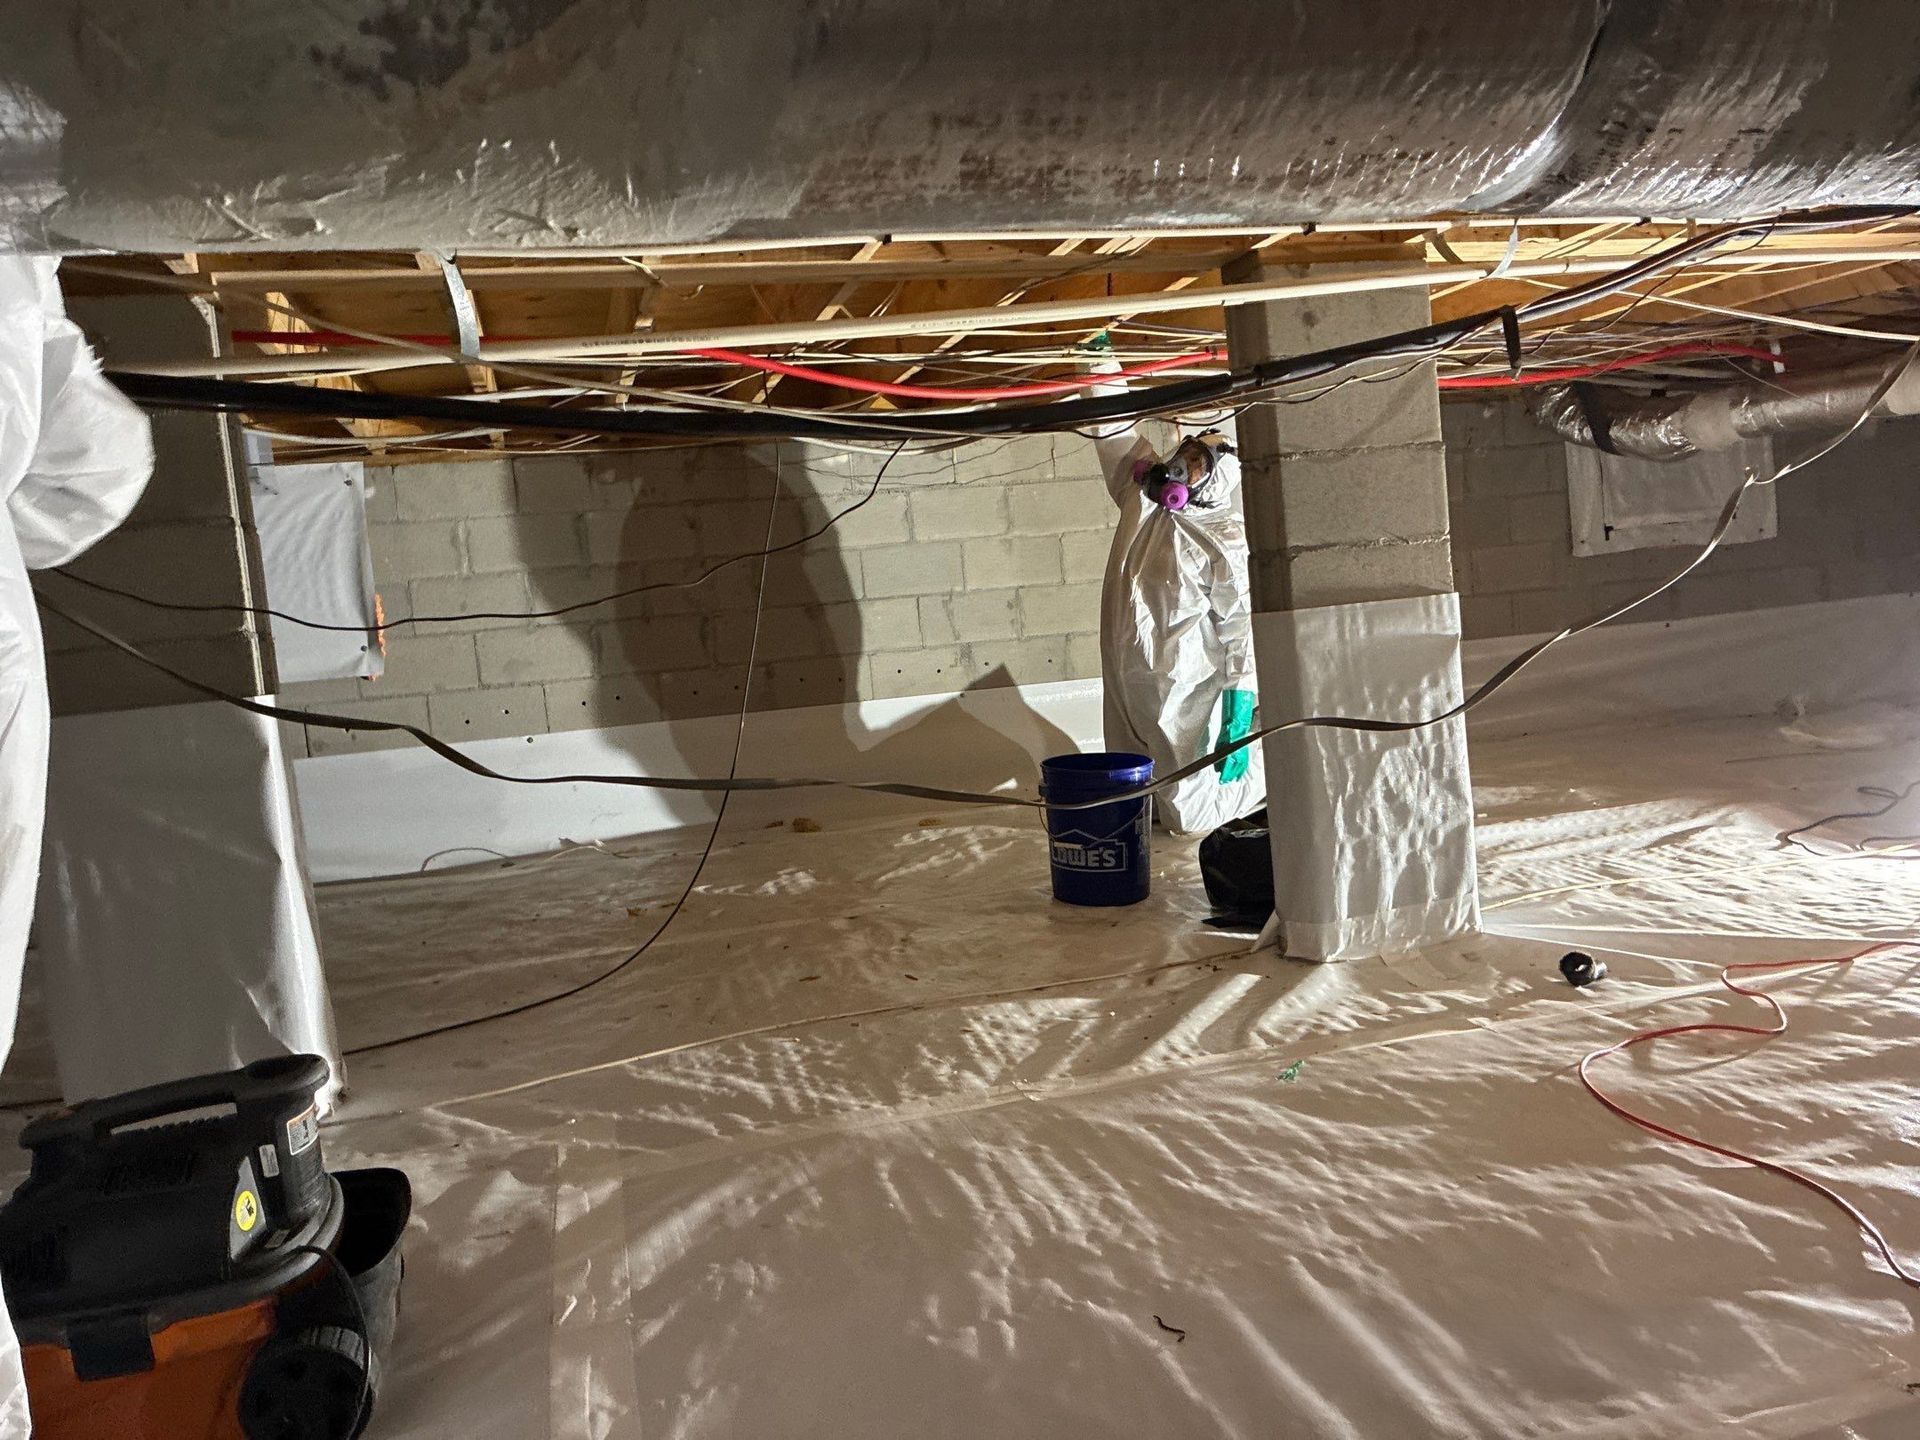
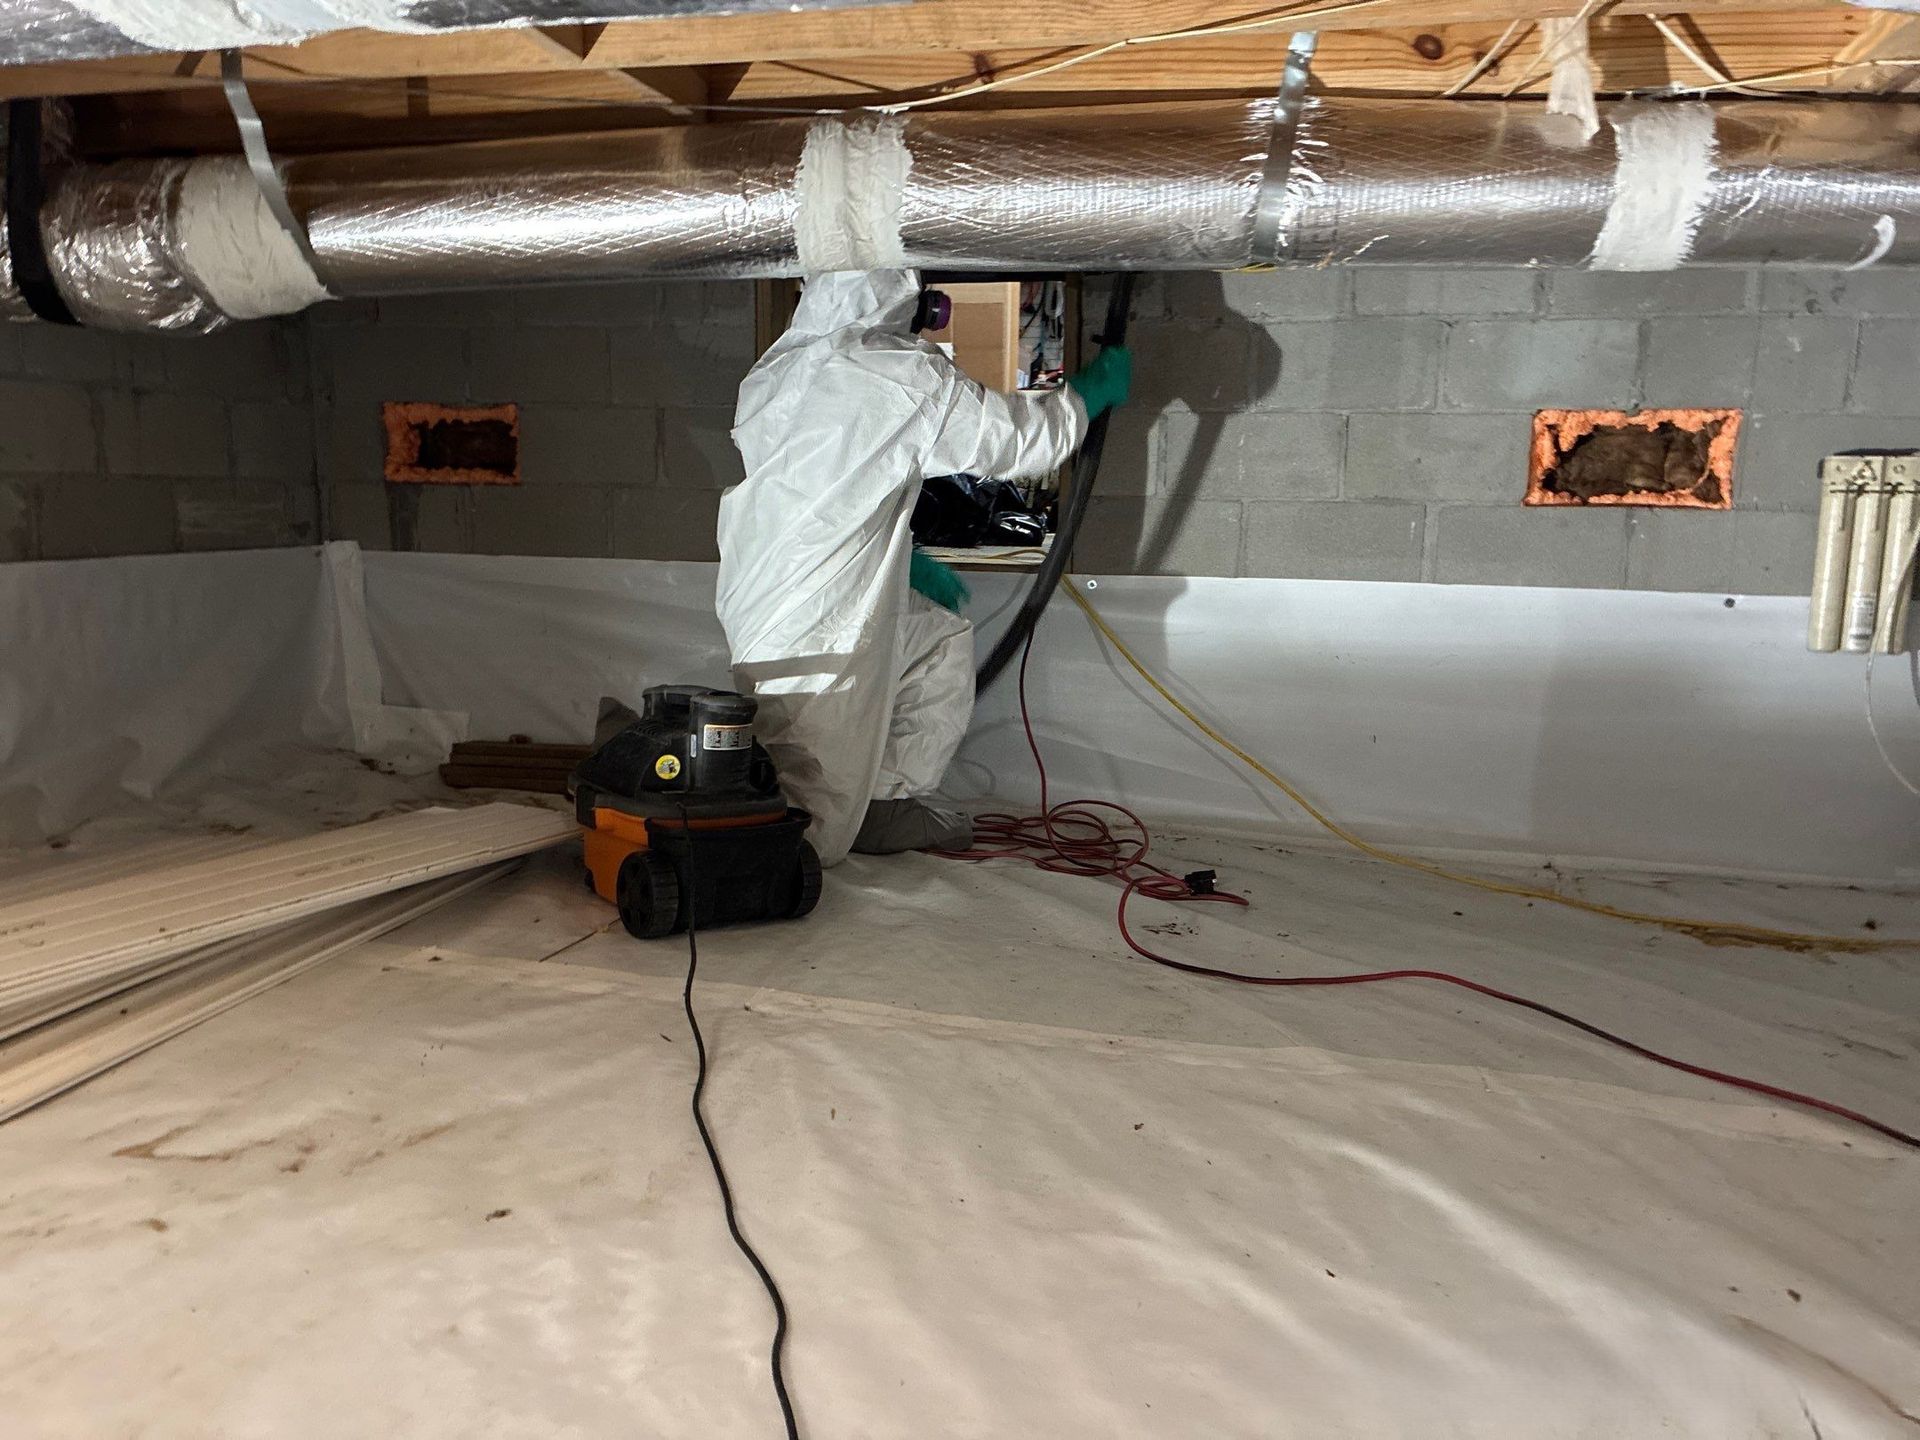
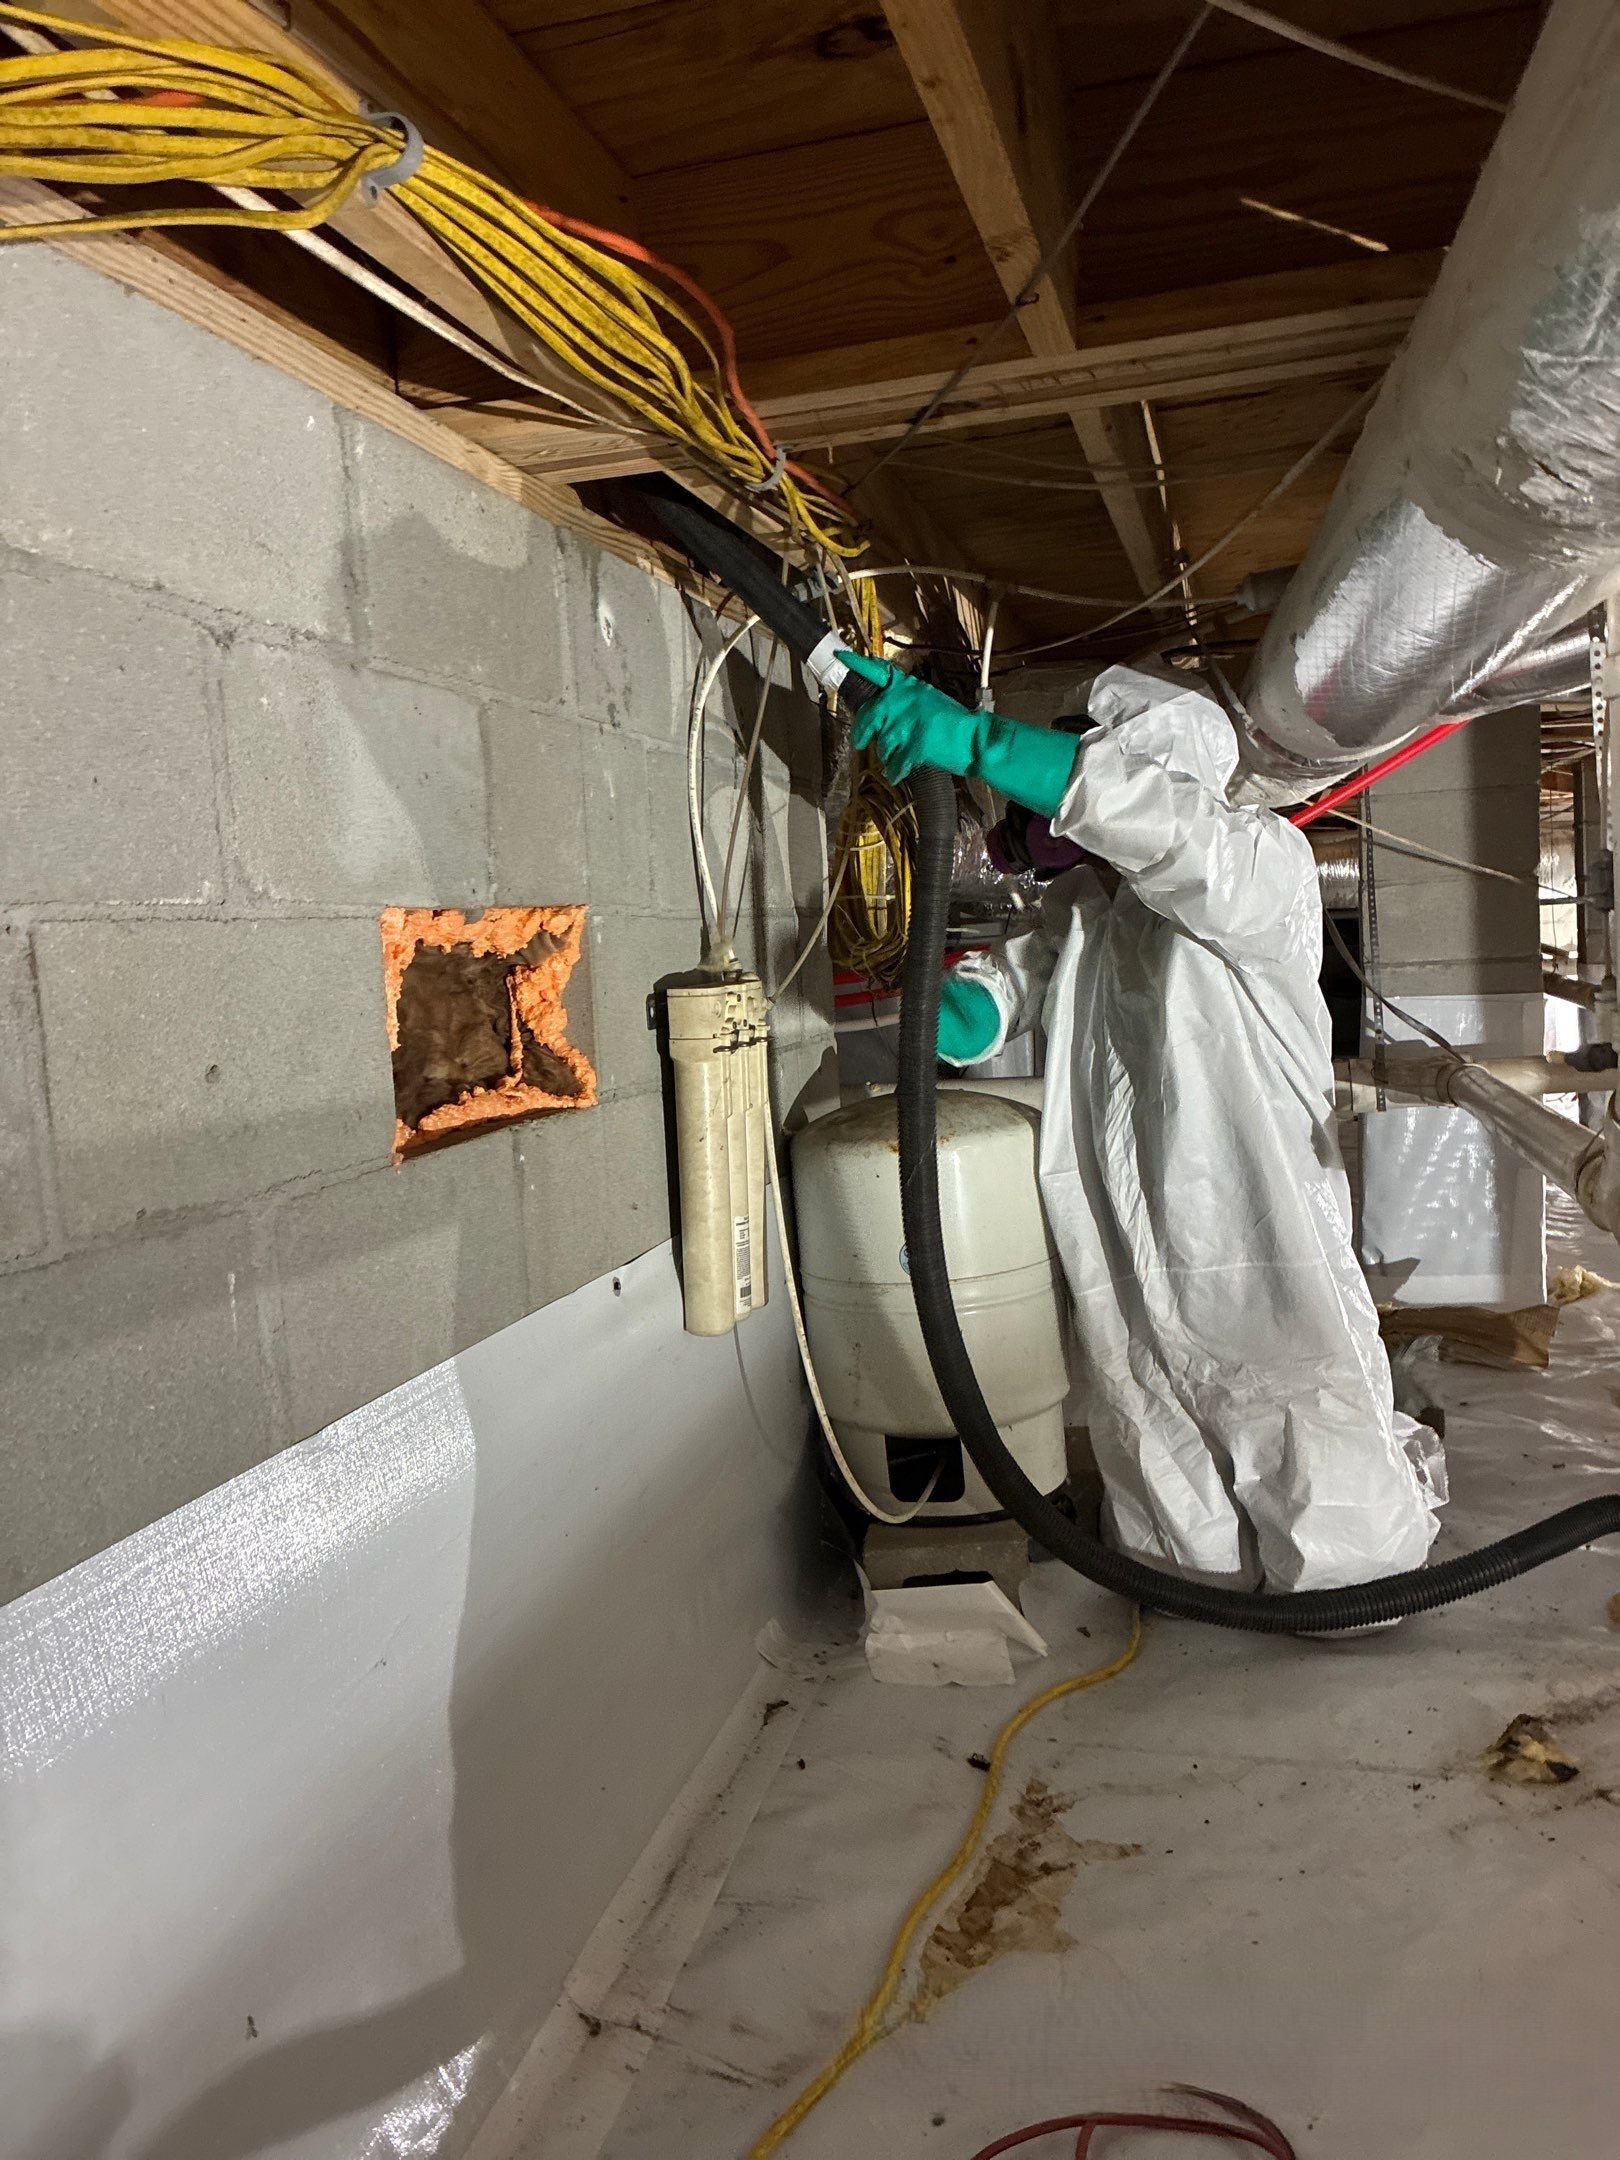
Crawlspaces can contain sewer gas leaks, mold contamination, exposed electrical hazards, sharp debris or nails, waste from rodents, mammals or insects, high humidity and poor ventilation. If you’re entering a crawlspace, basic safety precautions should include wearing respiratory protection (minimum N95 depending on conditions), gloves and protective clothing; having the proper lighting; monitoring for standing water near electrical components; and avoiding confined-space risks.


From an IICRC-informed moisture and environmental safety perspective, identifying hazards before disturbance is critical to preventing contamination spread and exposure.


Step 2: Understand the Source of the Problem

One of the most common DIY crawlspace mistakes is treating the symptom instead of fixing the cause. Soft floors, mold, musty odors, and condensation are often signs of underlying moisture problems, poor drainage, vapor intrusion, or structural damage.


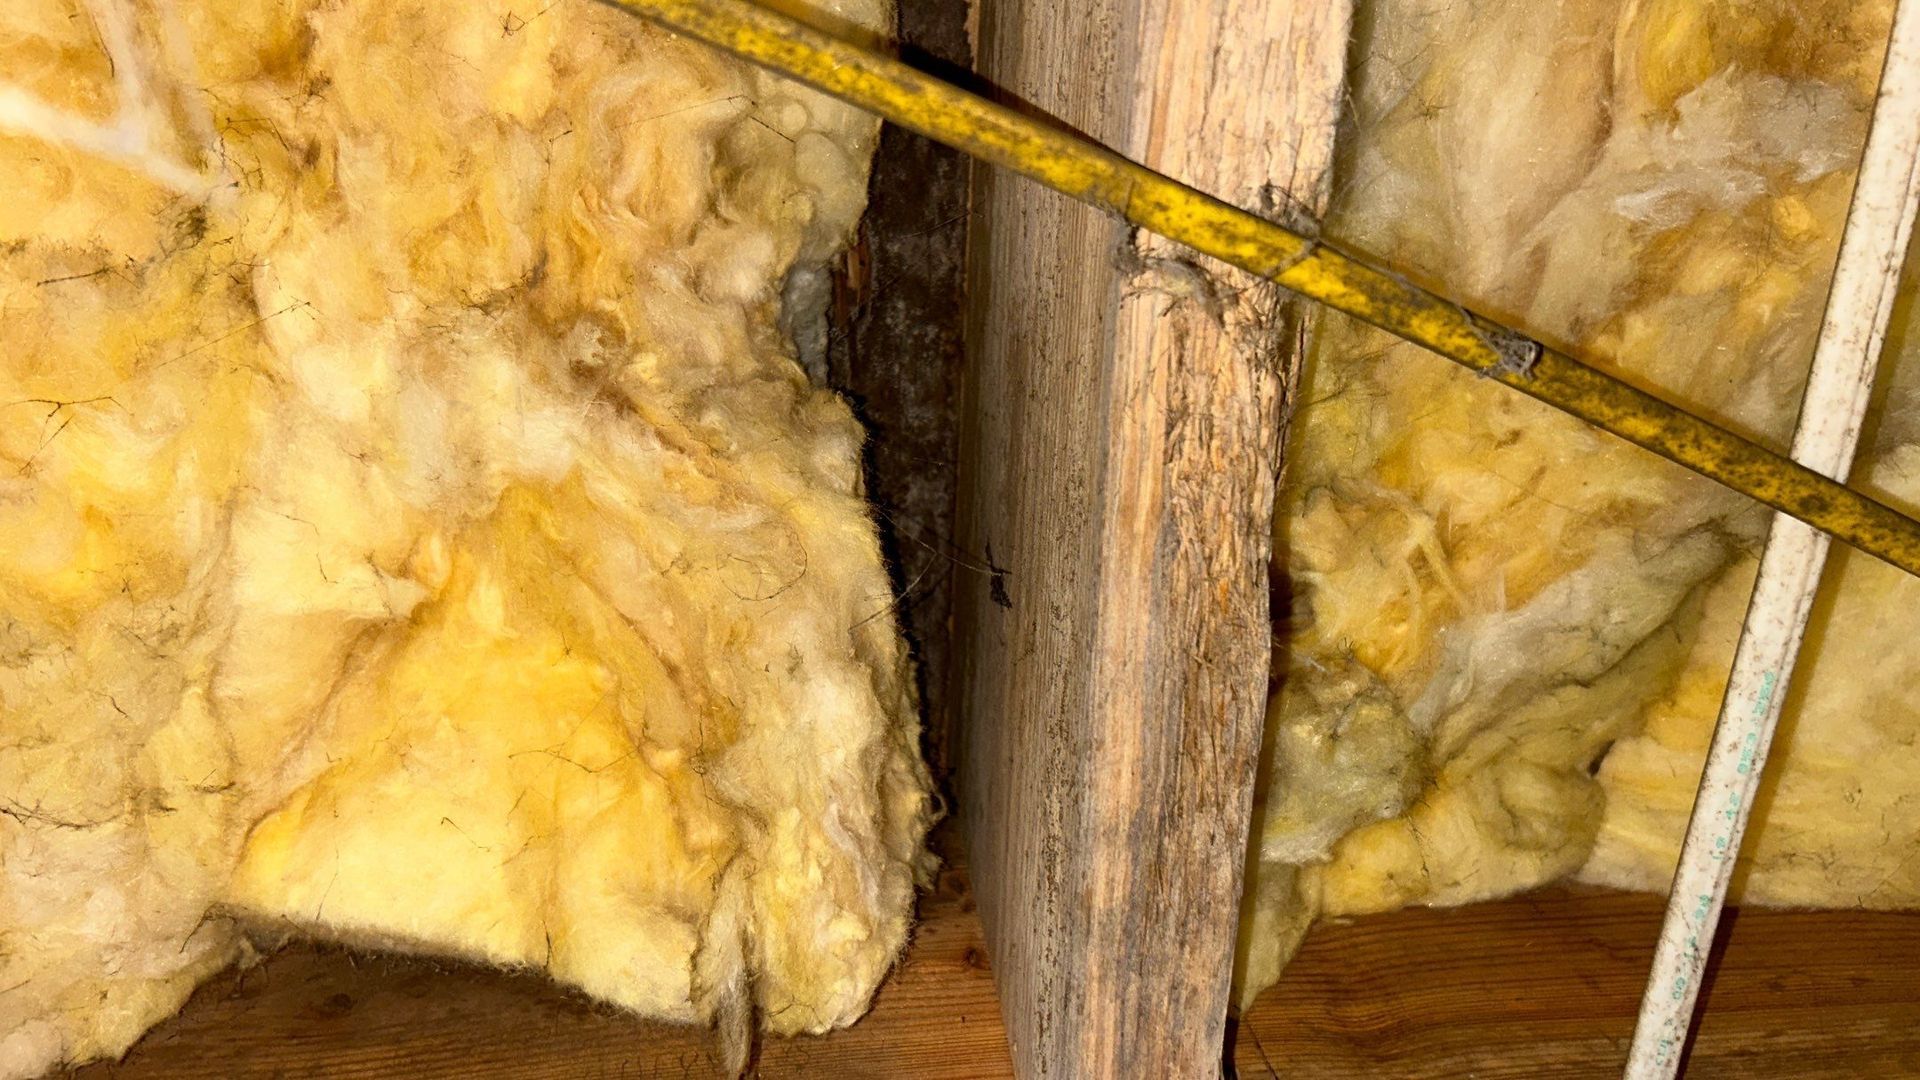
Many homeowners try to reinforce damaged areas without addressing the moisture that caused the problem in the first place. A proper crawlspace inspection should identify moisture sources, drainage issues, ventilation concerns, and any mold or structural deterioration. Following IICRC moisture management principles, the source of moisture should always be corrected before repairs or remediation begin.


Step 3: Be Careful With DIY Encapsulation

Encapsulation is one of the most searched crawlspace topics online — and one of the most commonly misunderstood.

  • Slide title

    Write your caption here
    Button
  • Slide title

    Write your caption here
    Button
  • Slide title

    Write your caption here
    Button

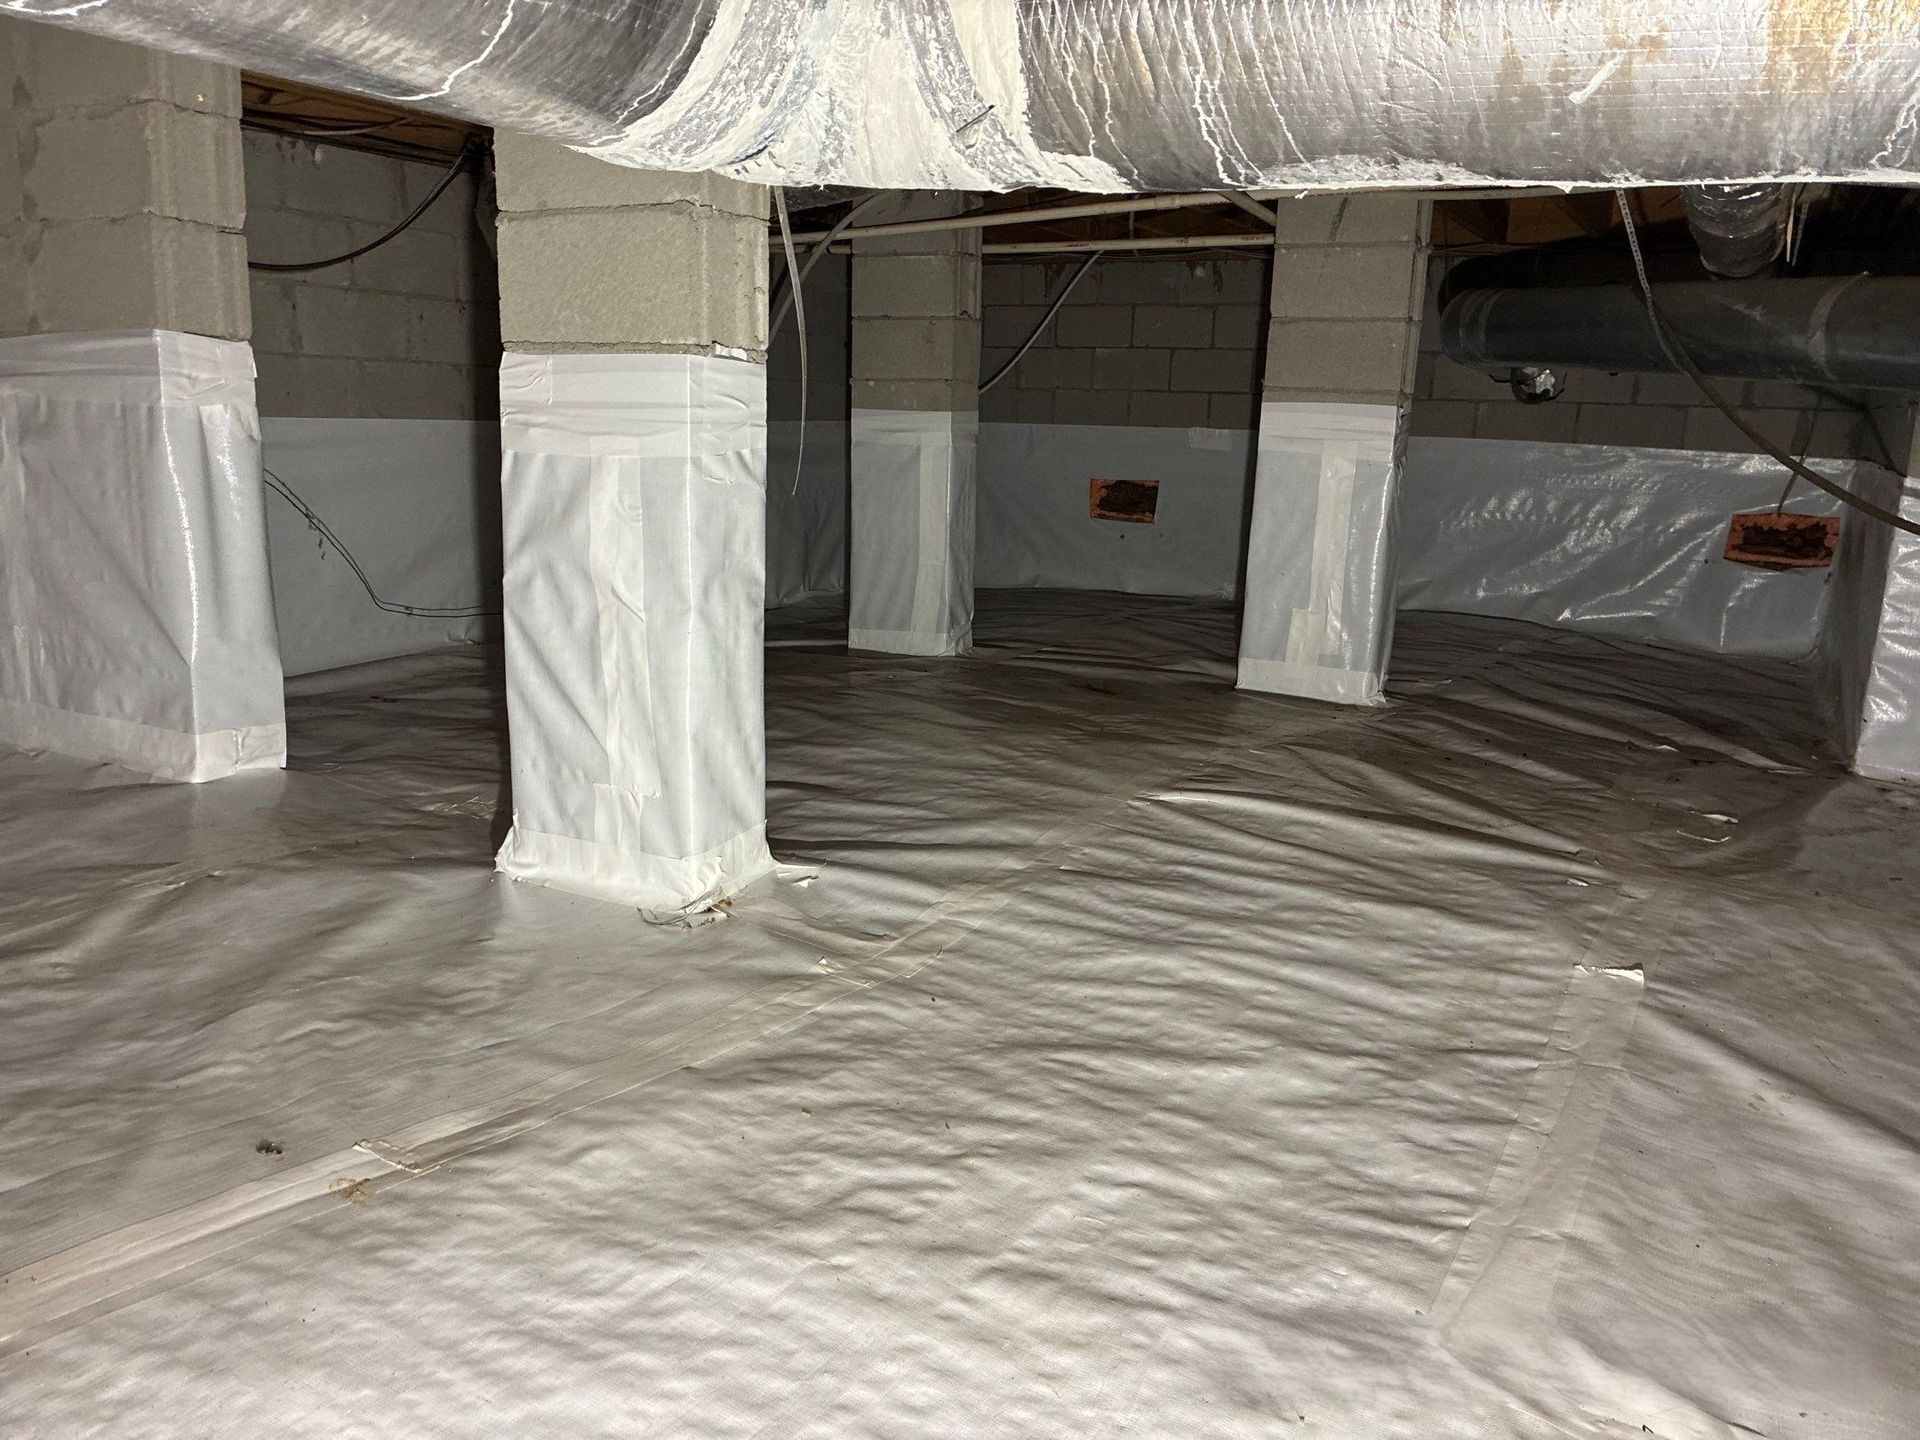
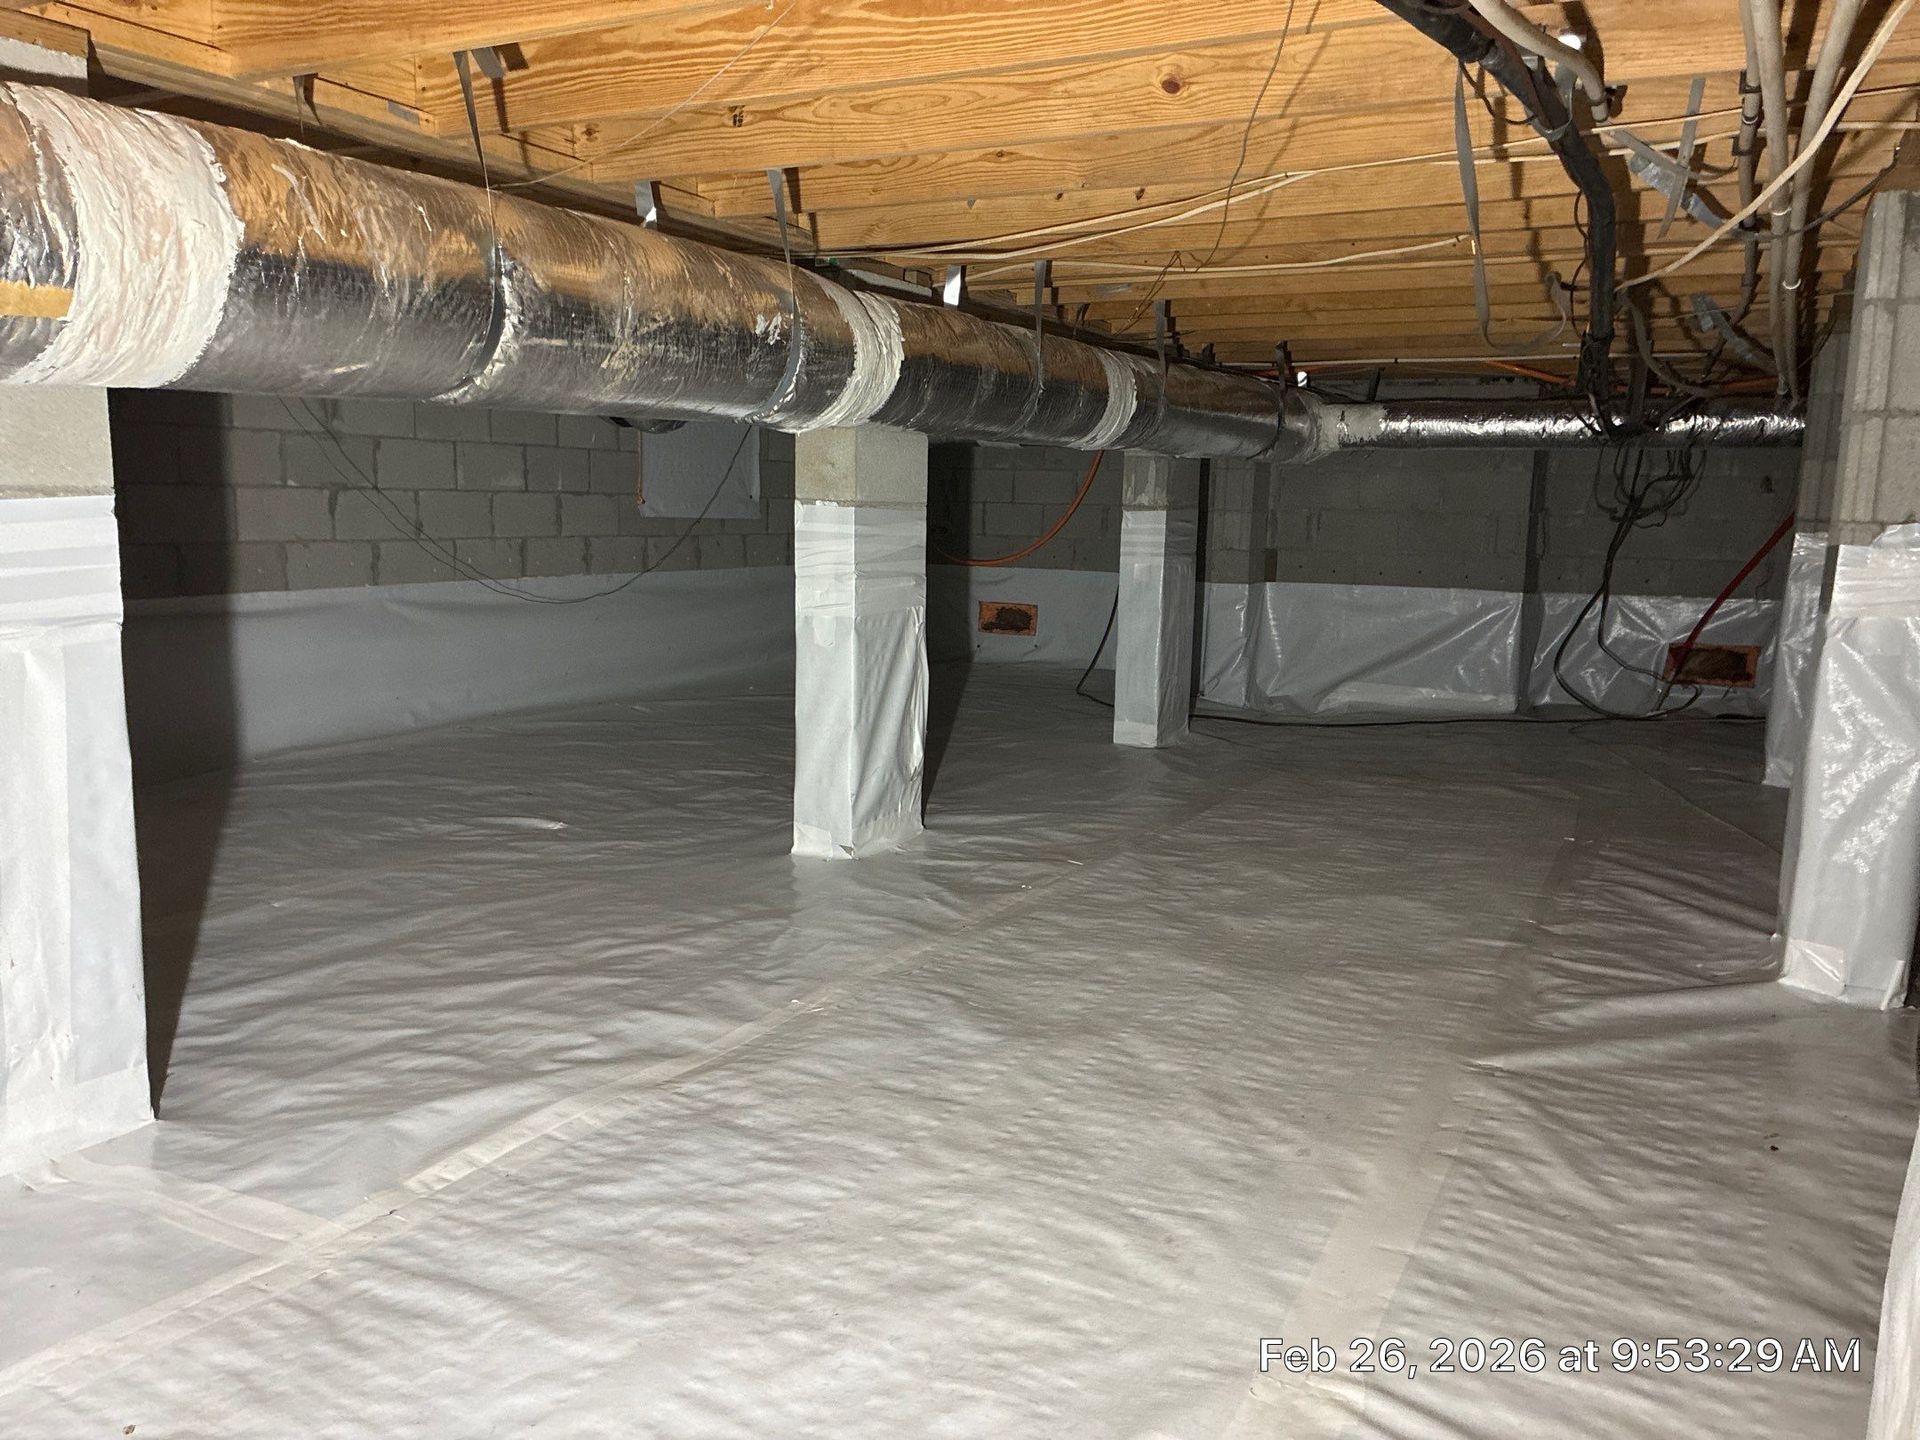
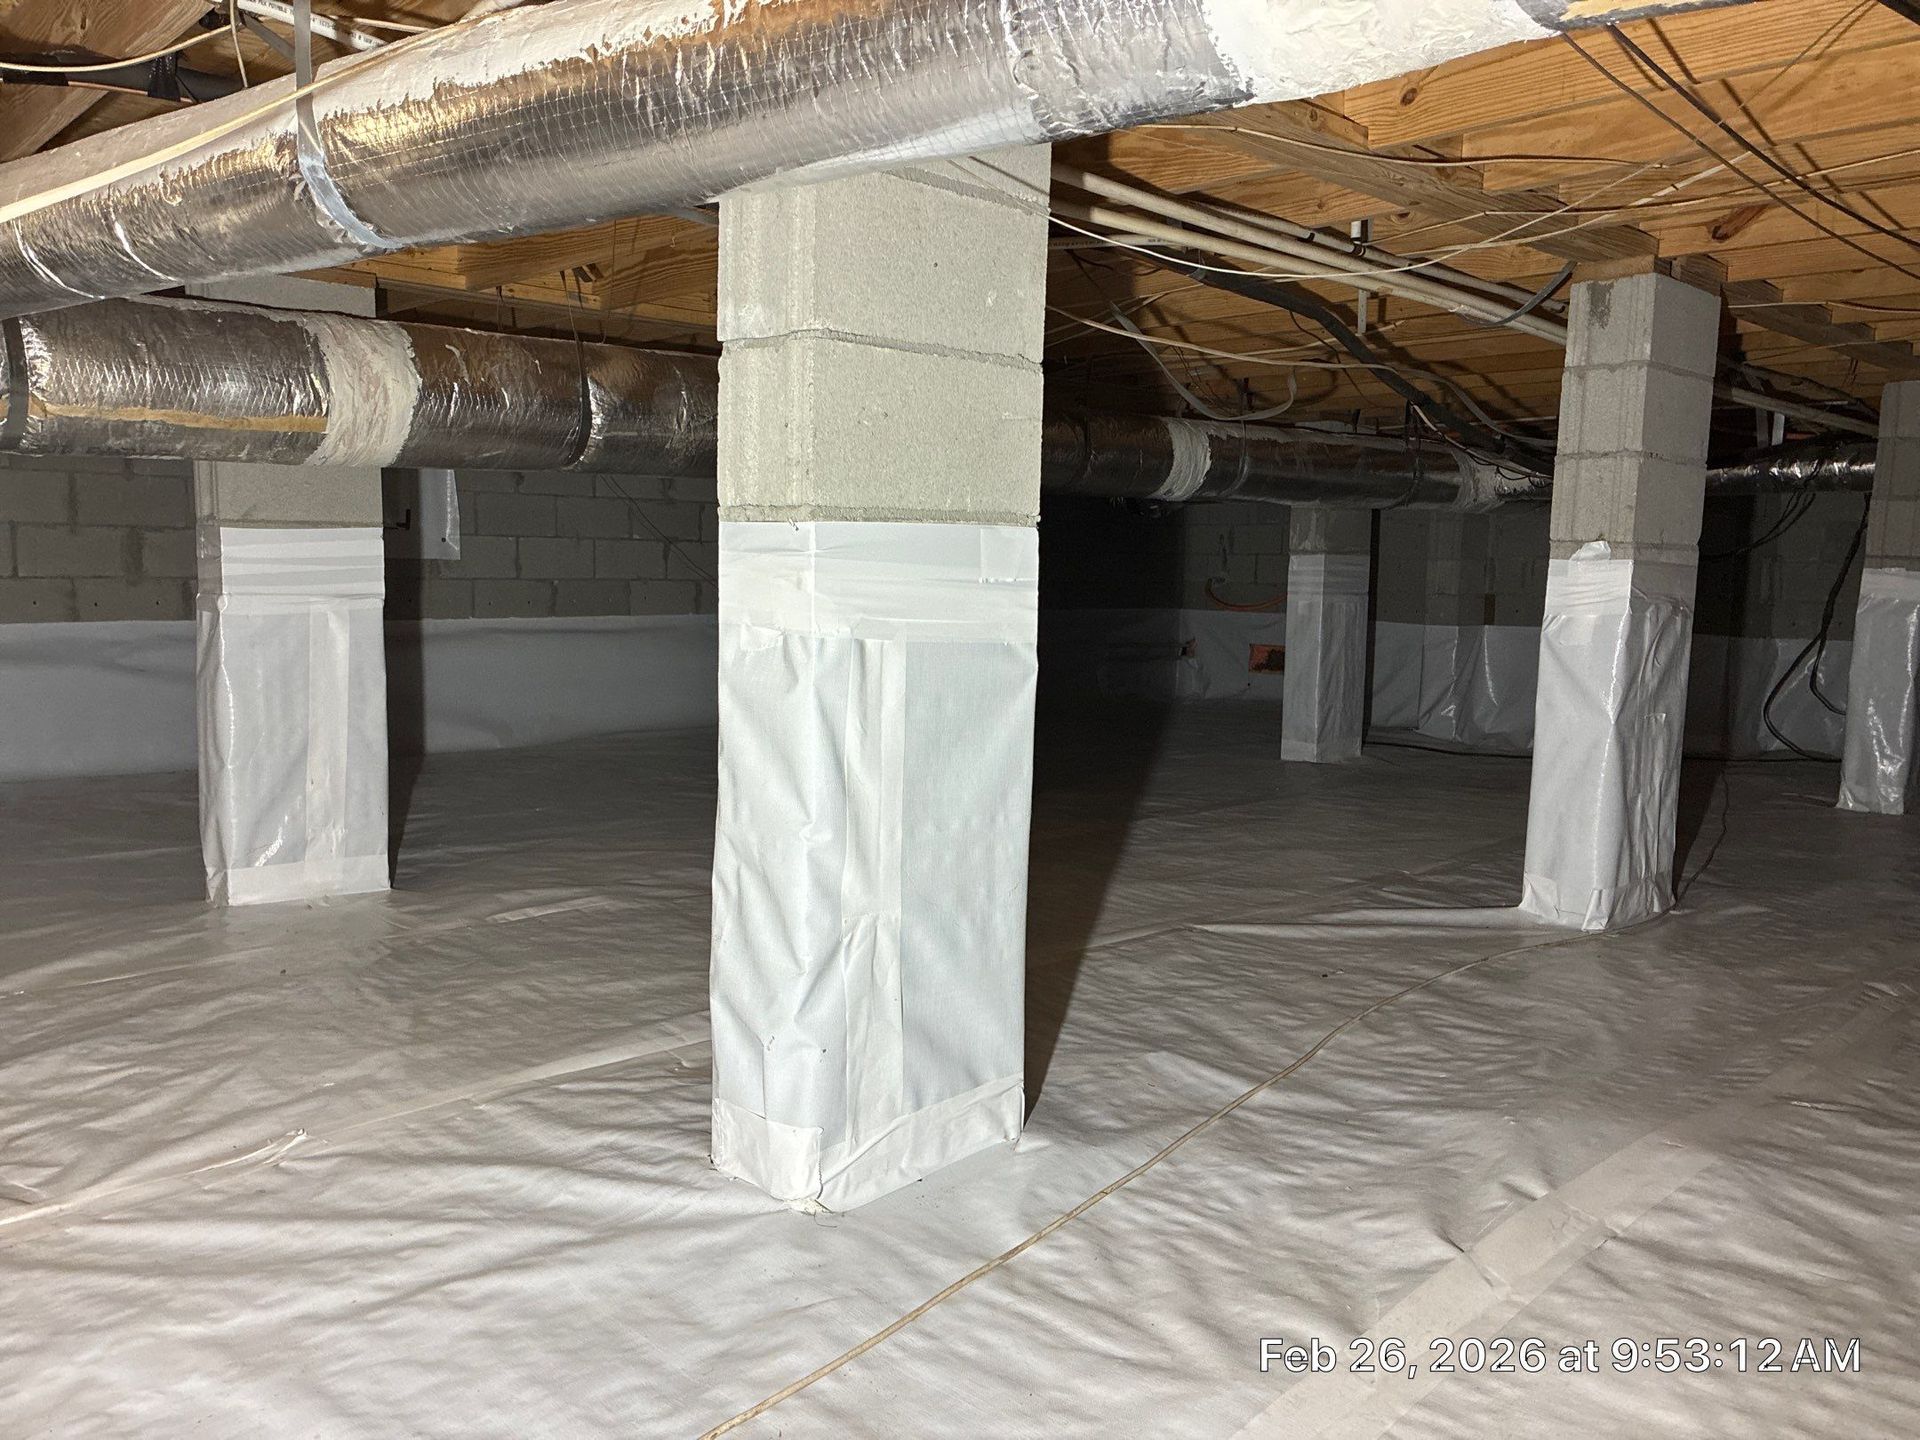
A poorly designed encapsulation system can actually make moisture issues worse. An effective crawlspace moisture control strategy typically includes proper vapor barrier installation, ground coverage continuity, sealed seams and penetrations, drainage correction, proper humidity management, and mechanical drying or dehumidification where necessary.

These principles align closely with IICRC S500 moisture control concepts, which emphasize controlling water intrusion and reducing elevated humidity conditions to prevent microbial growth.


Telephone receiver with a speech bubble containing three dots.

Contact EAS Environmental Today!

EAS Environmental will do everything we can to ensure your experience with us is excellent.

CALL US NOW

Request A FREE Estimate

Request a Free Estimate Form

Checkout Recent Post

By Spencer Turner April 8, 2026
Water damage can happen unexpectedly—from burst pipes and leaking appliances, to severe storms and flooding. While the immediate concern is often structural damage, another serious issue can develop quickly: mold growth. Many property owners are surprised to learn just how fast mold can begin to grow after water exposure. Understanding the timeline of mold growth and the importance of quick action can help protect both your property and your health. How Quickly Can Mold Grow After Water Damage? Mold can begin growing within 24 to 48 hours after water damage occurs. When moisture is present and the environment is warm and humid, mold spores—which naturally exist in the air—can quickly settle and begin to grow on damp surfaces. The mold growth timeline typically looks like this: First 24 Hours Materials such as drywall, wood, carpet, and insulation begin absorbing moisture. Mold spores may settle in damp areas. 24–48 Hours Mold colonies can begin forming. Musty odors may start to develop. Materials begin to swell, warp, or lose integrity. 48–72 Hours Mold growth becomes more visible. Spores begin spreading to nearby surfaces. Air quality begins to noticeably decline. Certain materials may no longer be salvageable. 3–7 Days Mold colonies expand rapidly. Structural materials may begin deteriorating. Strong, persistent odors develop throughout the space. Contamination can spread into HVAC systems. Because of this rapid growth timeline, immediate water extraction and drying are critical to prevent further damage, limit mold development, and improve the chances of salvaging affected materials.
By Spencer Turner January 23, 2026
When people hear the word “asbestos,” it can feel intimidating—and for good reason. Asbestos-Containing Materials (ACMs) must be handled carefully, even when they’re considered non-friable. The key is experience, preparation, and strict control throughout the entire process. At EAS Environmental, we provide asbestos abatement services throughout both South Carolina and Georgia. We use the information we are given by the Client to come up with a stellar Scope of Work including engineering controls, removal/abatement protocols, and disposal methods. Our goal is to help you understand how professional abatement is planned, executed, and verified, so that you can make the right decision when deciding who to hire as an abatement contractor. Abstract: EAS Environmental completed a Class II, non-friable Category II asbestos abatement project at a commercial facility in Savannah, GA, involving the controlled removal of asbestos-containing Transite wall panels. In this case study, we will outline the process of how our team prepared the regulated area, used engineering controls like containment barriers and HEPA filtration, the methods we used in order to remove panels while intact, packaged waste correctly for disposal, and followed documentation and inspection procedures to ensure a safe, compliant close-out. This article emphasizes the importance of the amount of care that these types of abatement projects require.
By Spencer Turner December 2, 2025
In today’s world, we believe that true success comes from more than just business growth — it’s about giving back and making a real difference where we live and work. At EAS Environmental LLC, we’re proud to be a full-service disaster restoration and environmental remediation company based in the Charleston, South Carolina region. While our work focuses on restoration, abatement, and remediation, our mission goes far beyond that. Every project we take on is driven by a deeper purpose: to help build safer, healthier environments for our neighbors, especially those most vulnerable to environmental risks. Below we’ll explore how EAS Environmental is making a difference — and then identify five key pillars of corporate responsibility in action.
By Spencer Turner October 27, 2025
Restoration work can feel overwhelming—especially when you’re staring down the aftermath of a flood, fire, or hazardous material exposure. At EAS Environmental, we believe that transparency and trust are key. That’s why we’re pulling back the curtain on what a real restoration project looks like when you work with our team—from the first call to the final walkthrough. Our goal is to help you understand every step of the process, so you know exactly what’s happening and why. With decades of experience and a commitment to safety, we make sure your property is restored the right way—the first time. By the end, you’ll not only have a clean, safe space again but also the peace of mind that comes from knowing it was done properly. Abstract: A grease fire broke out in the kitchen of a Florence apartment, spreading smoke and soot to the walls, ceilings, and floors throughout the second-story residence. Just your typical fire mitigation job, right? Wrong; after some third-party sampling and laboratory analysis, Asbestos-Containing Materials (ACMs) were identified in the apartment. In this case study, we walk through how our company, EAS Environmental, handled the turn-key process of the asbestos abatement, and then rebuilding the property to its pre-loss condition. From navigating complex environmental regulations to coordinating restoration timelines, this project showcased the importance of expertise, communication, and precision in every phase. This article highlights how our team transformed an unexpected challenge into a seamless, compliant, and fully restored living space. The Situation: Fire Damages Disturb Asbestos Containing Materials The tenant accidentally started a grease fire in the kitchen of their second-story Florence apartment. The good news: no one was seriously injured. The bad news: the fire left behind significant damage – smoke and soot coating every surface in every room. Fire mitigation projects happen every day, but not all of them come with an unexpected condition lurking beneath the layers of soot and smoke.
SEE MORE

Got a Question? We’re Here to Help.

You can arrange an appointment or make an enquiry by phone or email, orget in touch to us via our contact form.

CONTACT US TODAY