Restoration work can feel overwhelming—especially when you’re staring down the aftermath of a flood, fire, or hazardous material exposure. At EAS Environmental, we believe that transparency and trust are key. That’s why we’re pulling back the curtain on what a real restoration project looks like when you work with our team—from the first call to the final walkthrough. Our goal is to help you understand every step of the process, so you know exactly what’s happening and why. With decades of experience and a commitment to safety, we make sure your property is restored the right way—the first time. By the end, you’ll not only have a clean, safe space again but also the peace of mind that comes from knowing it was done properly.
Abstract:
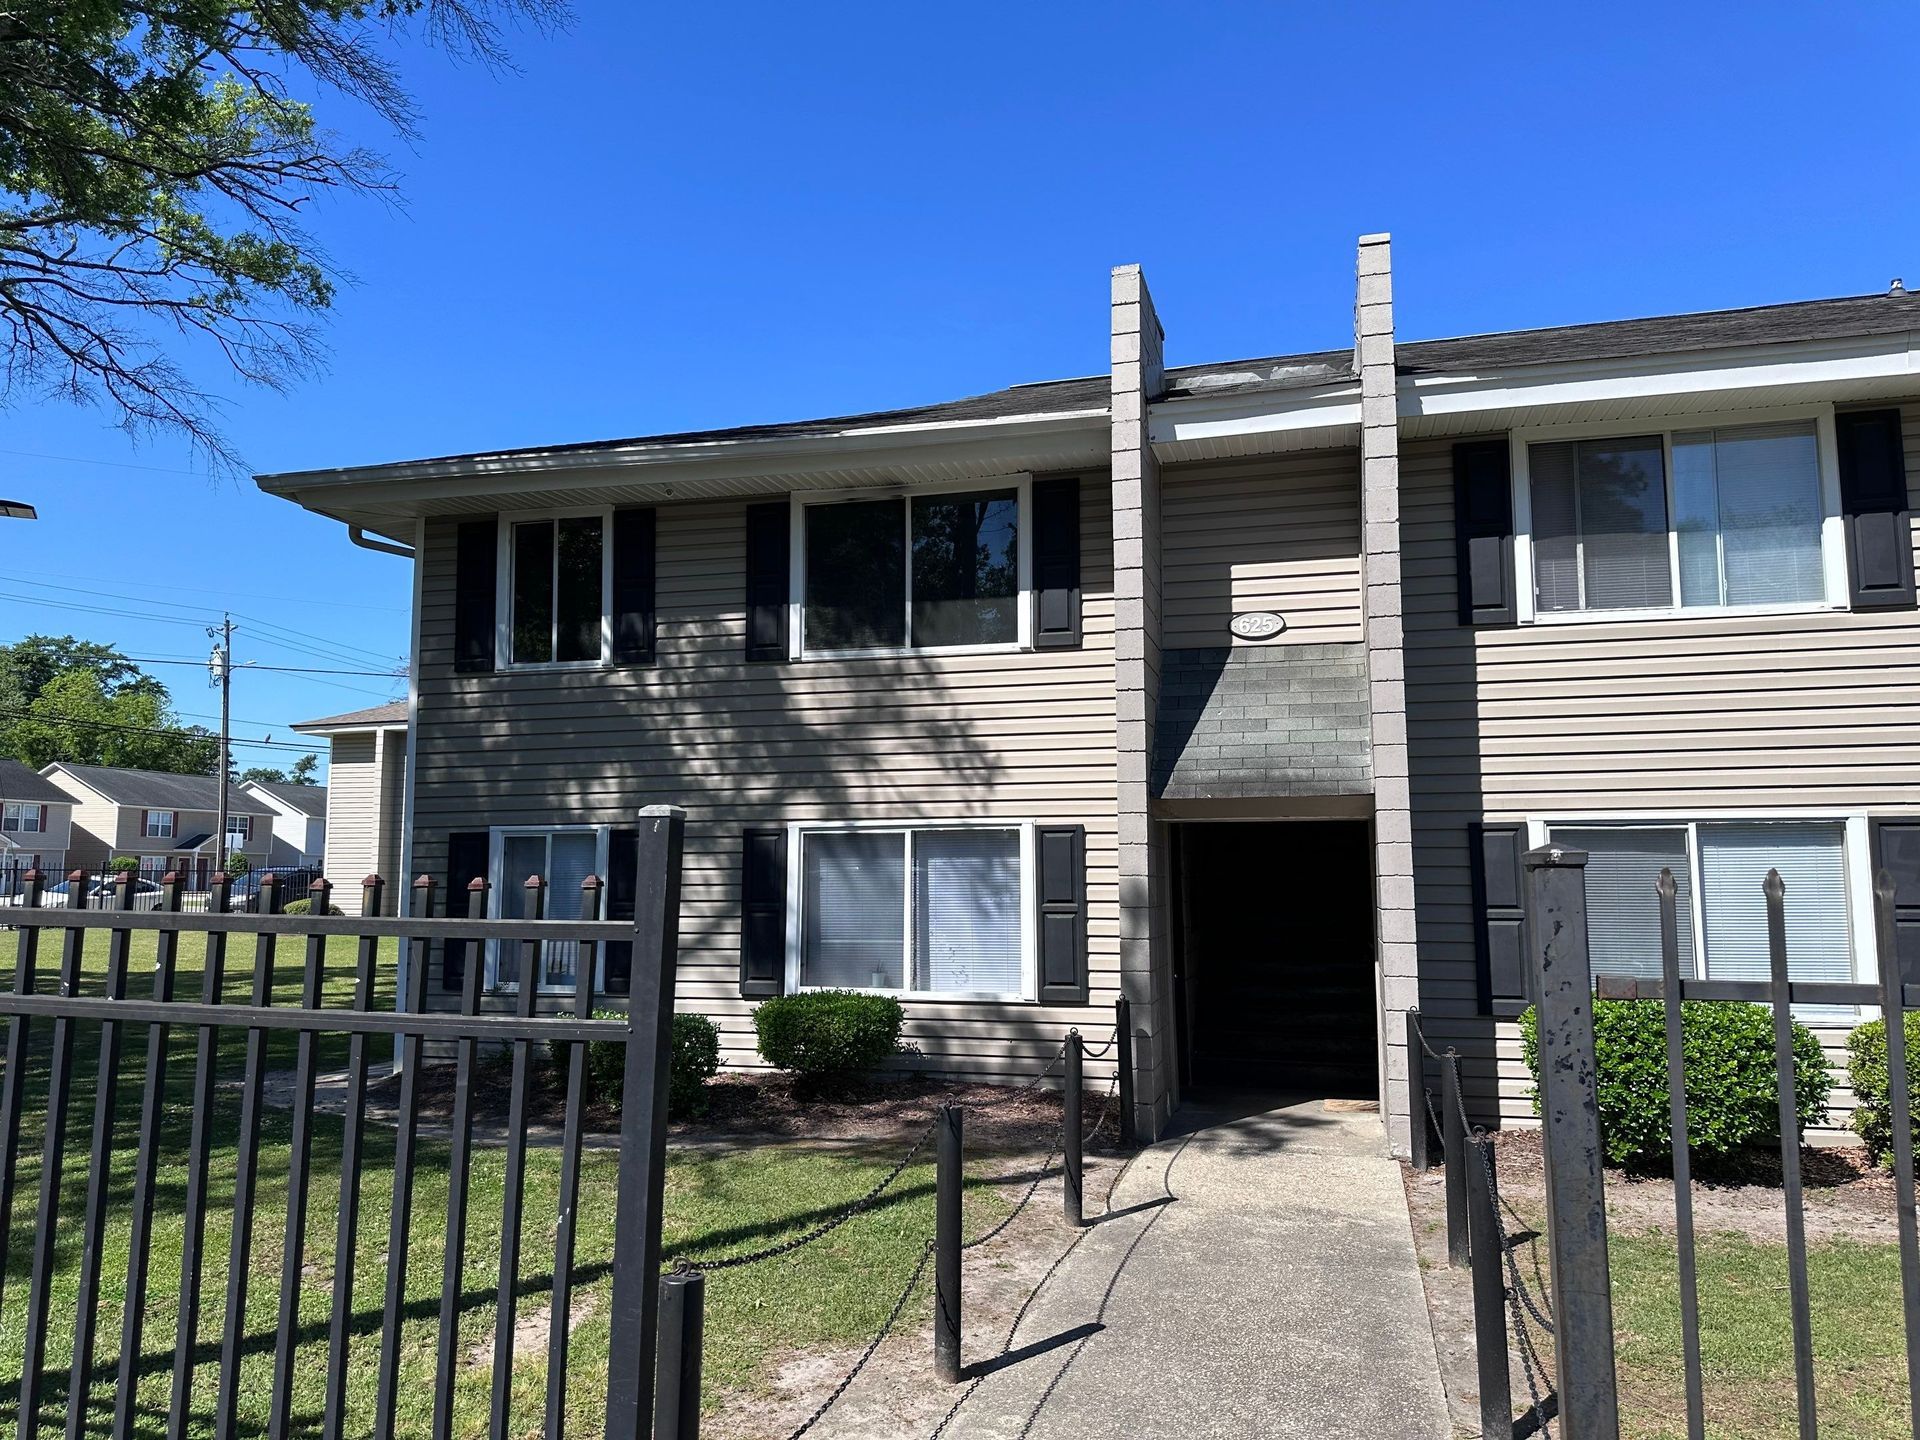
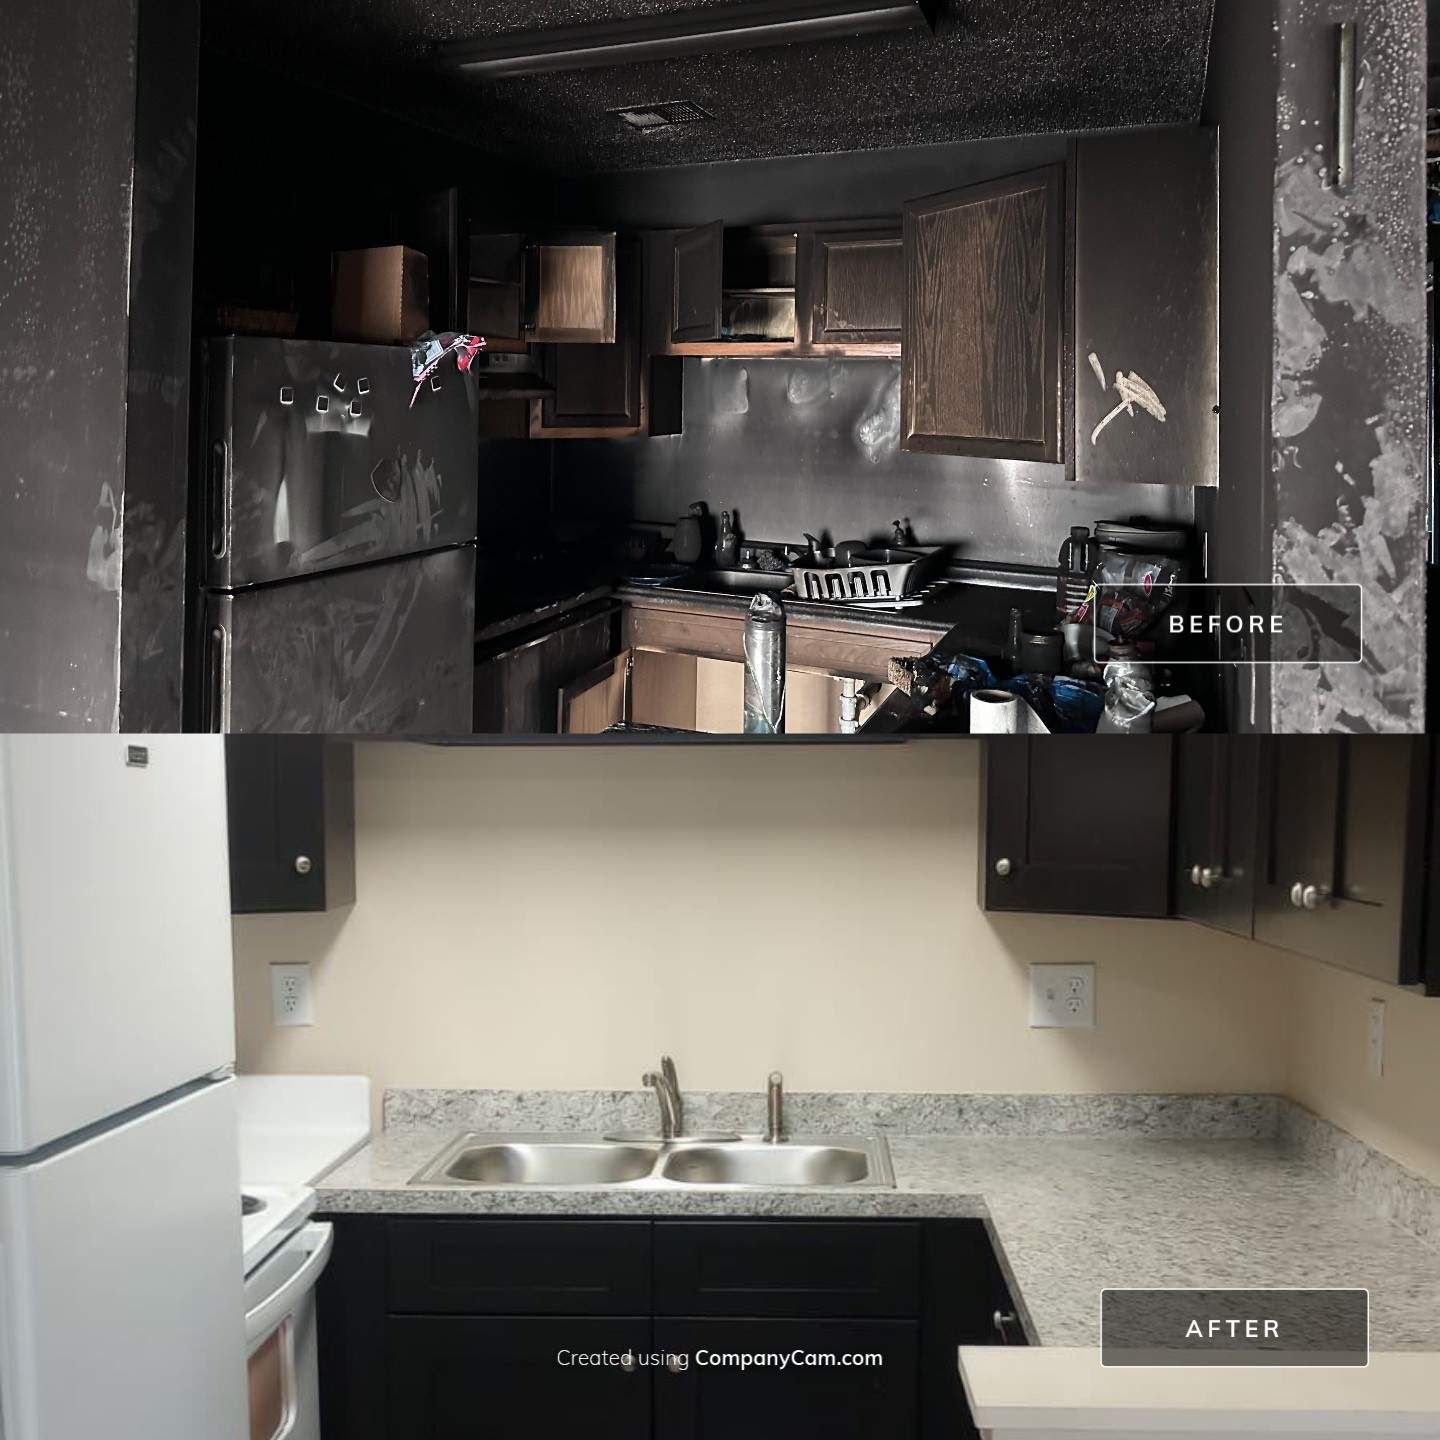
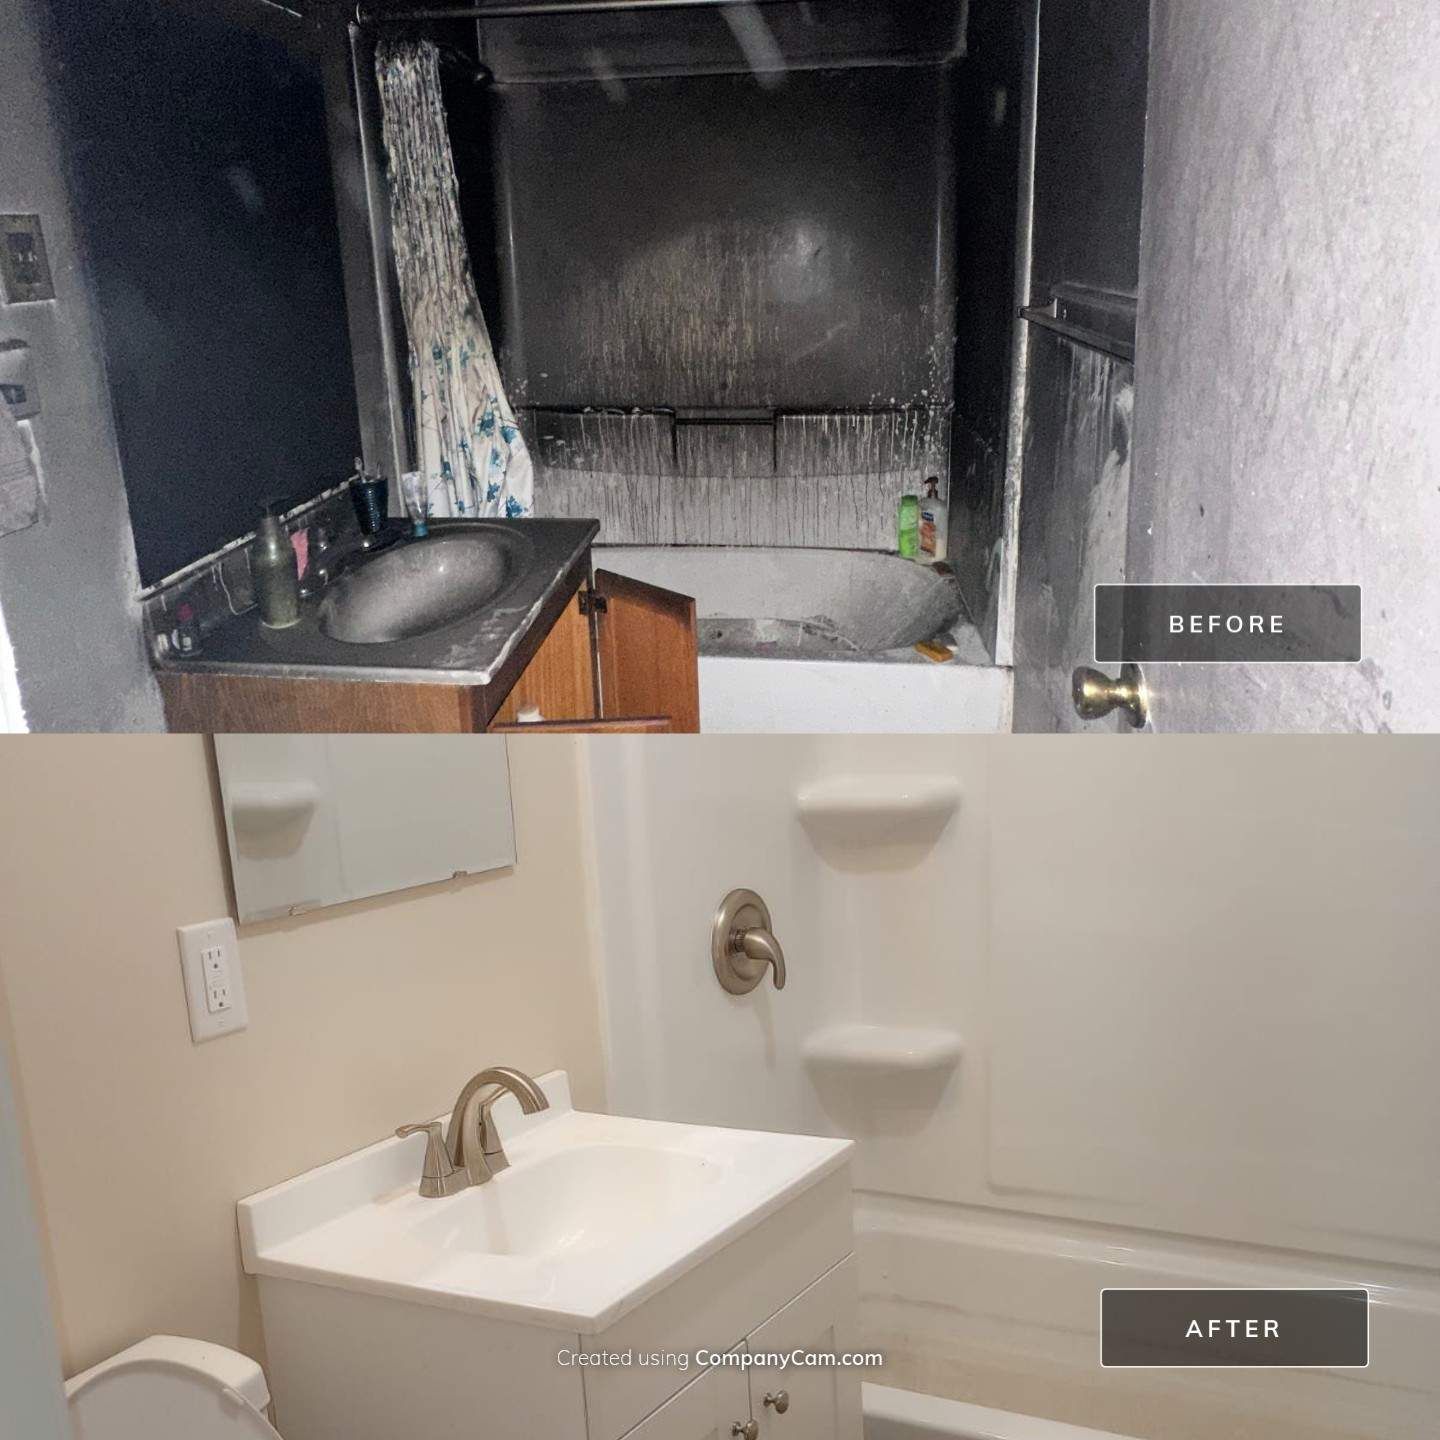
A grease fire broke out in the kitchen of a Florence apartment, spreading smoke and soot to the walls, ceilings, and floors throughout the second-story residence. Just your typical fire mitigation job, right? Wrong; after some third-party sampling and laboratory analysis, Asbestos-Containing Materials (ACMs) were identified in the apartment. In this case study, we walk through how our company, EAS Environmental, handled the turn-key process of the asbestos abatement, and then rebuilding the property to its pre-loss condition. From navigating complex environmental regulations to coordinating restoration timelines, this project showcased the importance of expertise, communication, and precision in every phase. This article highlights how our team
transformed an unexpected challenge into a seamless, compliant, and fully restored living space.
The Situation: Fire Damages Disturb Asbestos Containing Materials
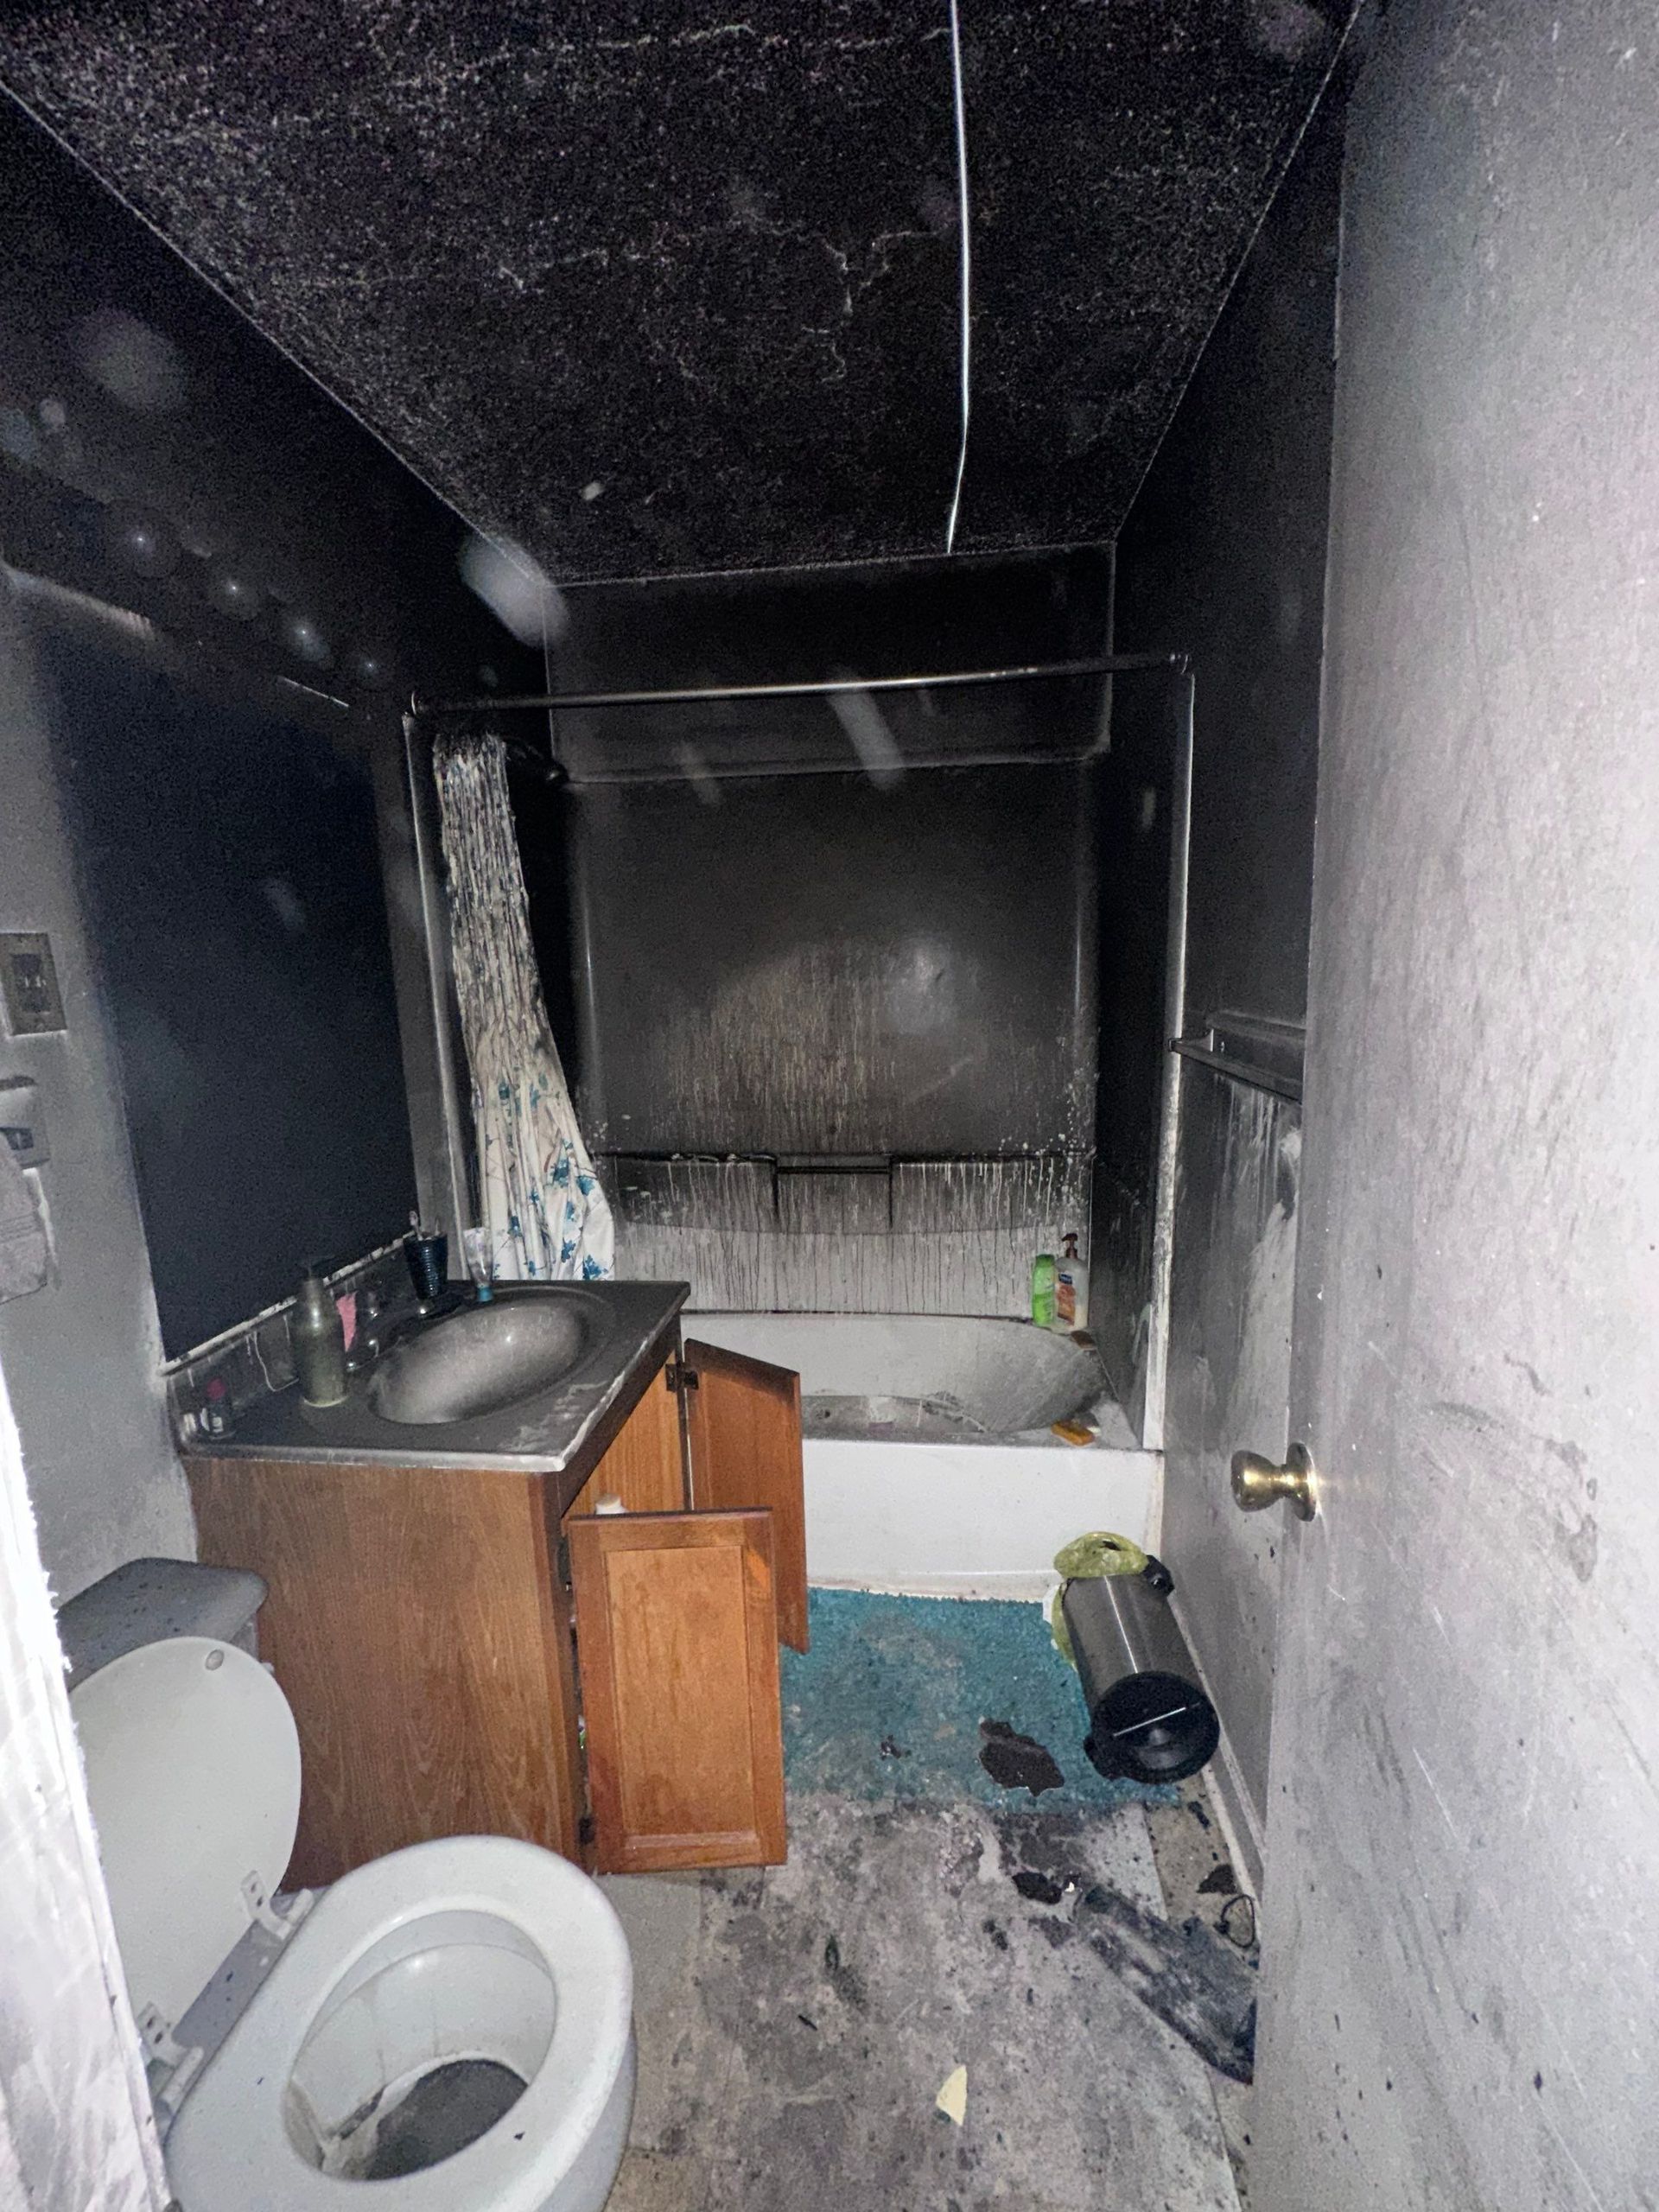
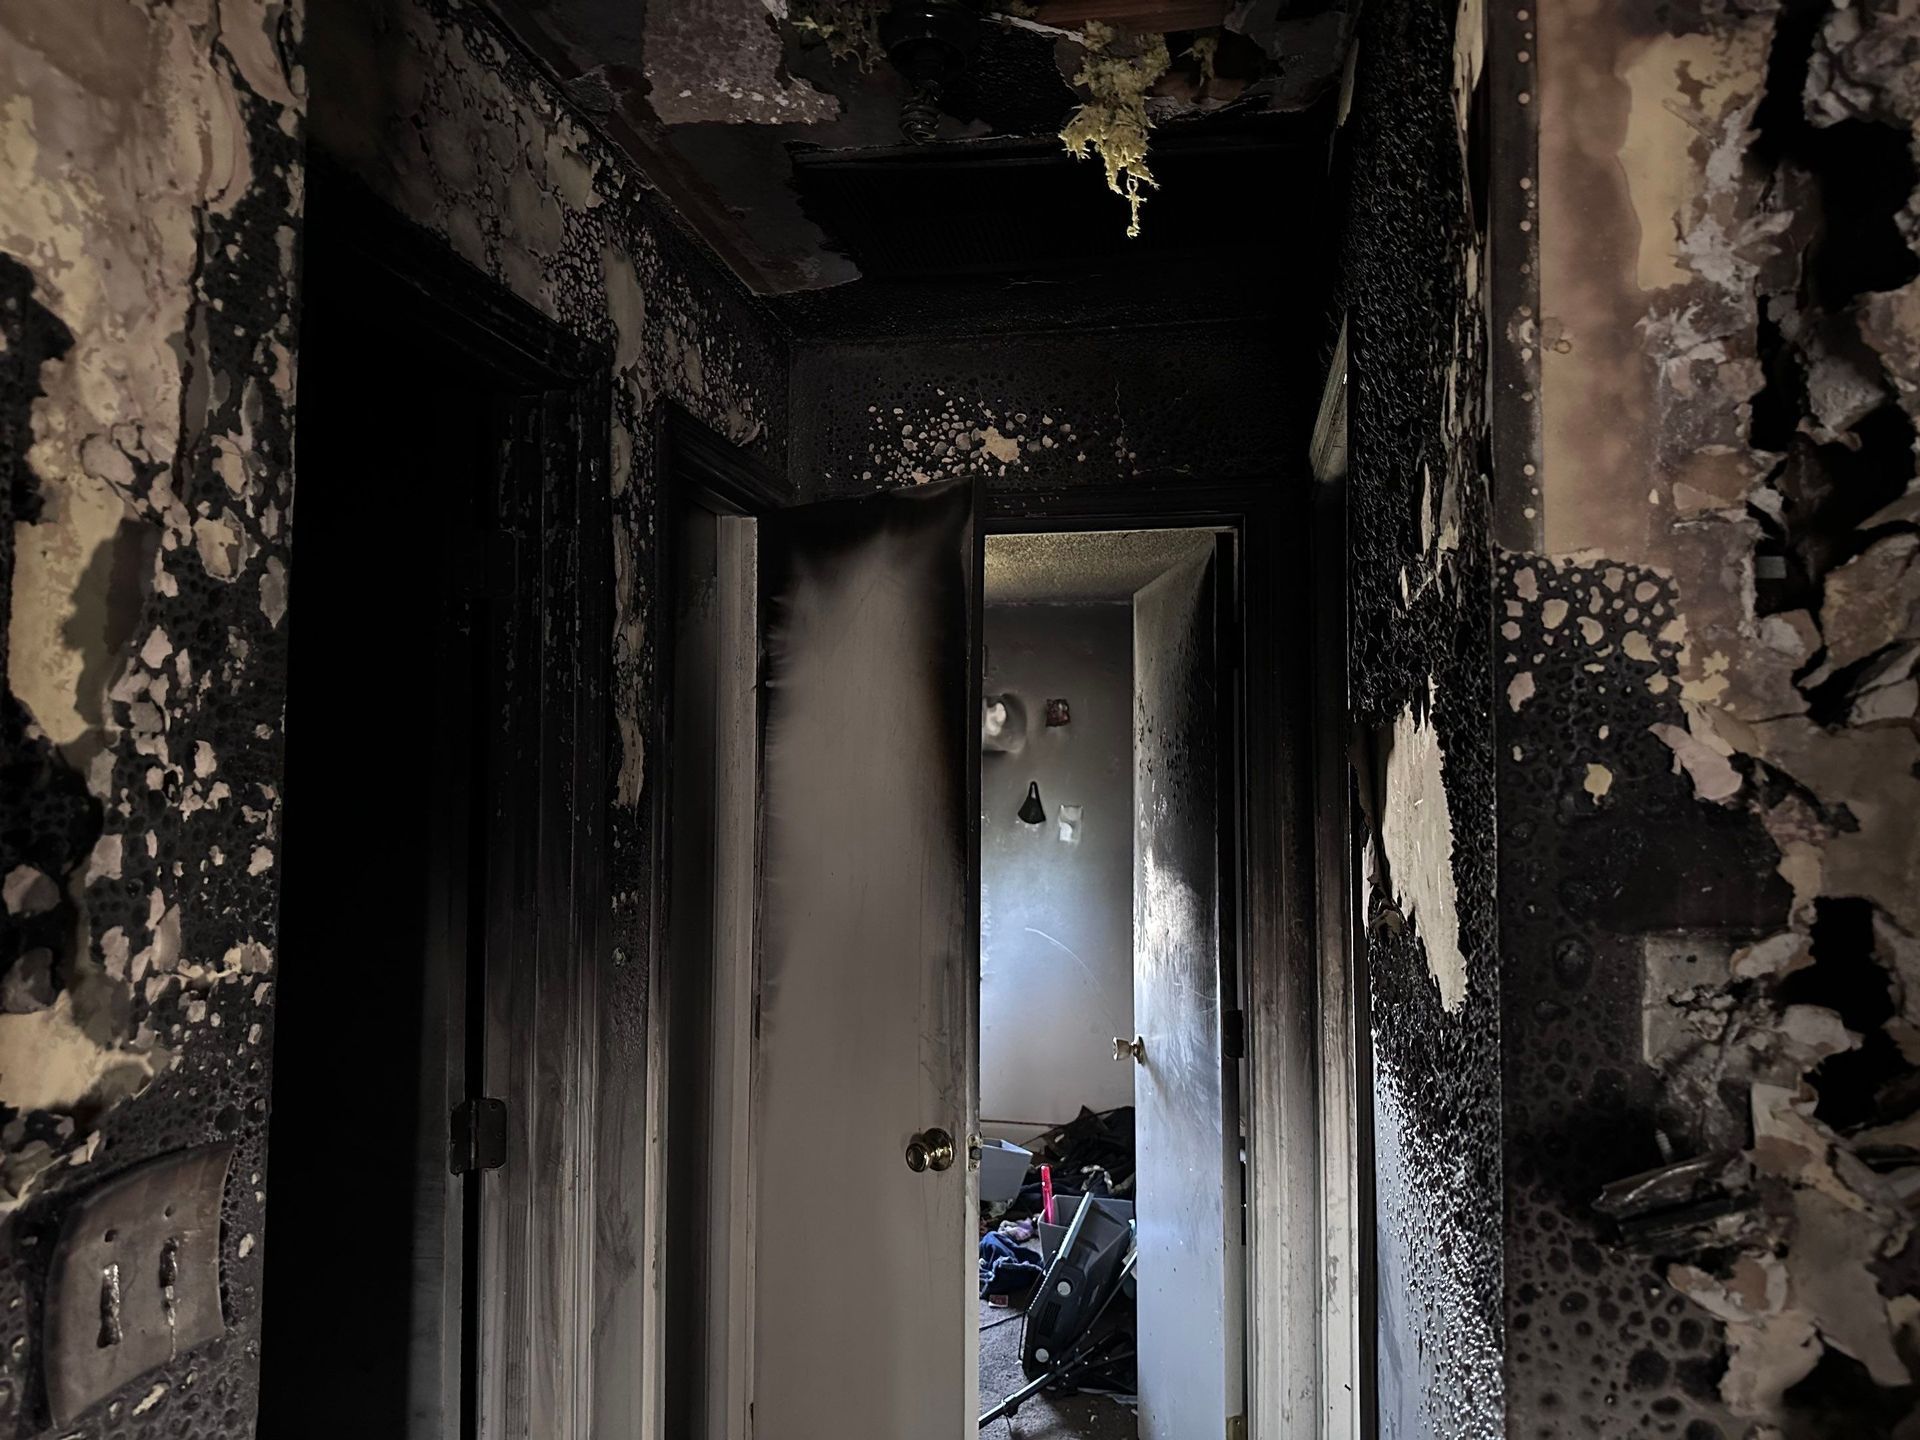
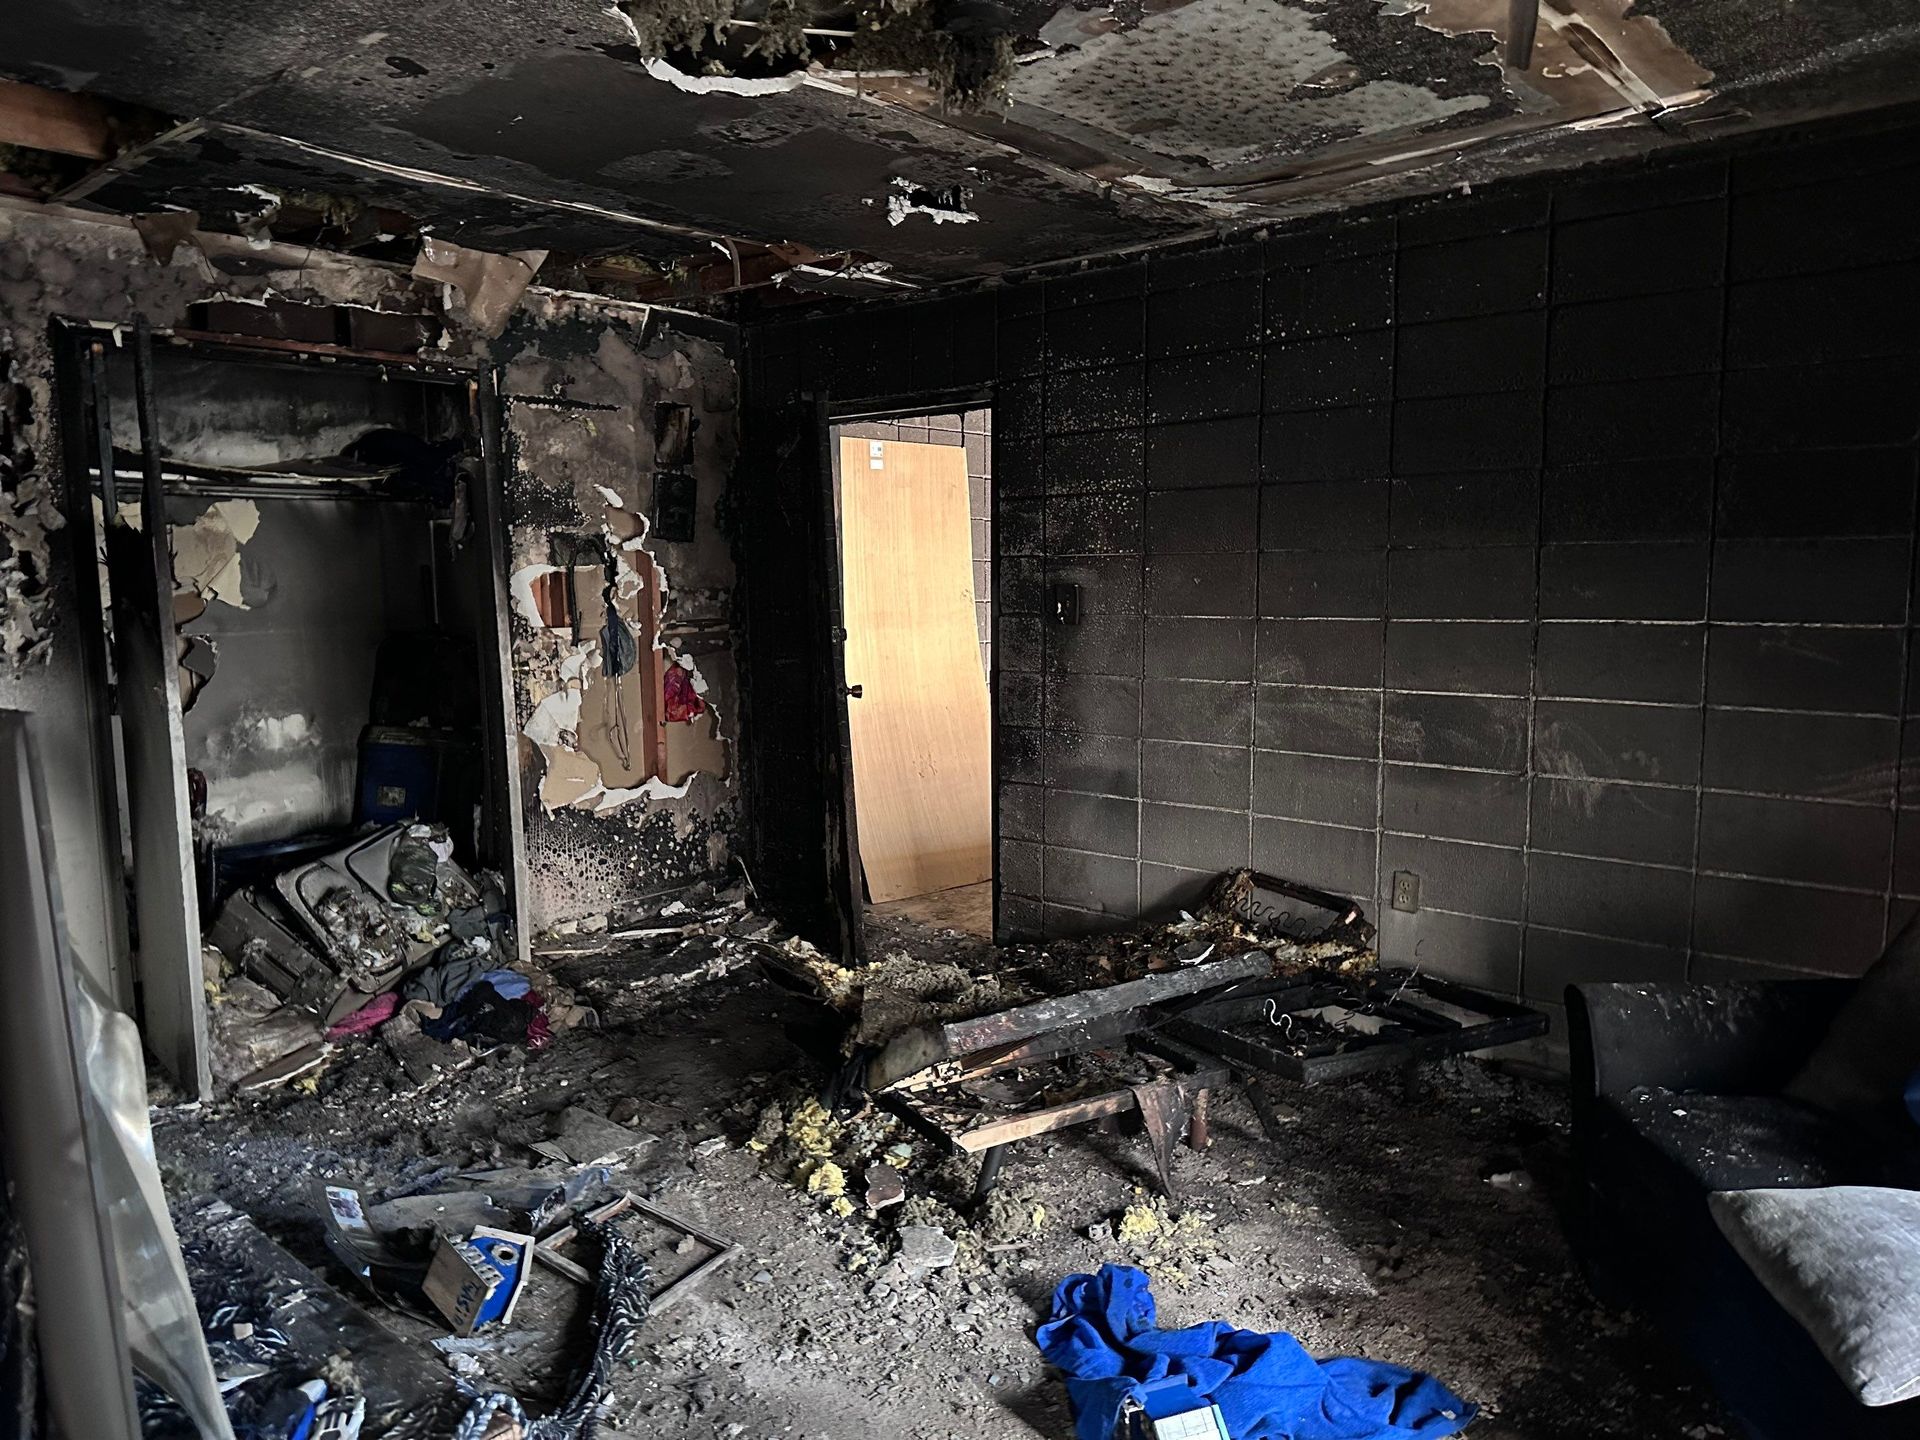
The tenant accidentally started a grease fire in the kitchen of their second-story Florence apartment. The good news: no one was seriously injured. The bad news: the fire left behind significant damage – smoke and soot coating every surface in every room. Fire mitigation projects happen every day, but not all of them come with an unexpected condition lurking beneath the layers of soot and smoke.
Our Solution: Comprehensive Asbestos Abatement
After third-party samples and laboratory results confirmed the presence of asbestos-containing floor tile, joint compound and associated drywall, our team developed a scope of work to safely and effectively abate the ACMs.
Step 1: Immediate Response and Site Assessment
When disaster strikes, timing is everything. Our team mobilizes quickly to secure the property, assess potential hazards, and determine the scope of work. During this stage, we:
Identify structural and safety risks.
Pinpoint affected building materials.
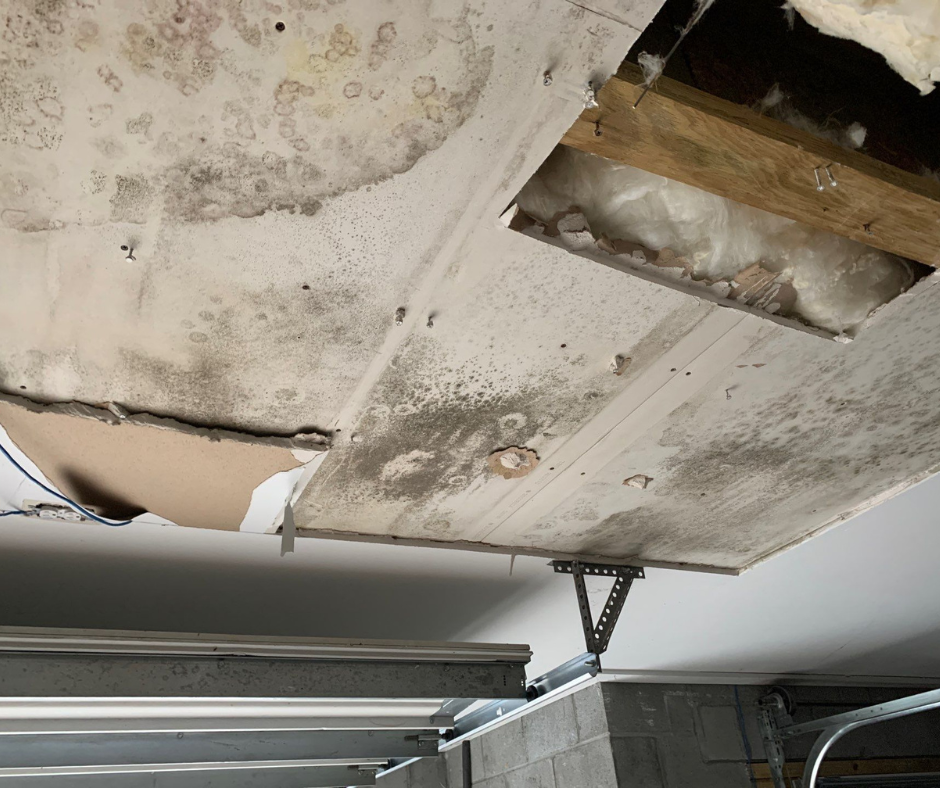
Evaluate environmental concerns like mold, asbestos, or chemical residue.
Develop a customized restoration plan prioritizing health, safety, and structural stability.
This is where the roadmap begins, ensuring the project is not just reactive but strategic. In this Case Study, because of the presence of asbestos-containing joint compound on all walls and ceilings, as well as asbestos-containing floor tile, an immediate demo was not necessary.
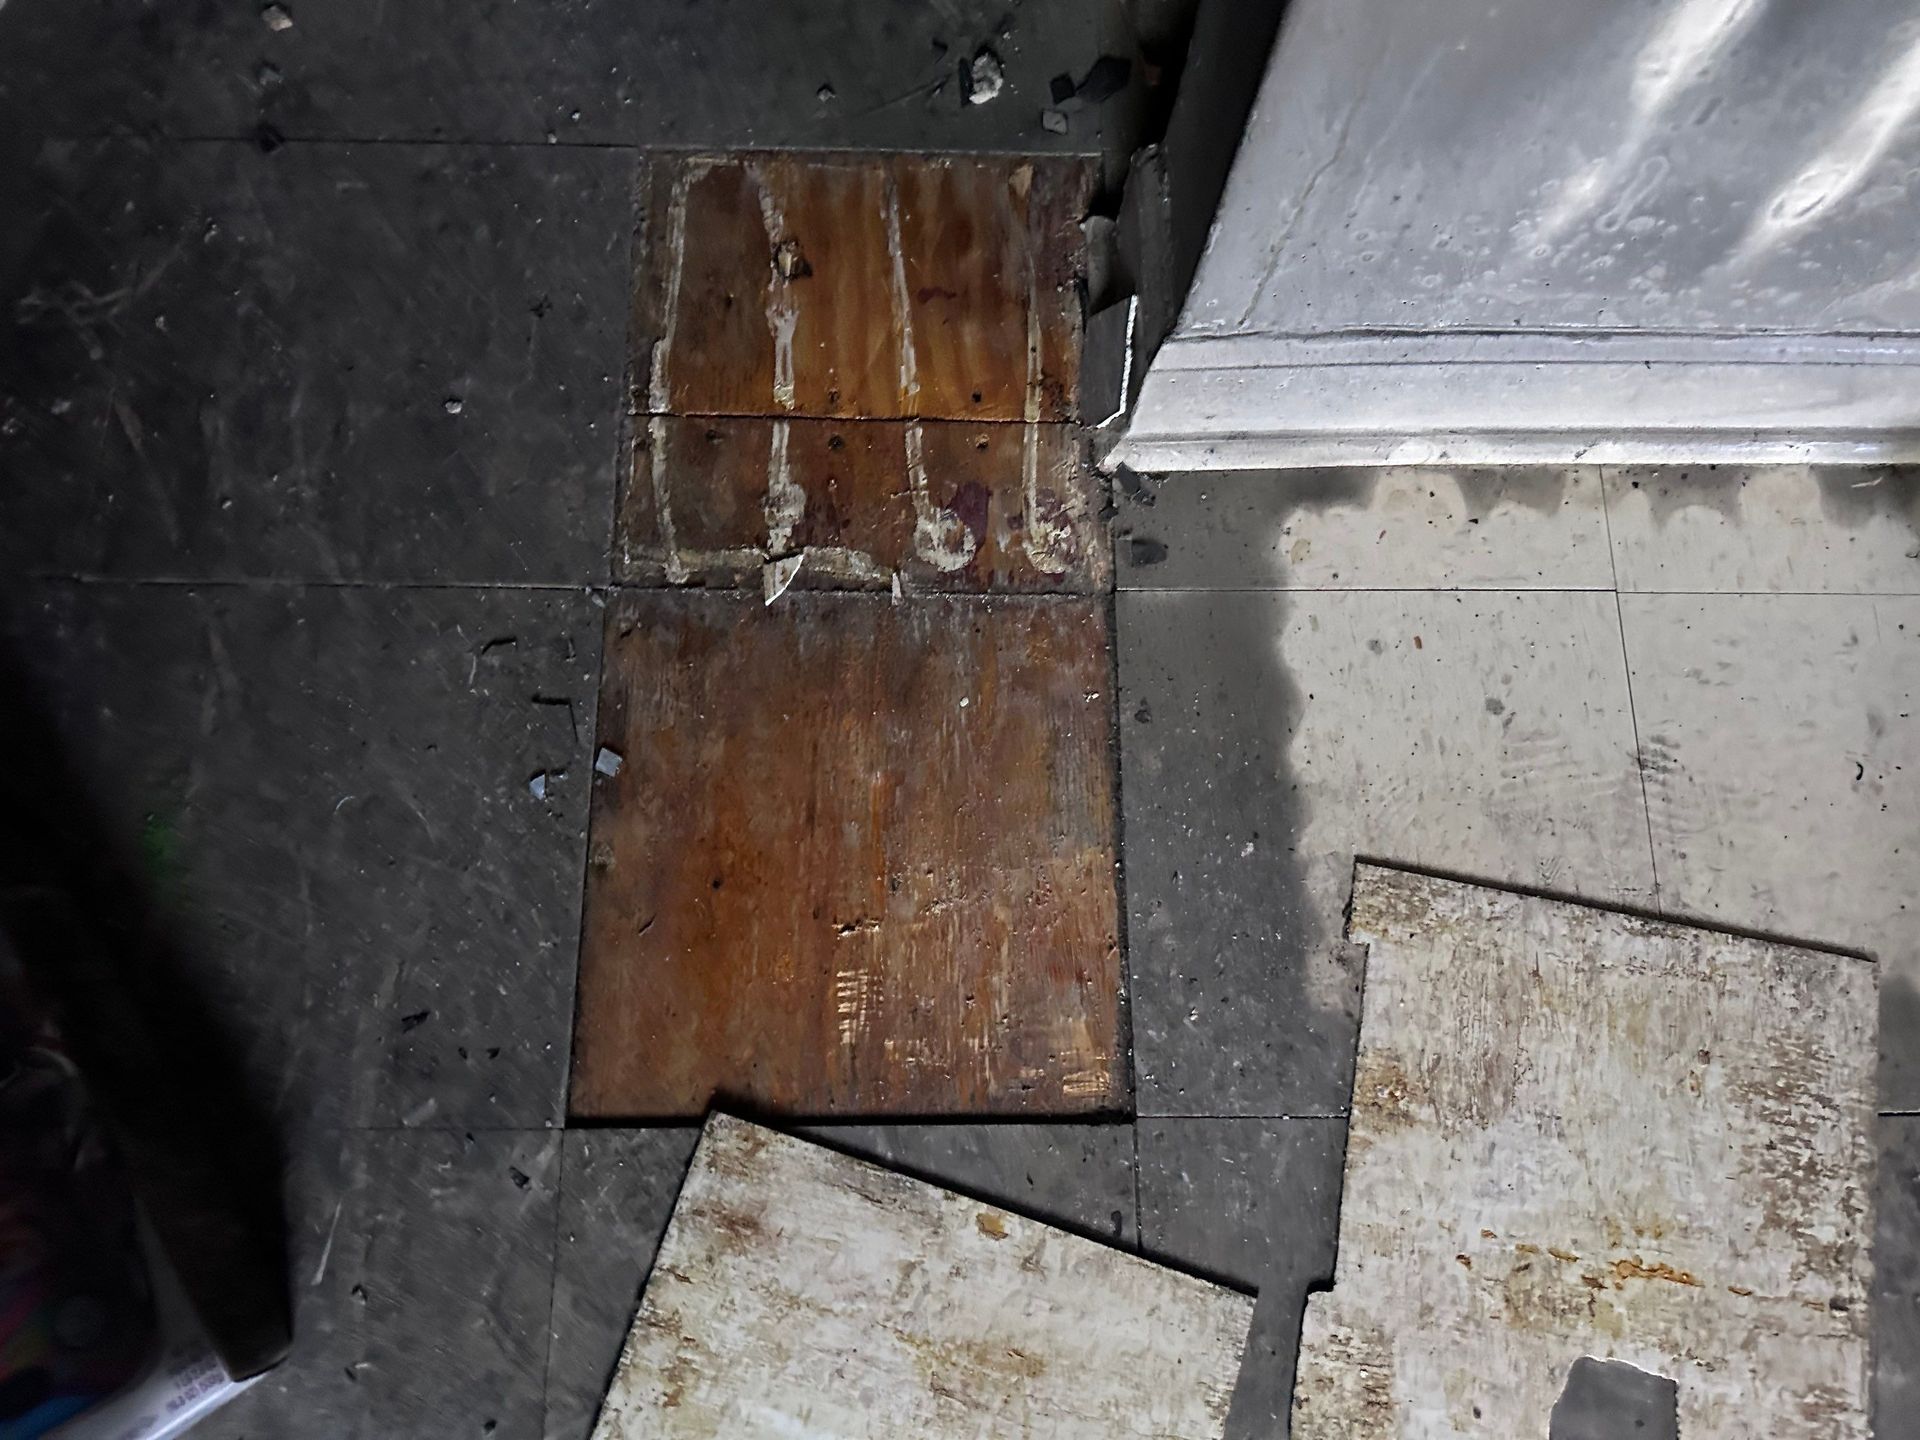

Asbestos-Containing Floor tile was found in both bedrooms, kitchen, and bathroom. Asbestos-containing joint compound was found throughout the apartment.
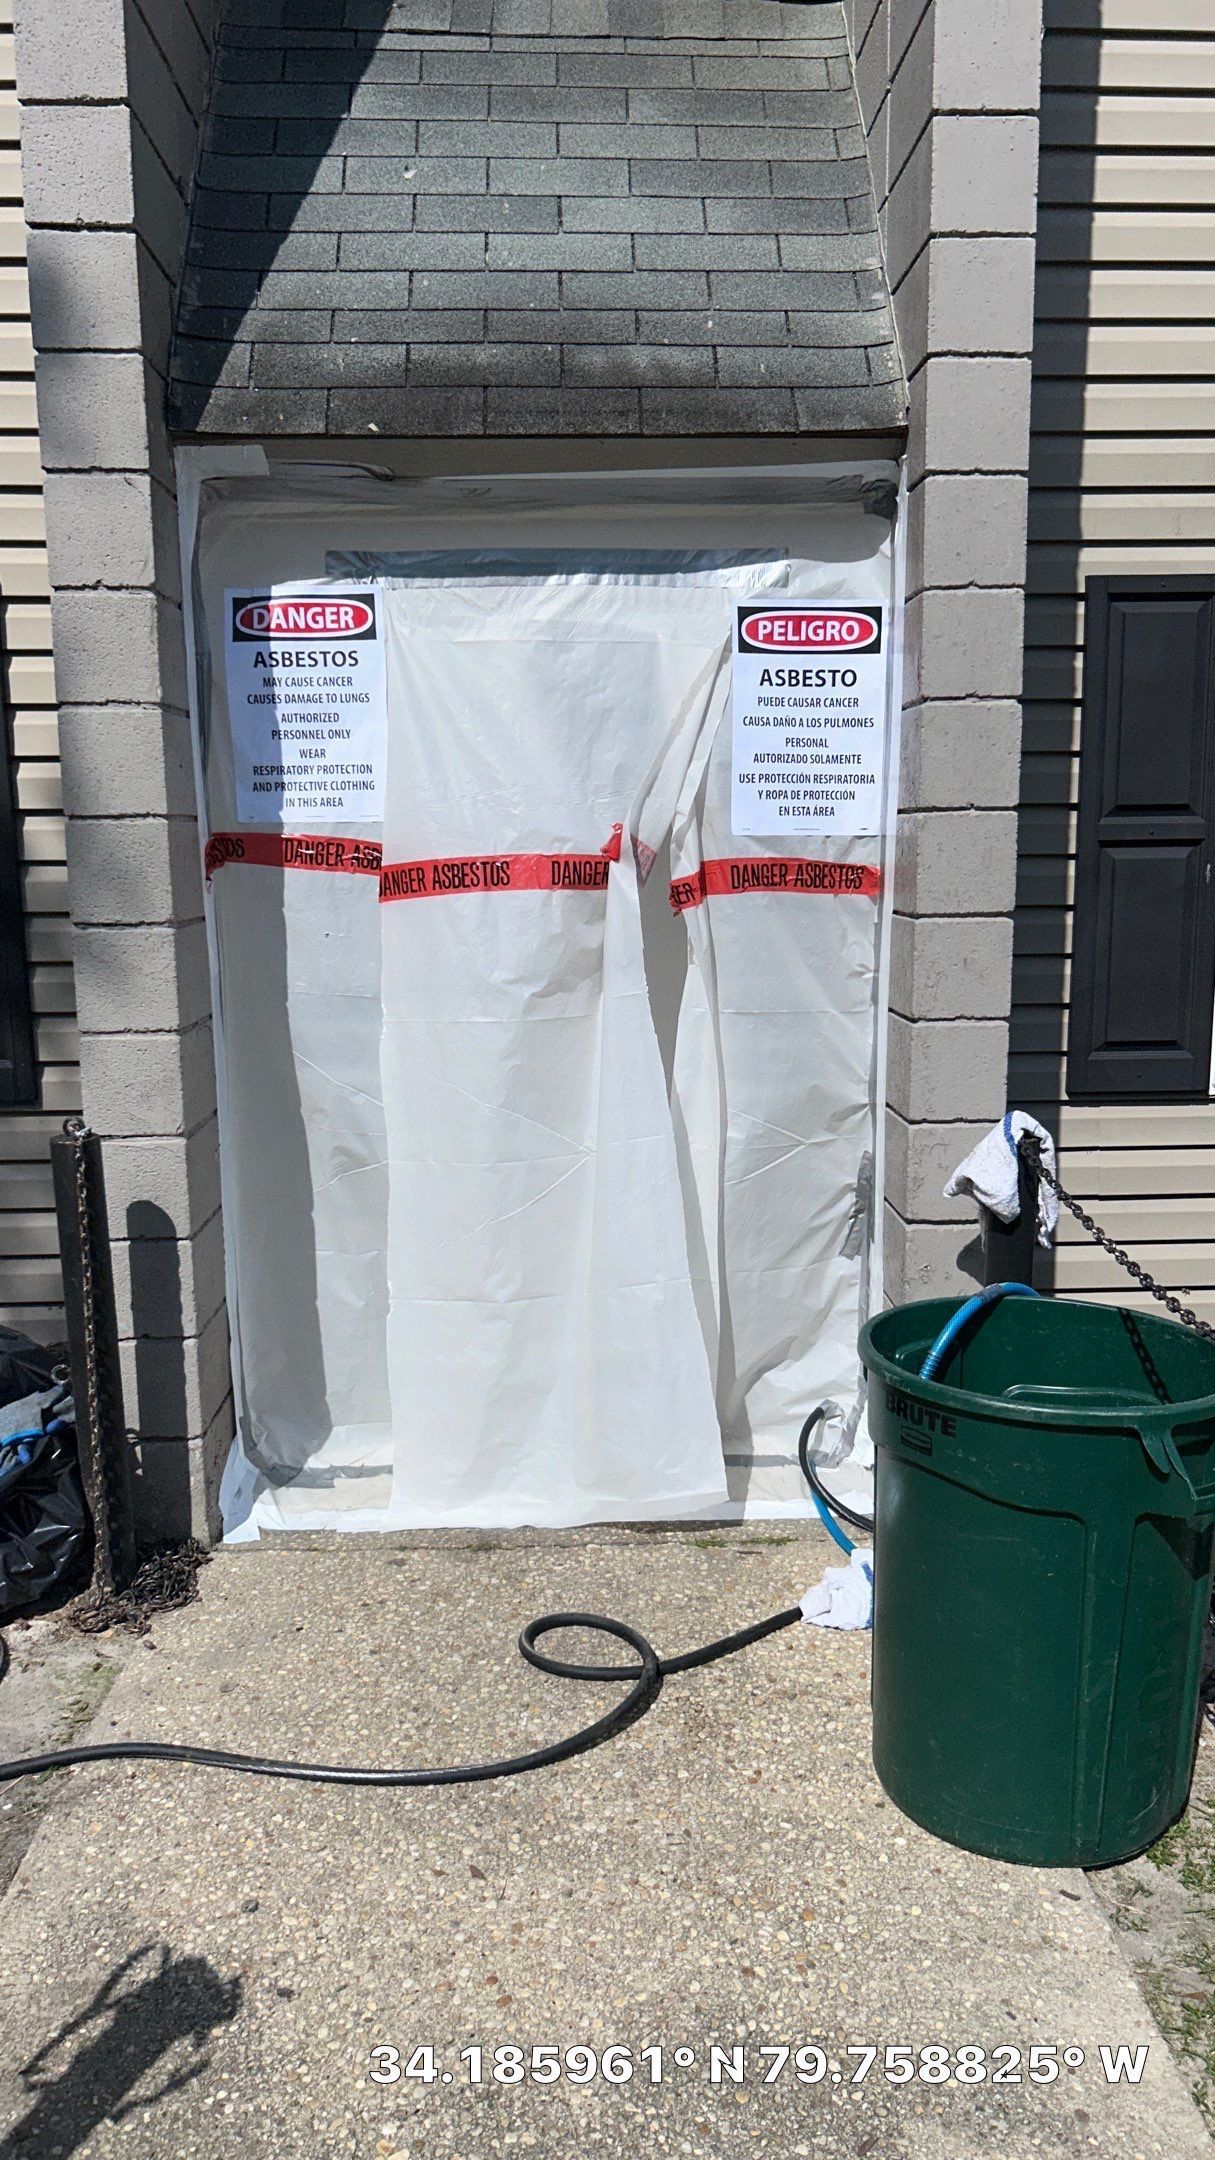
Step 2: Containment and Safety Setup
Every restoration project begins with containment and safety protocols. Whether handling Category 3 black water, asbestos abatement, or fire damage cleanup, our team ensures contaminants stay contained. We do this by:
- Sealing off impacted zones with industry-grade barriers.
Setting up negative air pressure and HEPA filtration. - Shutting down HVAC systems to prevent cross-contamination.
At EAS Environmental, your safety—and that of our crew—always comes first. Since an extremely large amount of ACMs were identified on this project, EASE followed the regulated containment procedures outlined in SC Regulation 61.86.1 for NESHAP Projects. NESHAP stands for National Emission Standards for Hazardous Air Pollutants, and this level of regulation applies for projects that have greater than 160 square feet of ACMs. This requires a decontamination enclosure system adjoining the contained work area. This consists of a clean room equipped with appropriate storage containers and adequate space for changing clothing; an air lock; a shower room containing hot and cold or warm running water controllable at the tap; and an equipment room suitable for storage of tools and equipment. After the containment is set up, equipment can be loaded in.
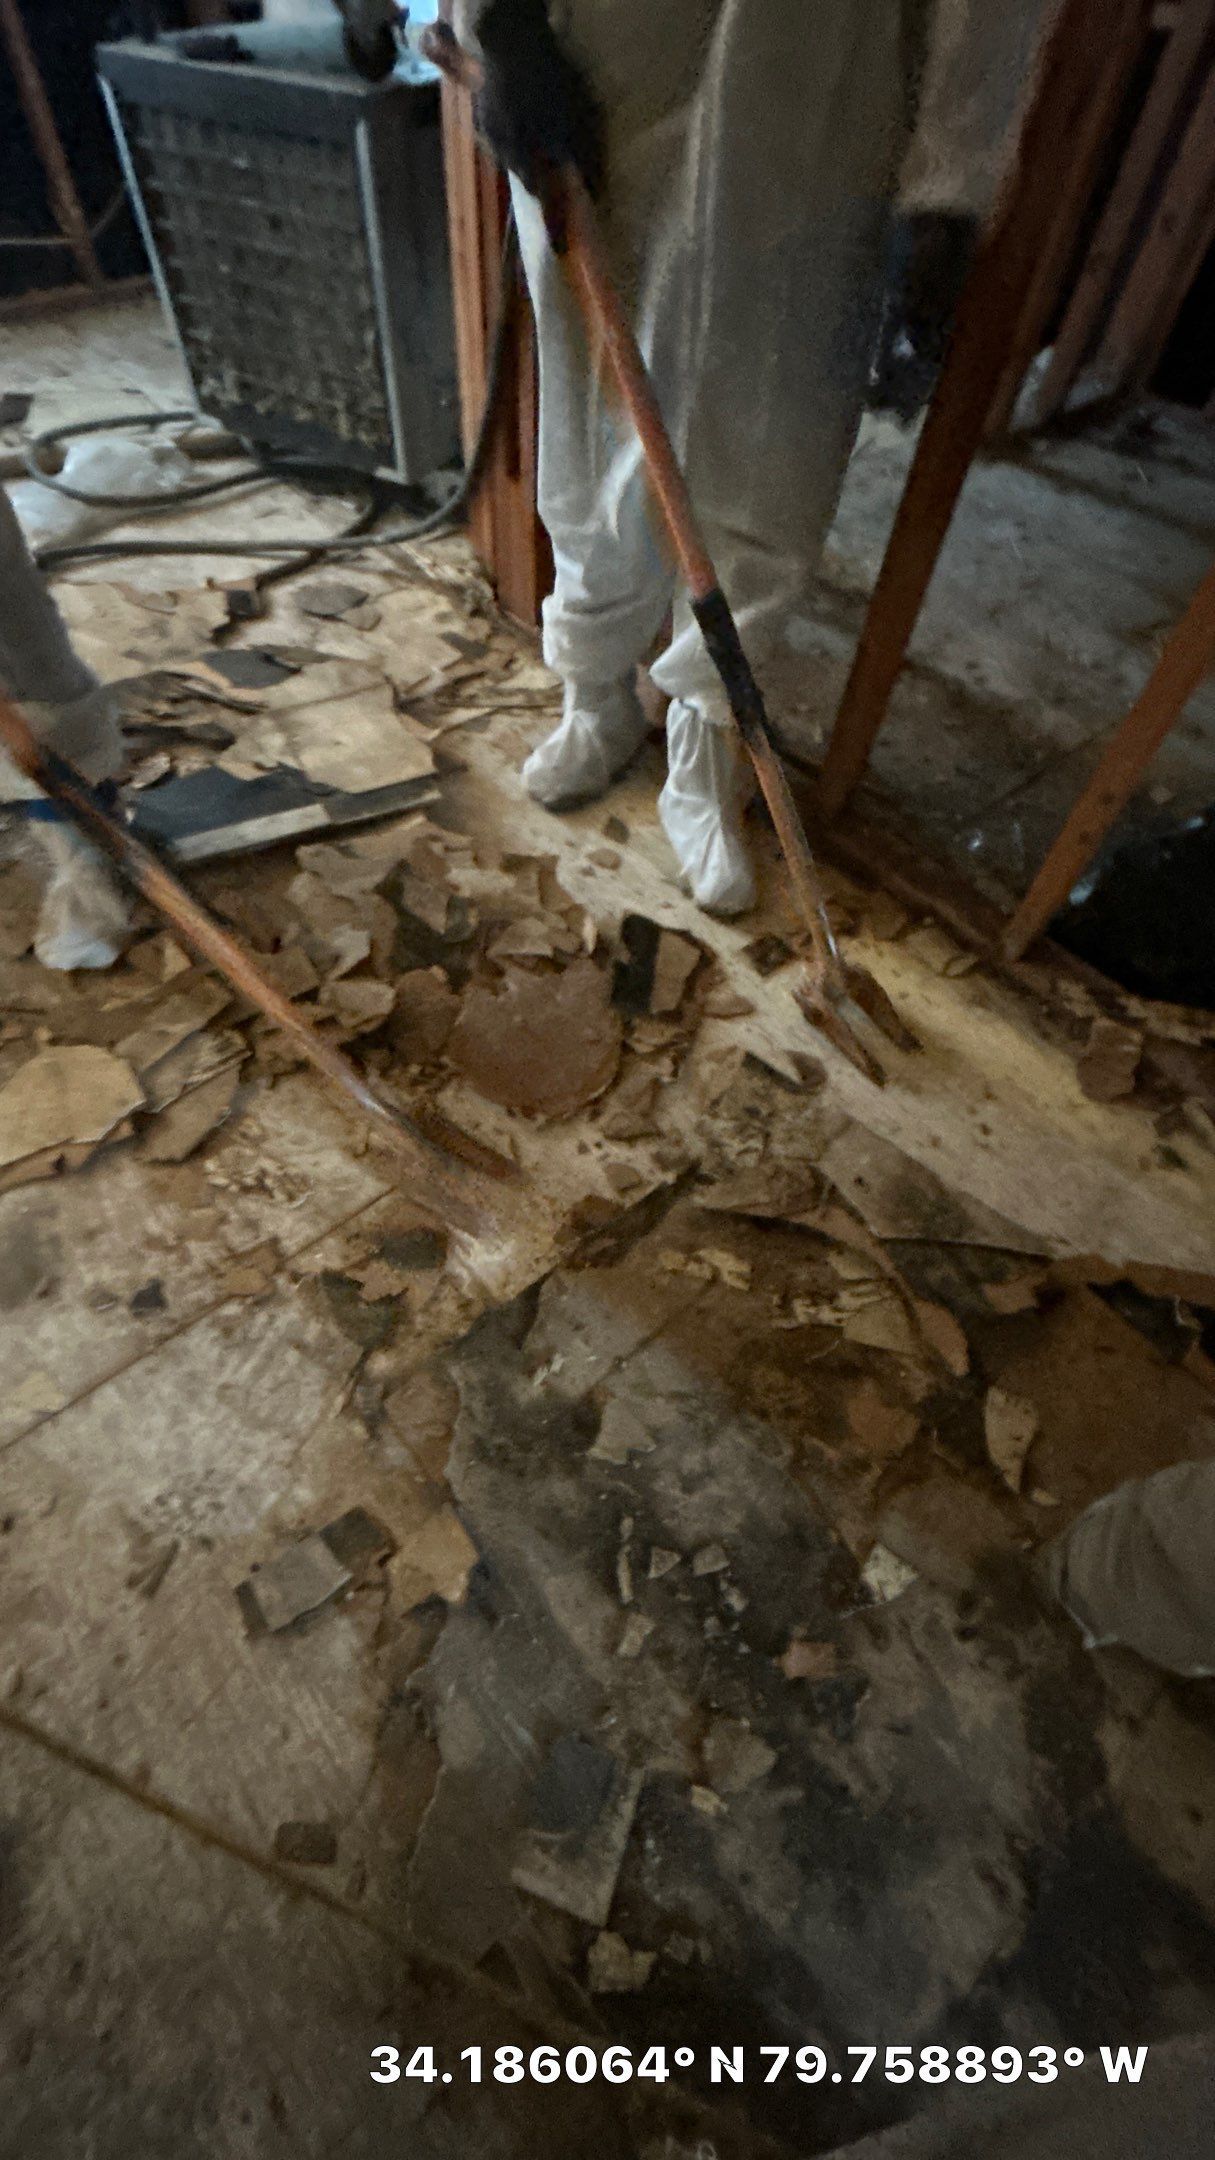
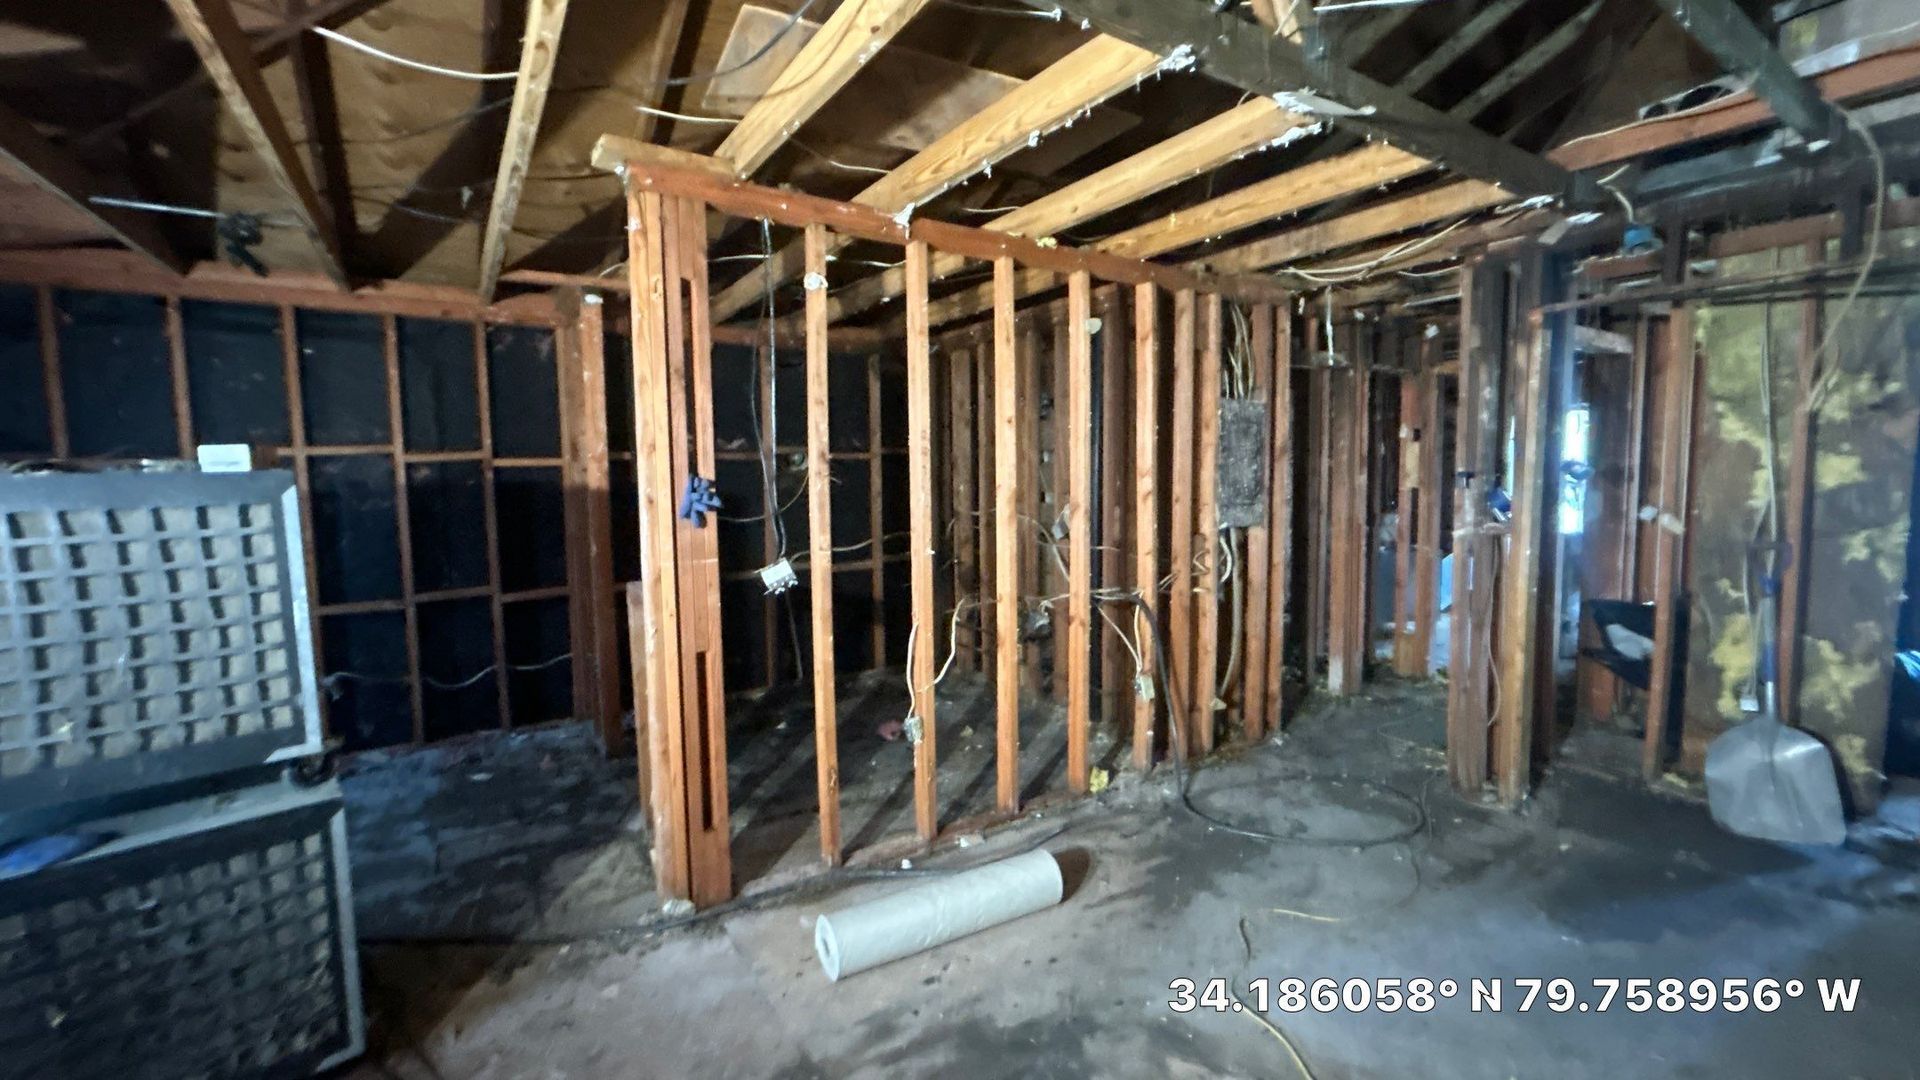
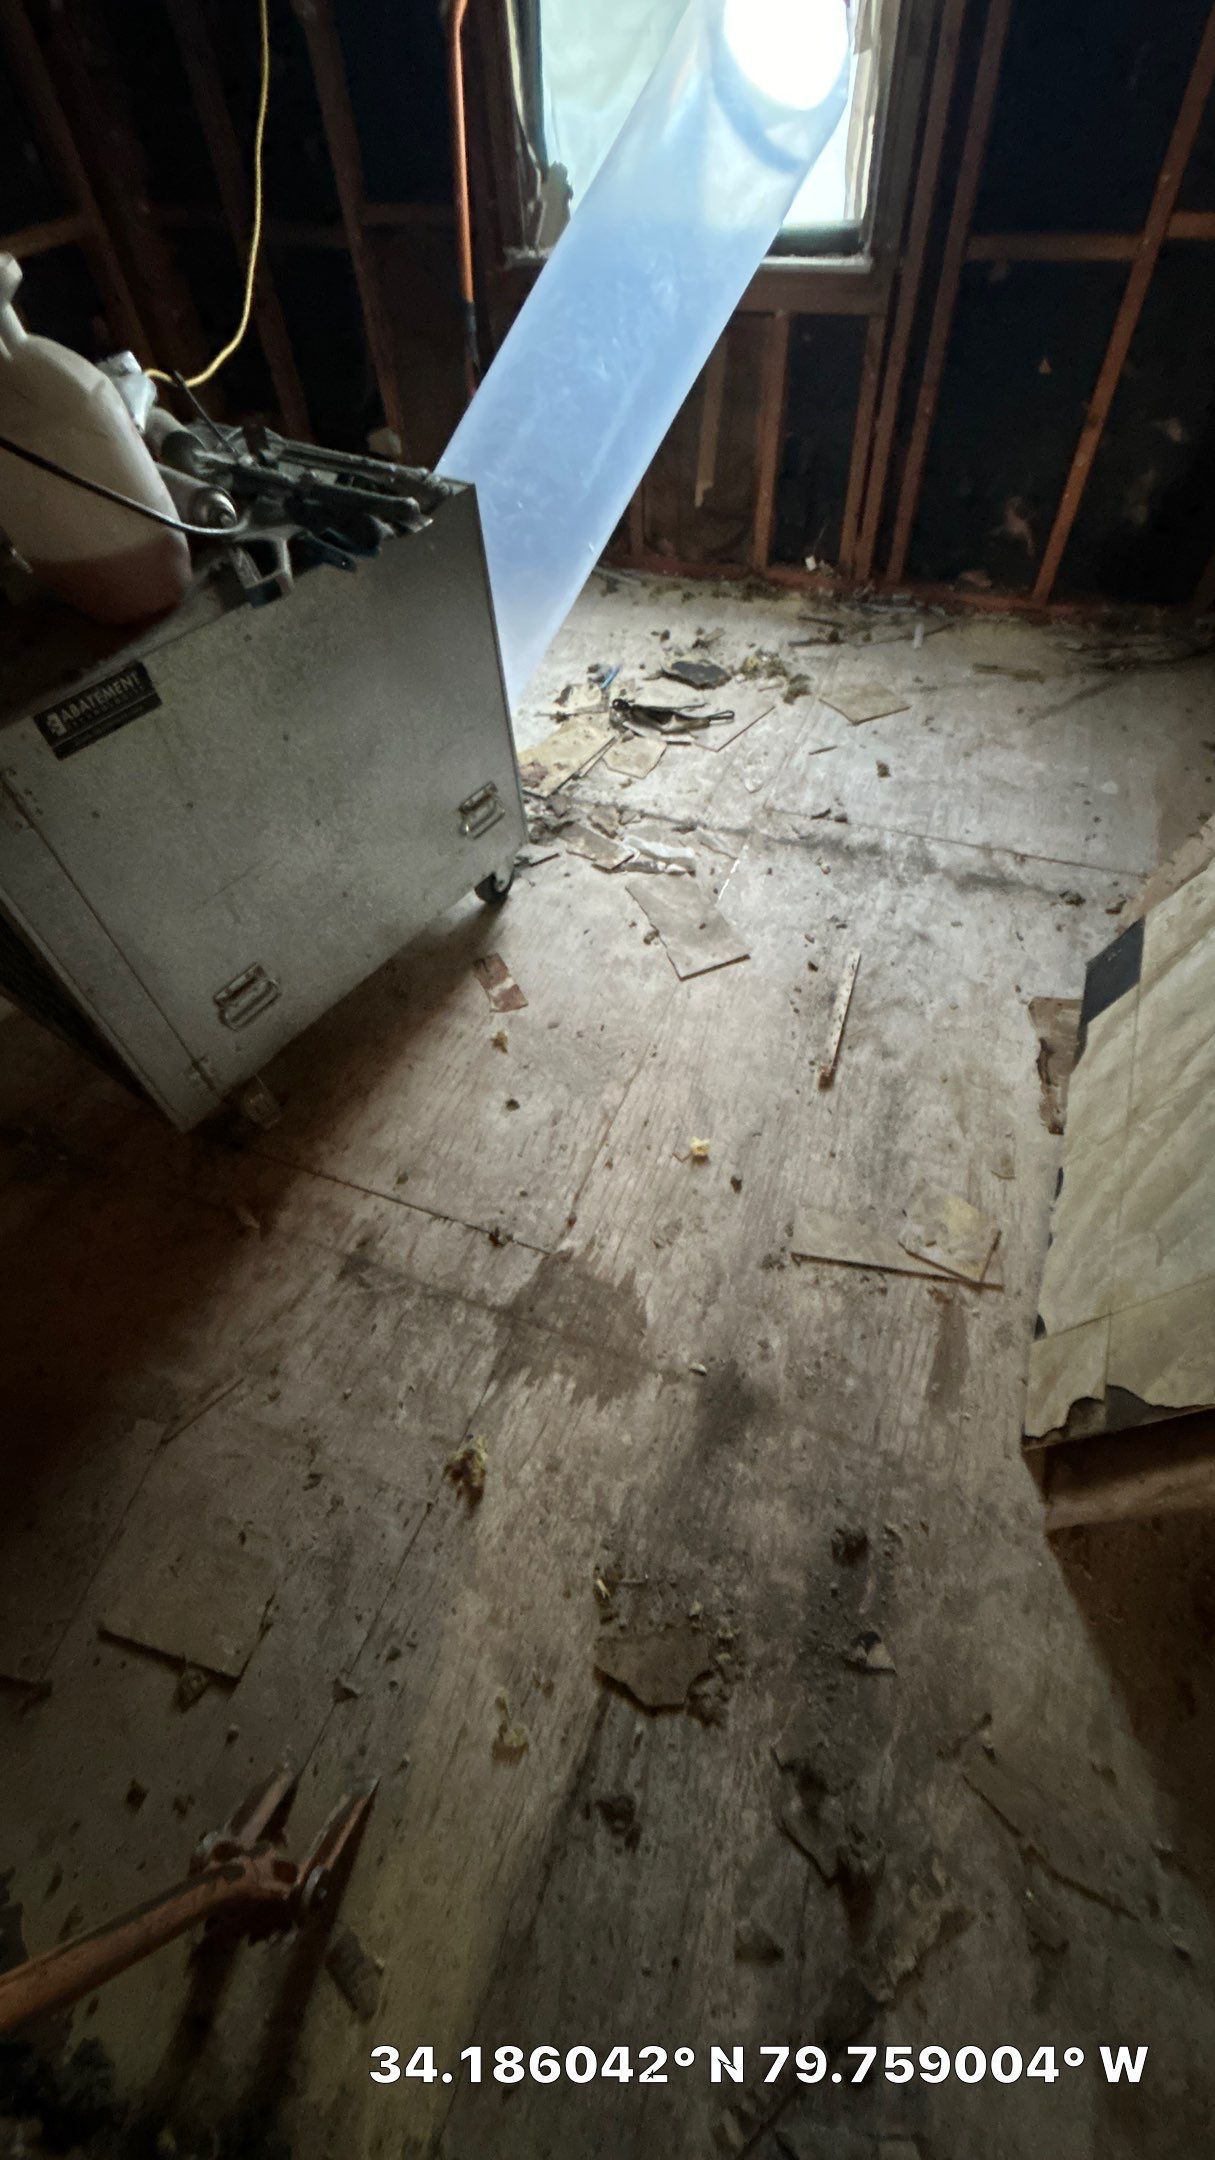
Step 3: Demolition and Removal of Damaged Materials
Next, our team follows strict regulatory disposal standards. Any salvageable belongings are packed, cleaned, and stored safely for return. We then carefully remove unsalvageable building materials. Depending on the project, this may include:
- Drywall, flooring, insulation, and ceilings.
- Fire- and water-damaged contents.
- Materials compromised by mold or hazardous substances.
For this particular case, everything was deemed non-salvageable, so once the proper containment barriers and decontamination enclosure systems were put into place, our team got to work. First, we removed all the non-asbestos-containing materials; this includes cabinets, sinks, shower/tub, contents, etc. Second, we start the abatement of ACMs. The drywall and associated building materials were abated first, and then the floor tile.
Step 4: Cleaning and Environmental Remediation
With the damaged materials removed, we transition to
deep cleaning and environmental remediation. This includes:
- Asbestos and hazardous material abatement following EPA and OSHA standards.
- Mold remediation using HEPA vacuums, antimicrobial treatments, and specialized containment.
- Fire damage restoration with soot cleaning, smoke odor removal, and surface sanitization.
- Water damage restoration with drying and dehumidification.
Since this specific project consisted of both fire damage mitigation and asbestos abatement, the cleanup consisted of more than just abatement level cleaning. For asbestos abatements, every surface is HEPA vacuumed, wiped down with a disinfectant, and HEPA vacuumed again. We then fogged the whole apartment with a safe, odor-neutralizing mist, and set up Hydroxyl generators to break down and eliminate odor-causing molecules.
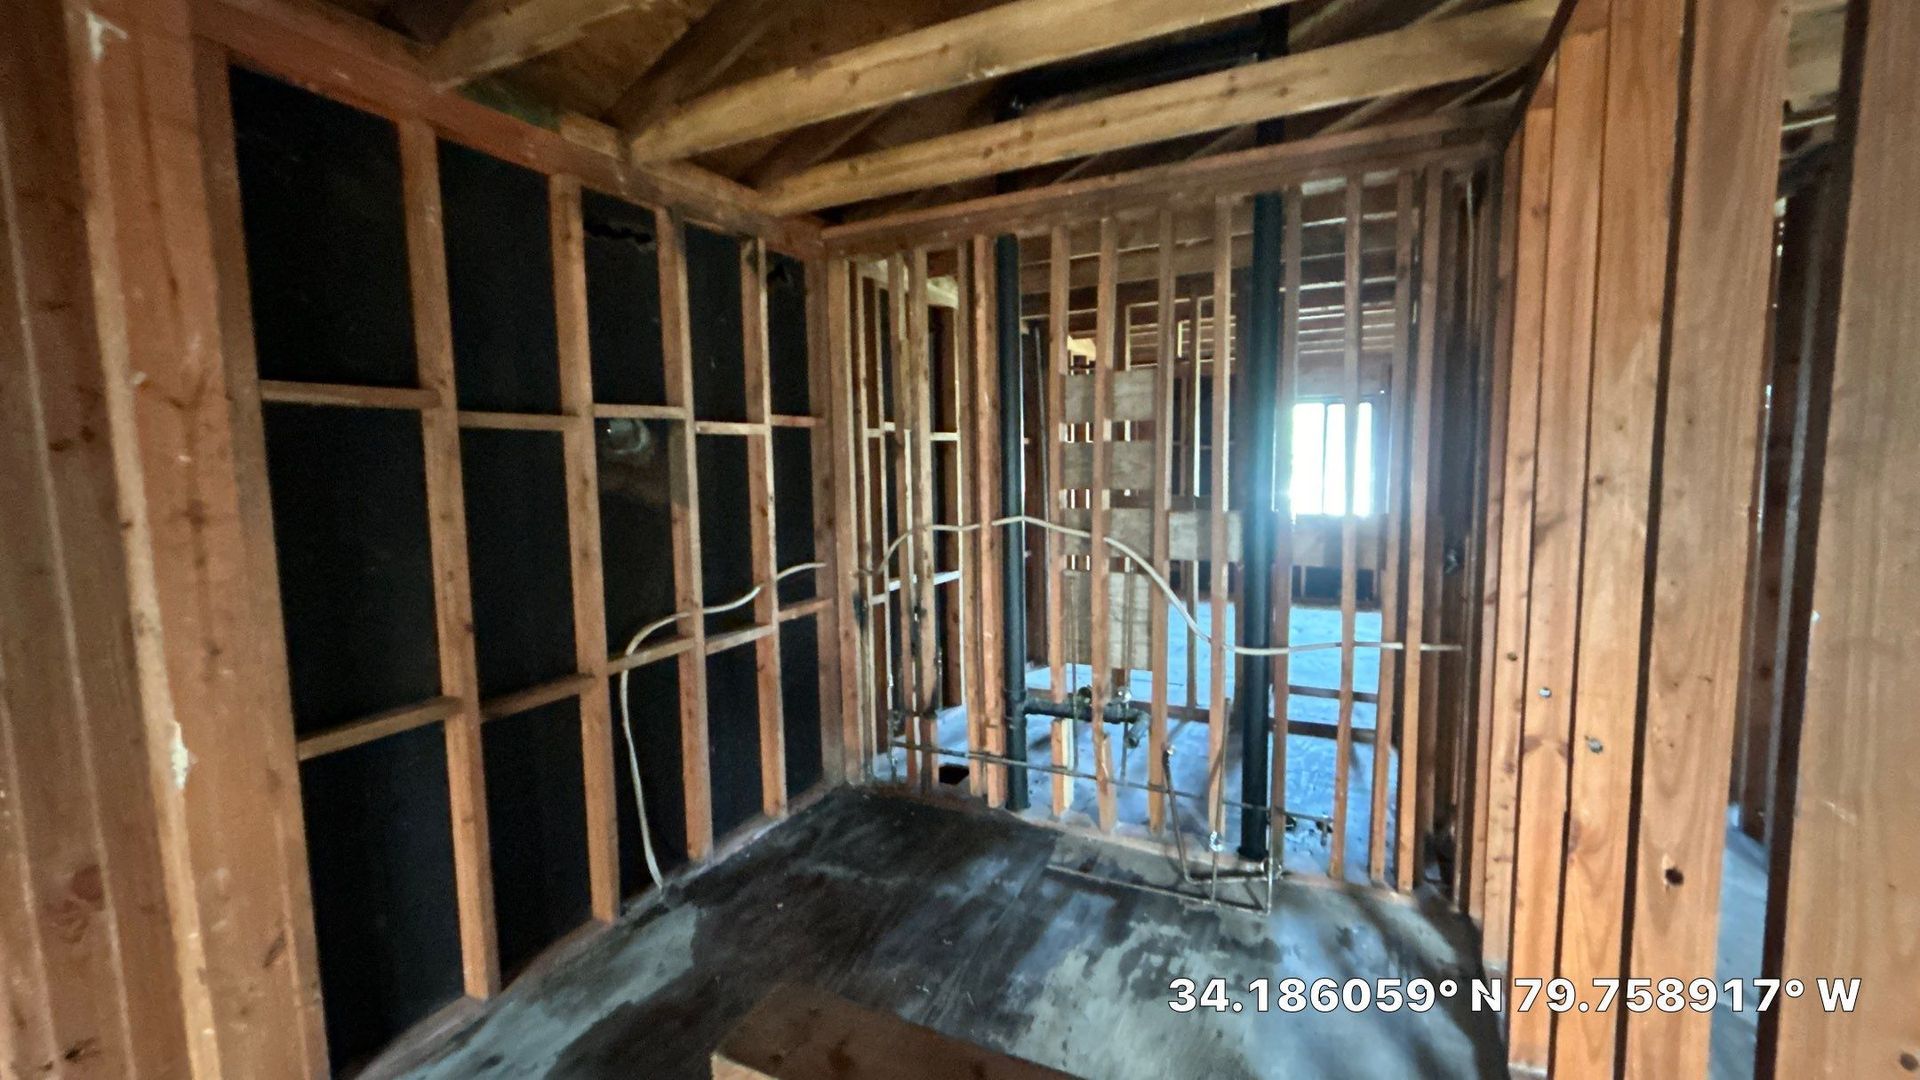
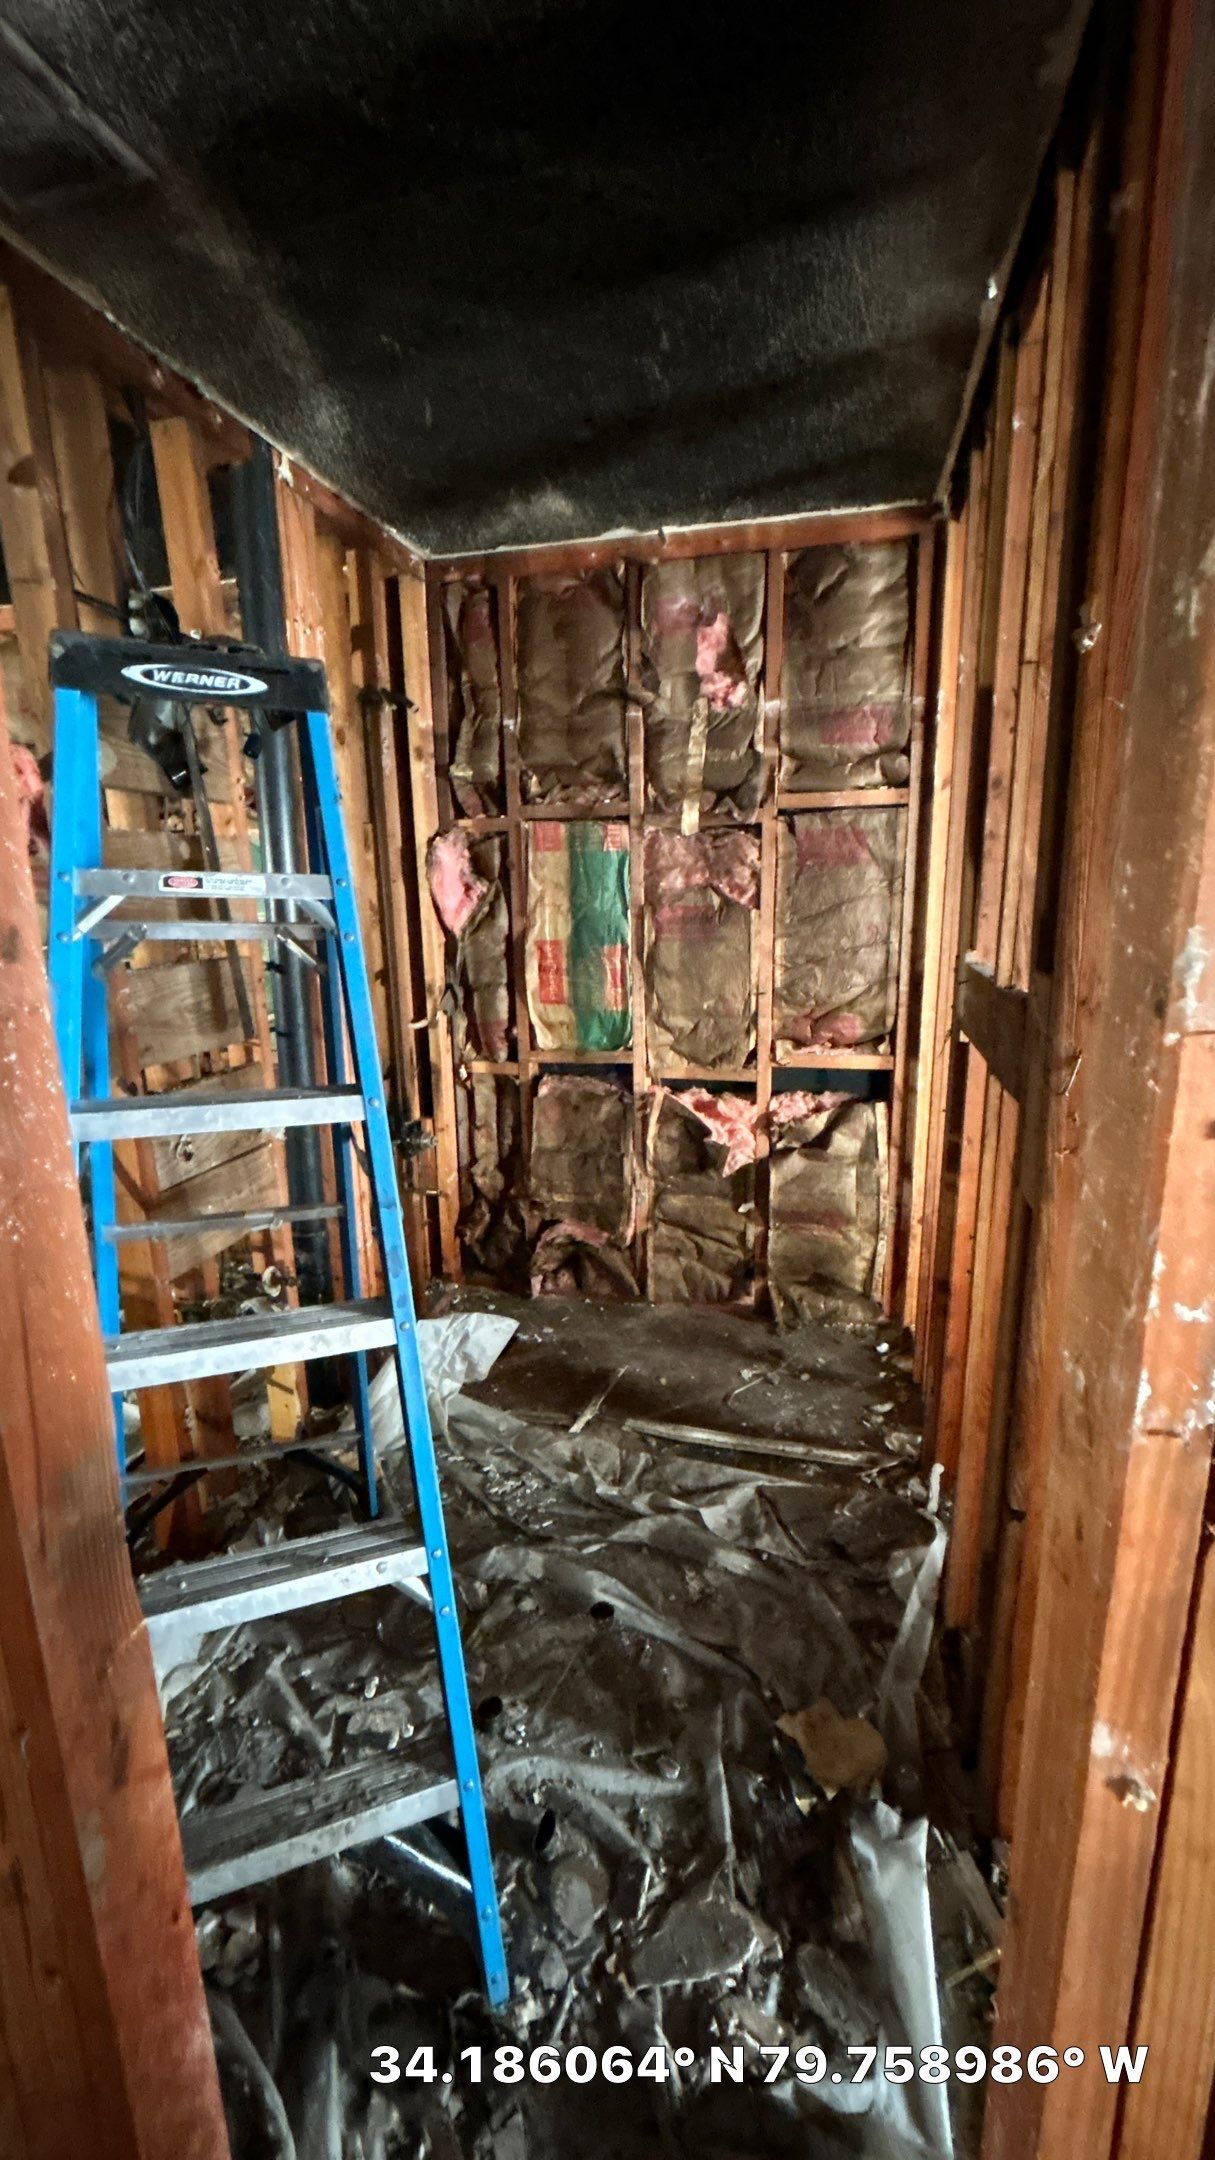
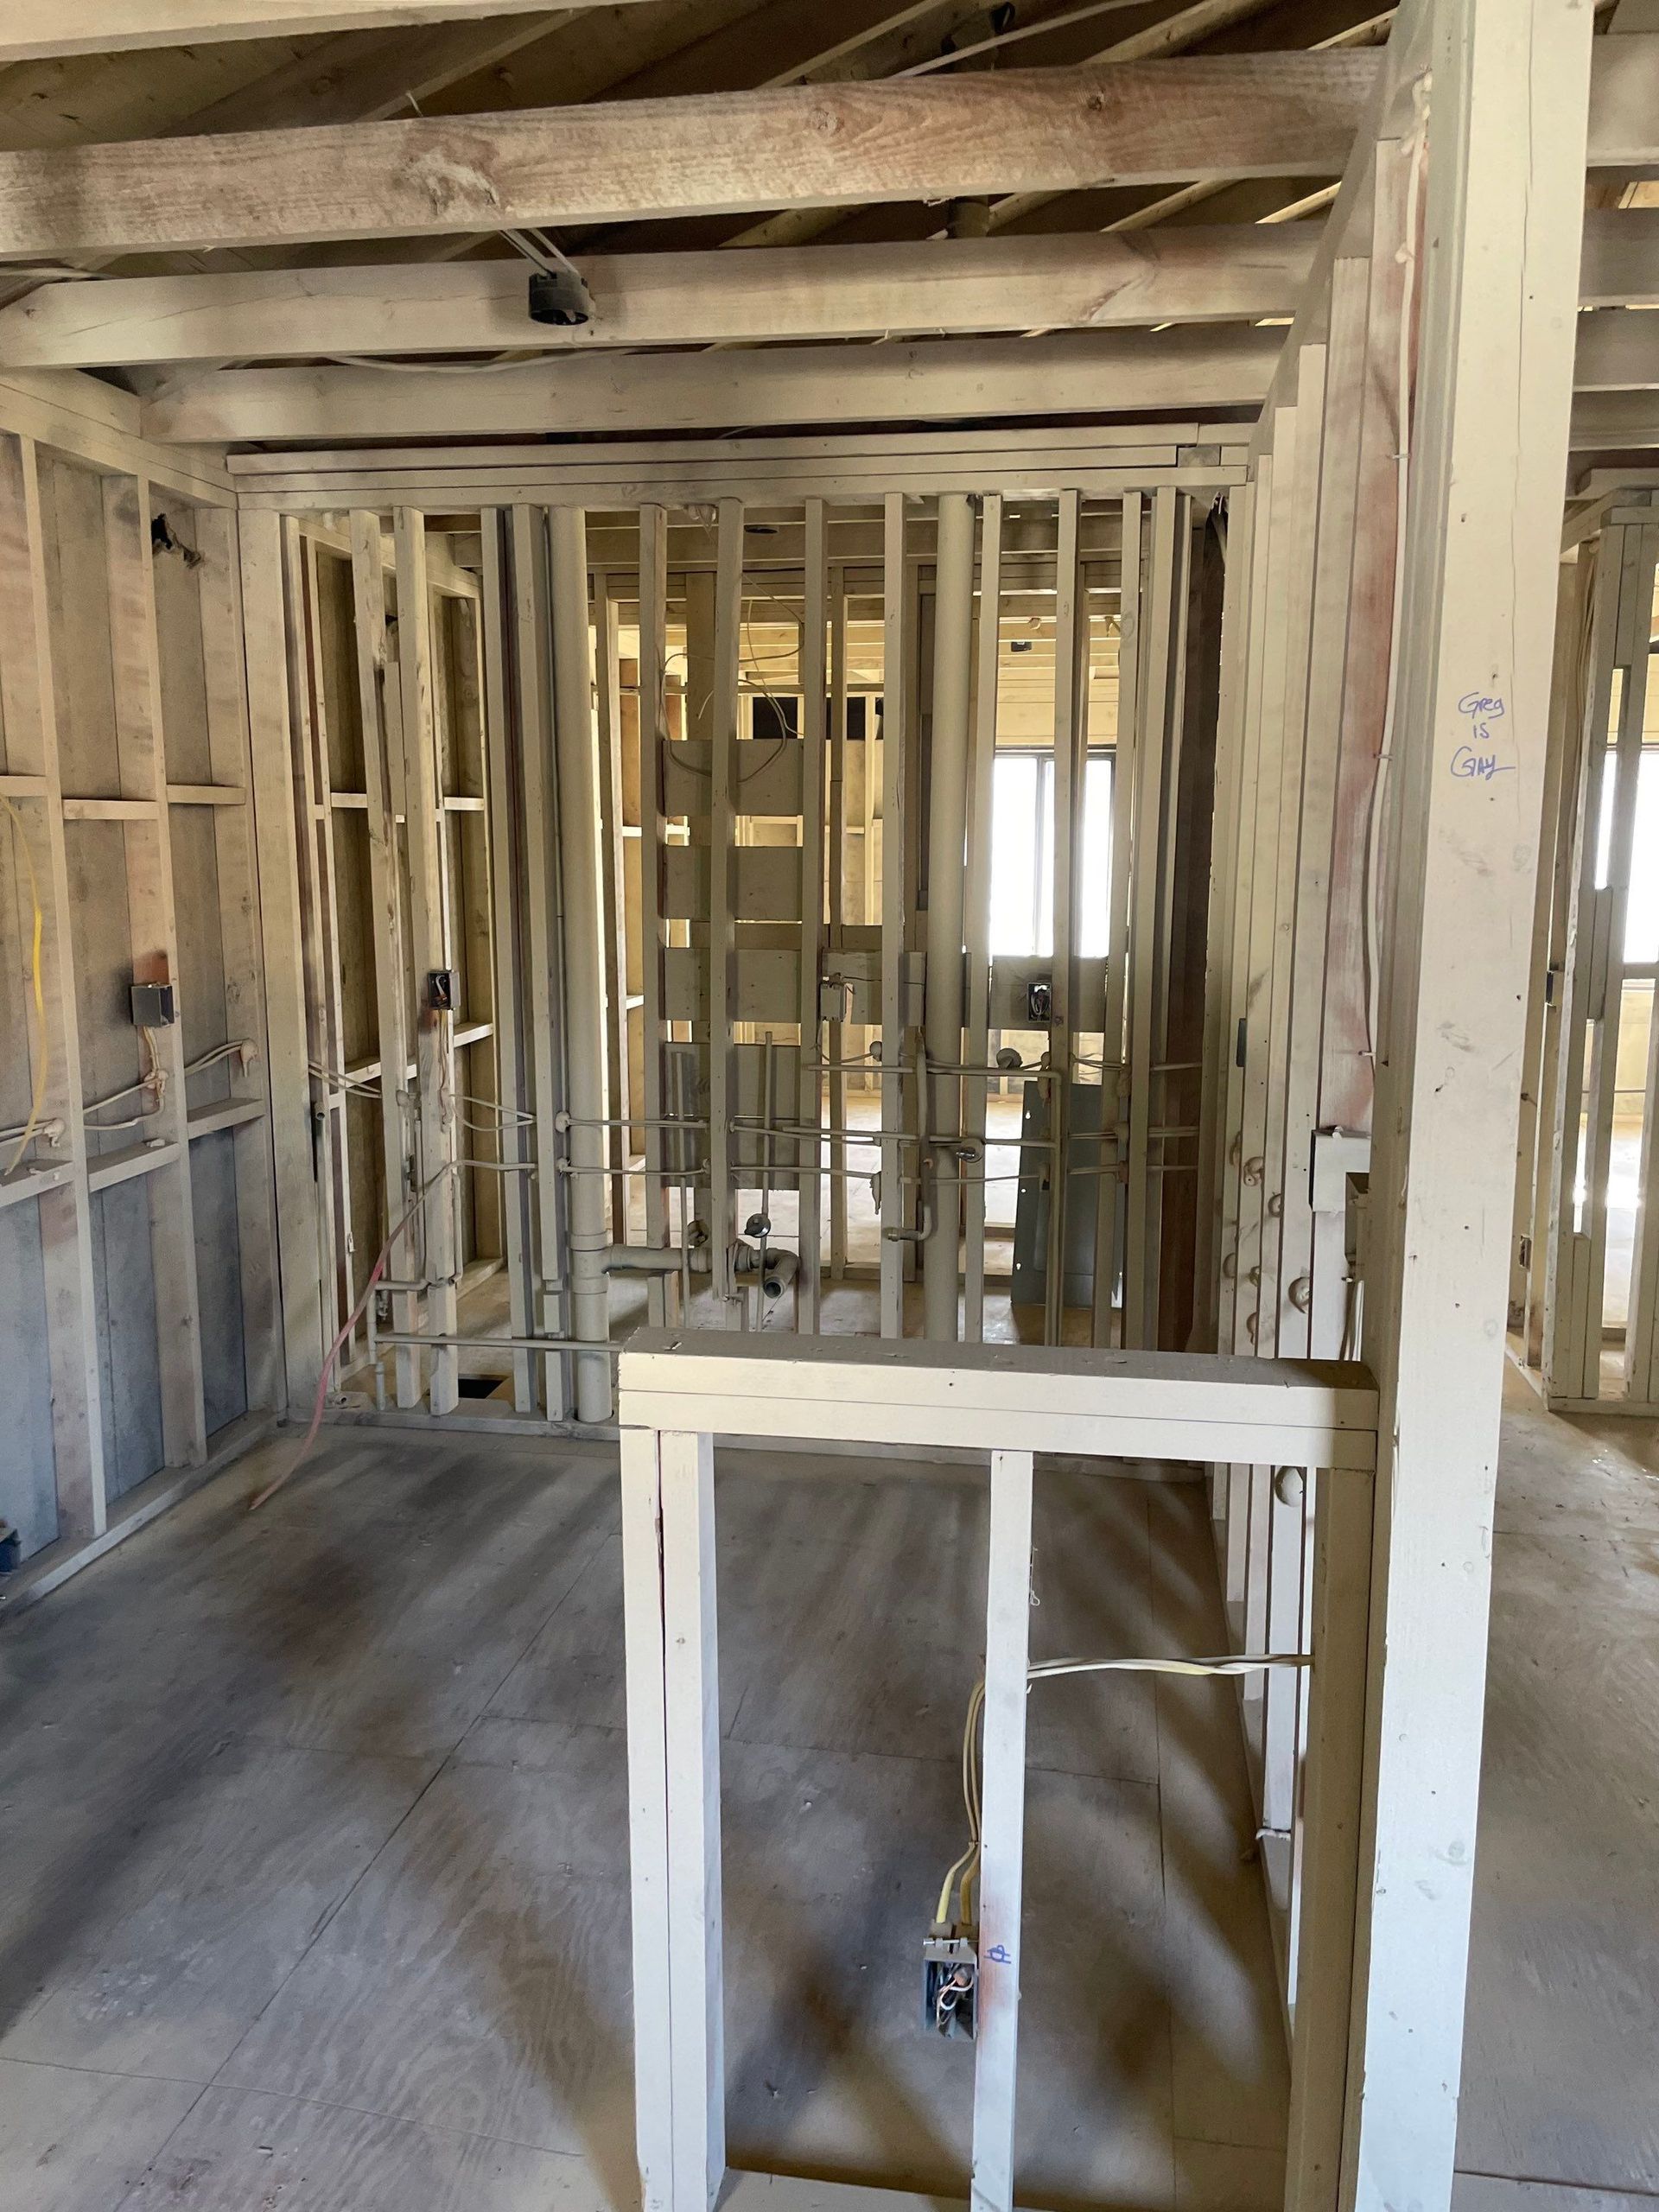
Step 5: Final Air Clearance and Close-Out
The final stage is about verification and peace of mind. An independent air quality professional performs clearance testing to confirm the property is safe for re-entry. After approval, we:
- Dismantle containment barriers.
- Conduct one final cleaning and sanitization.
Return the property to you—safe, clean, and ready for rebuild.
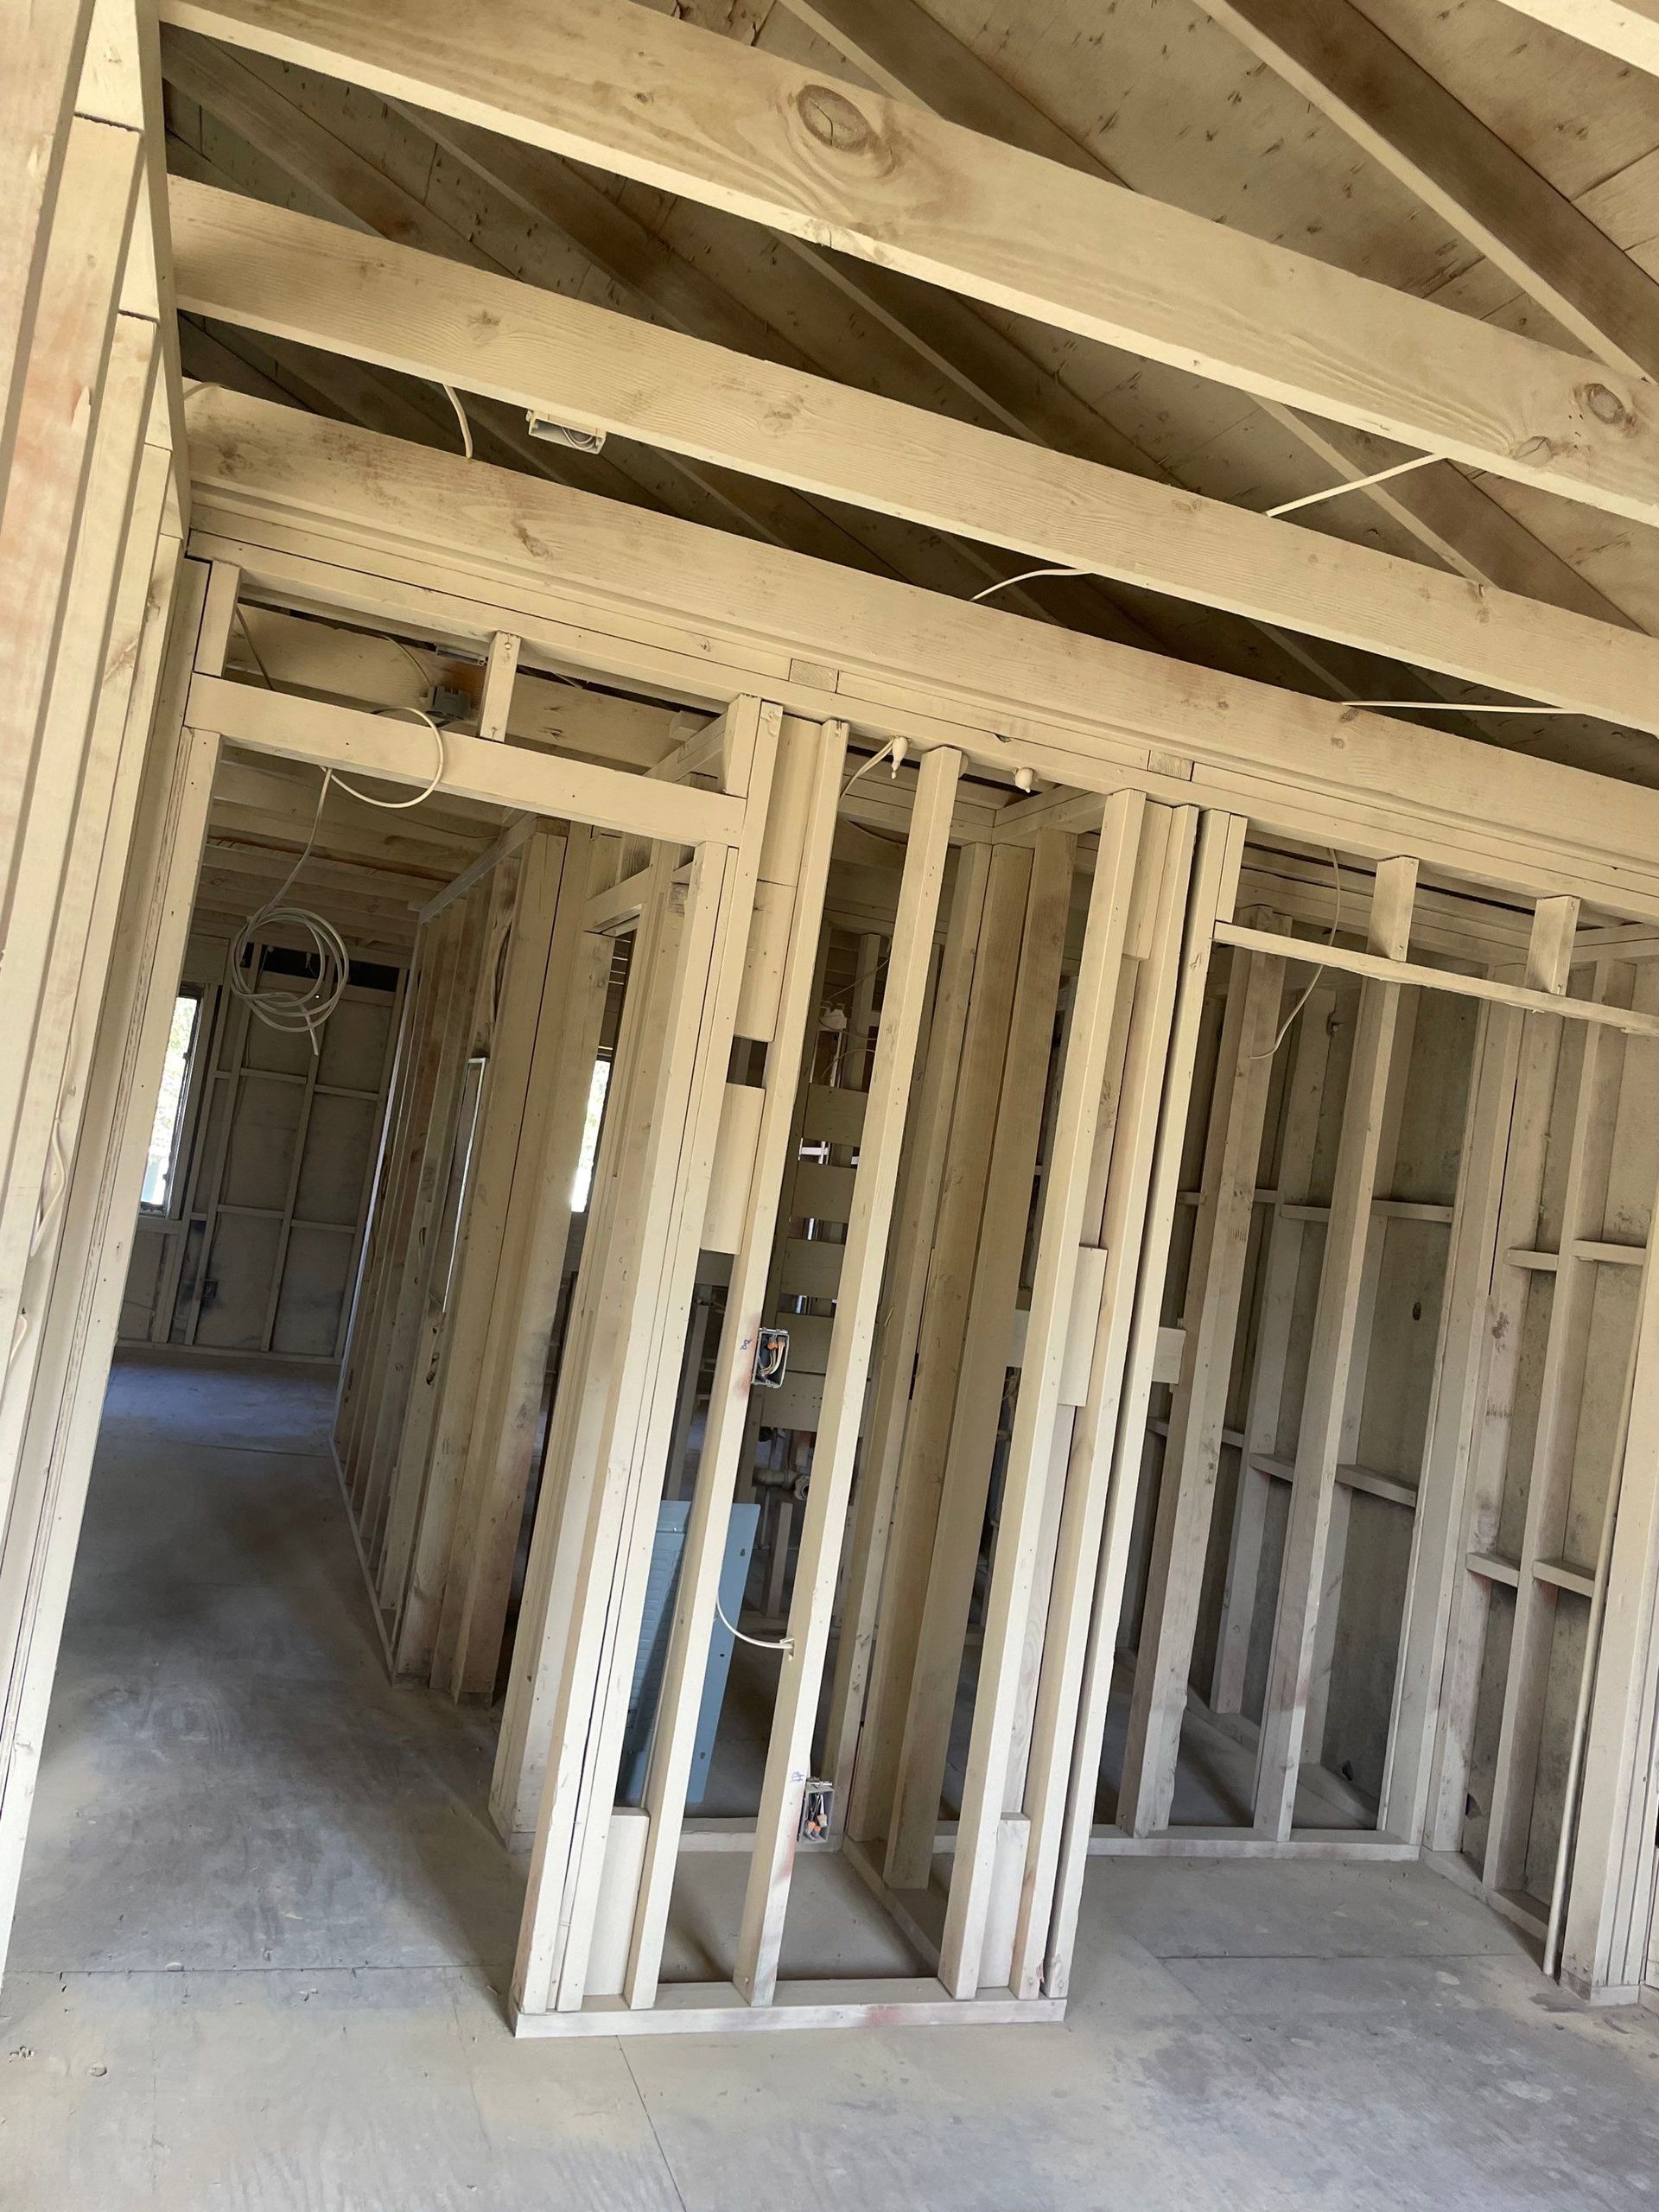
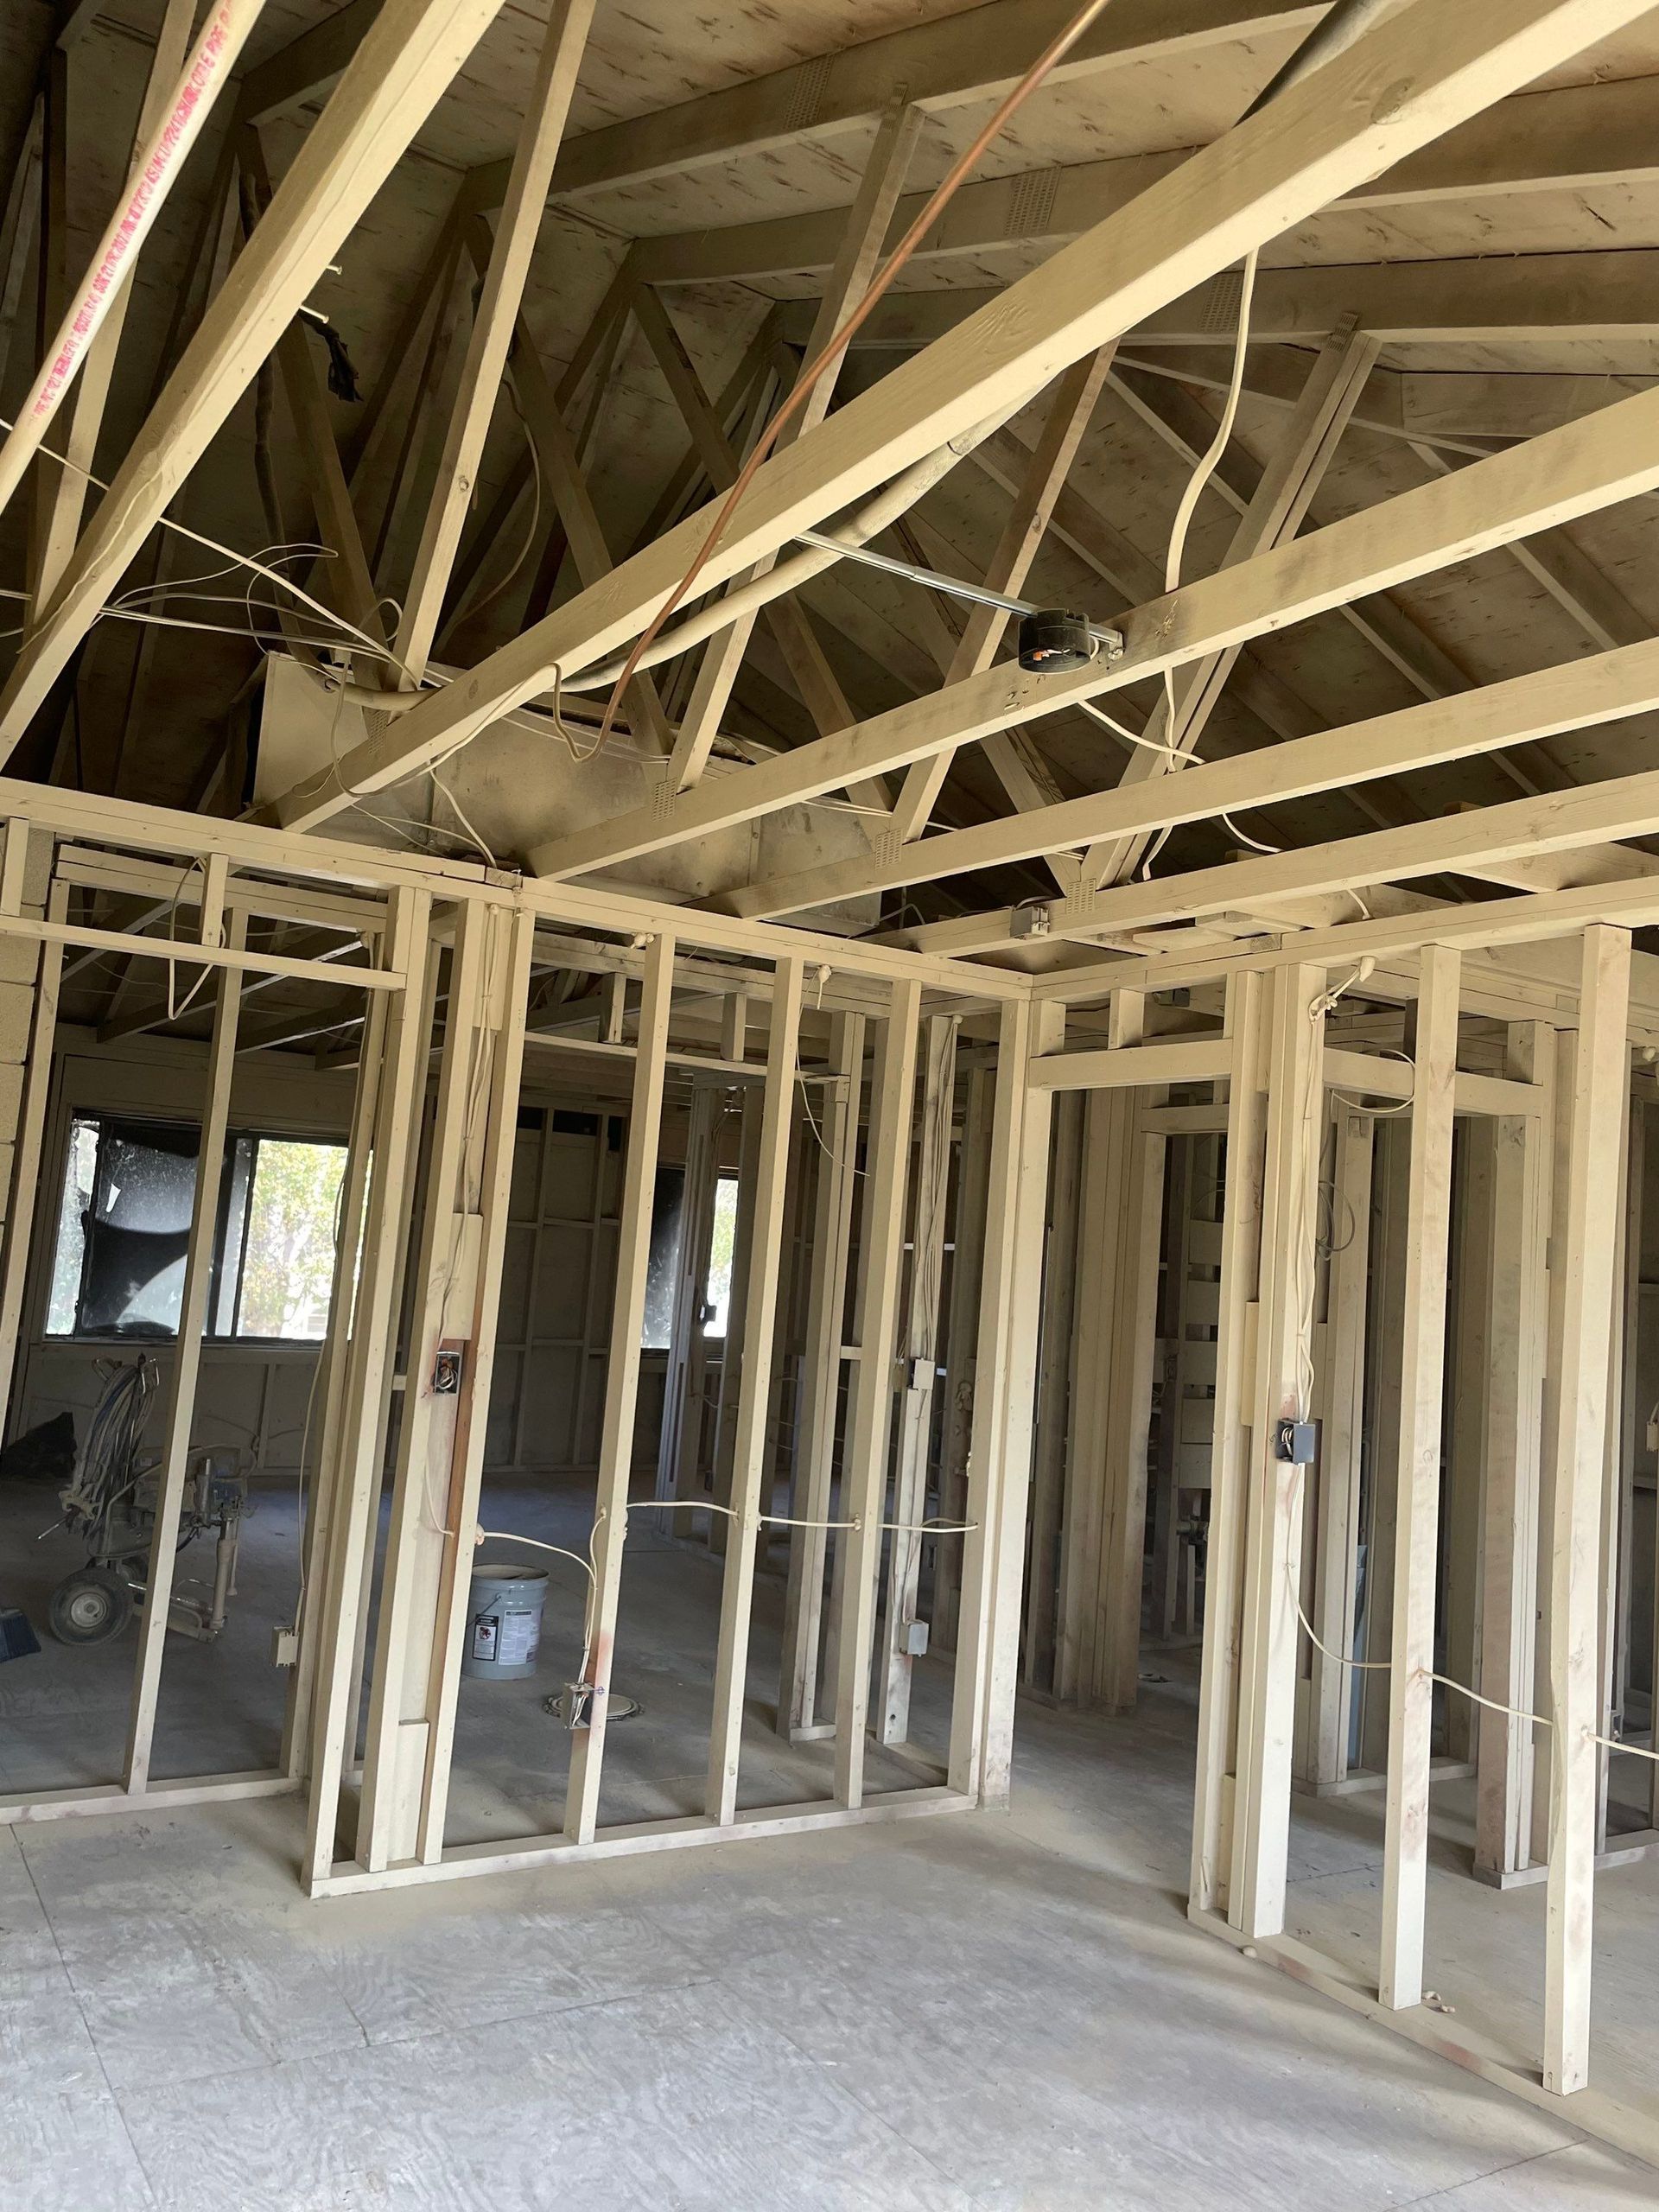
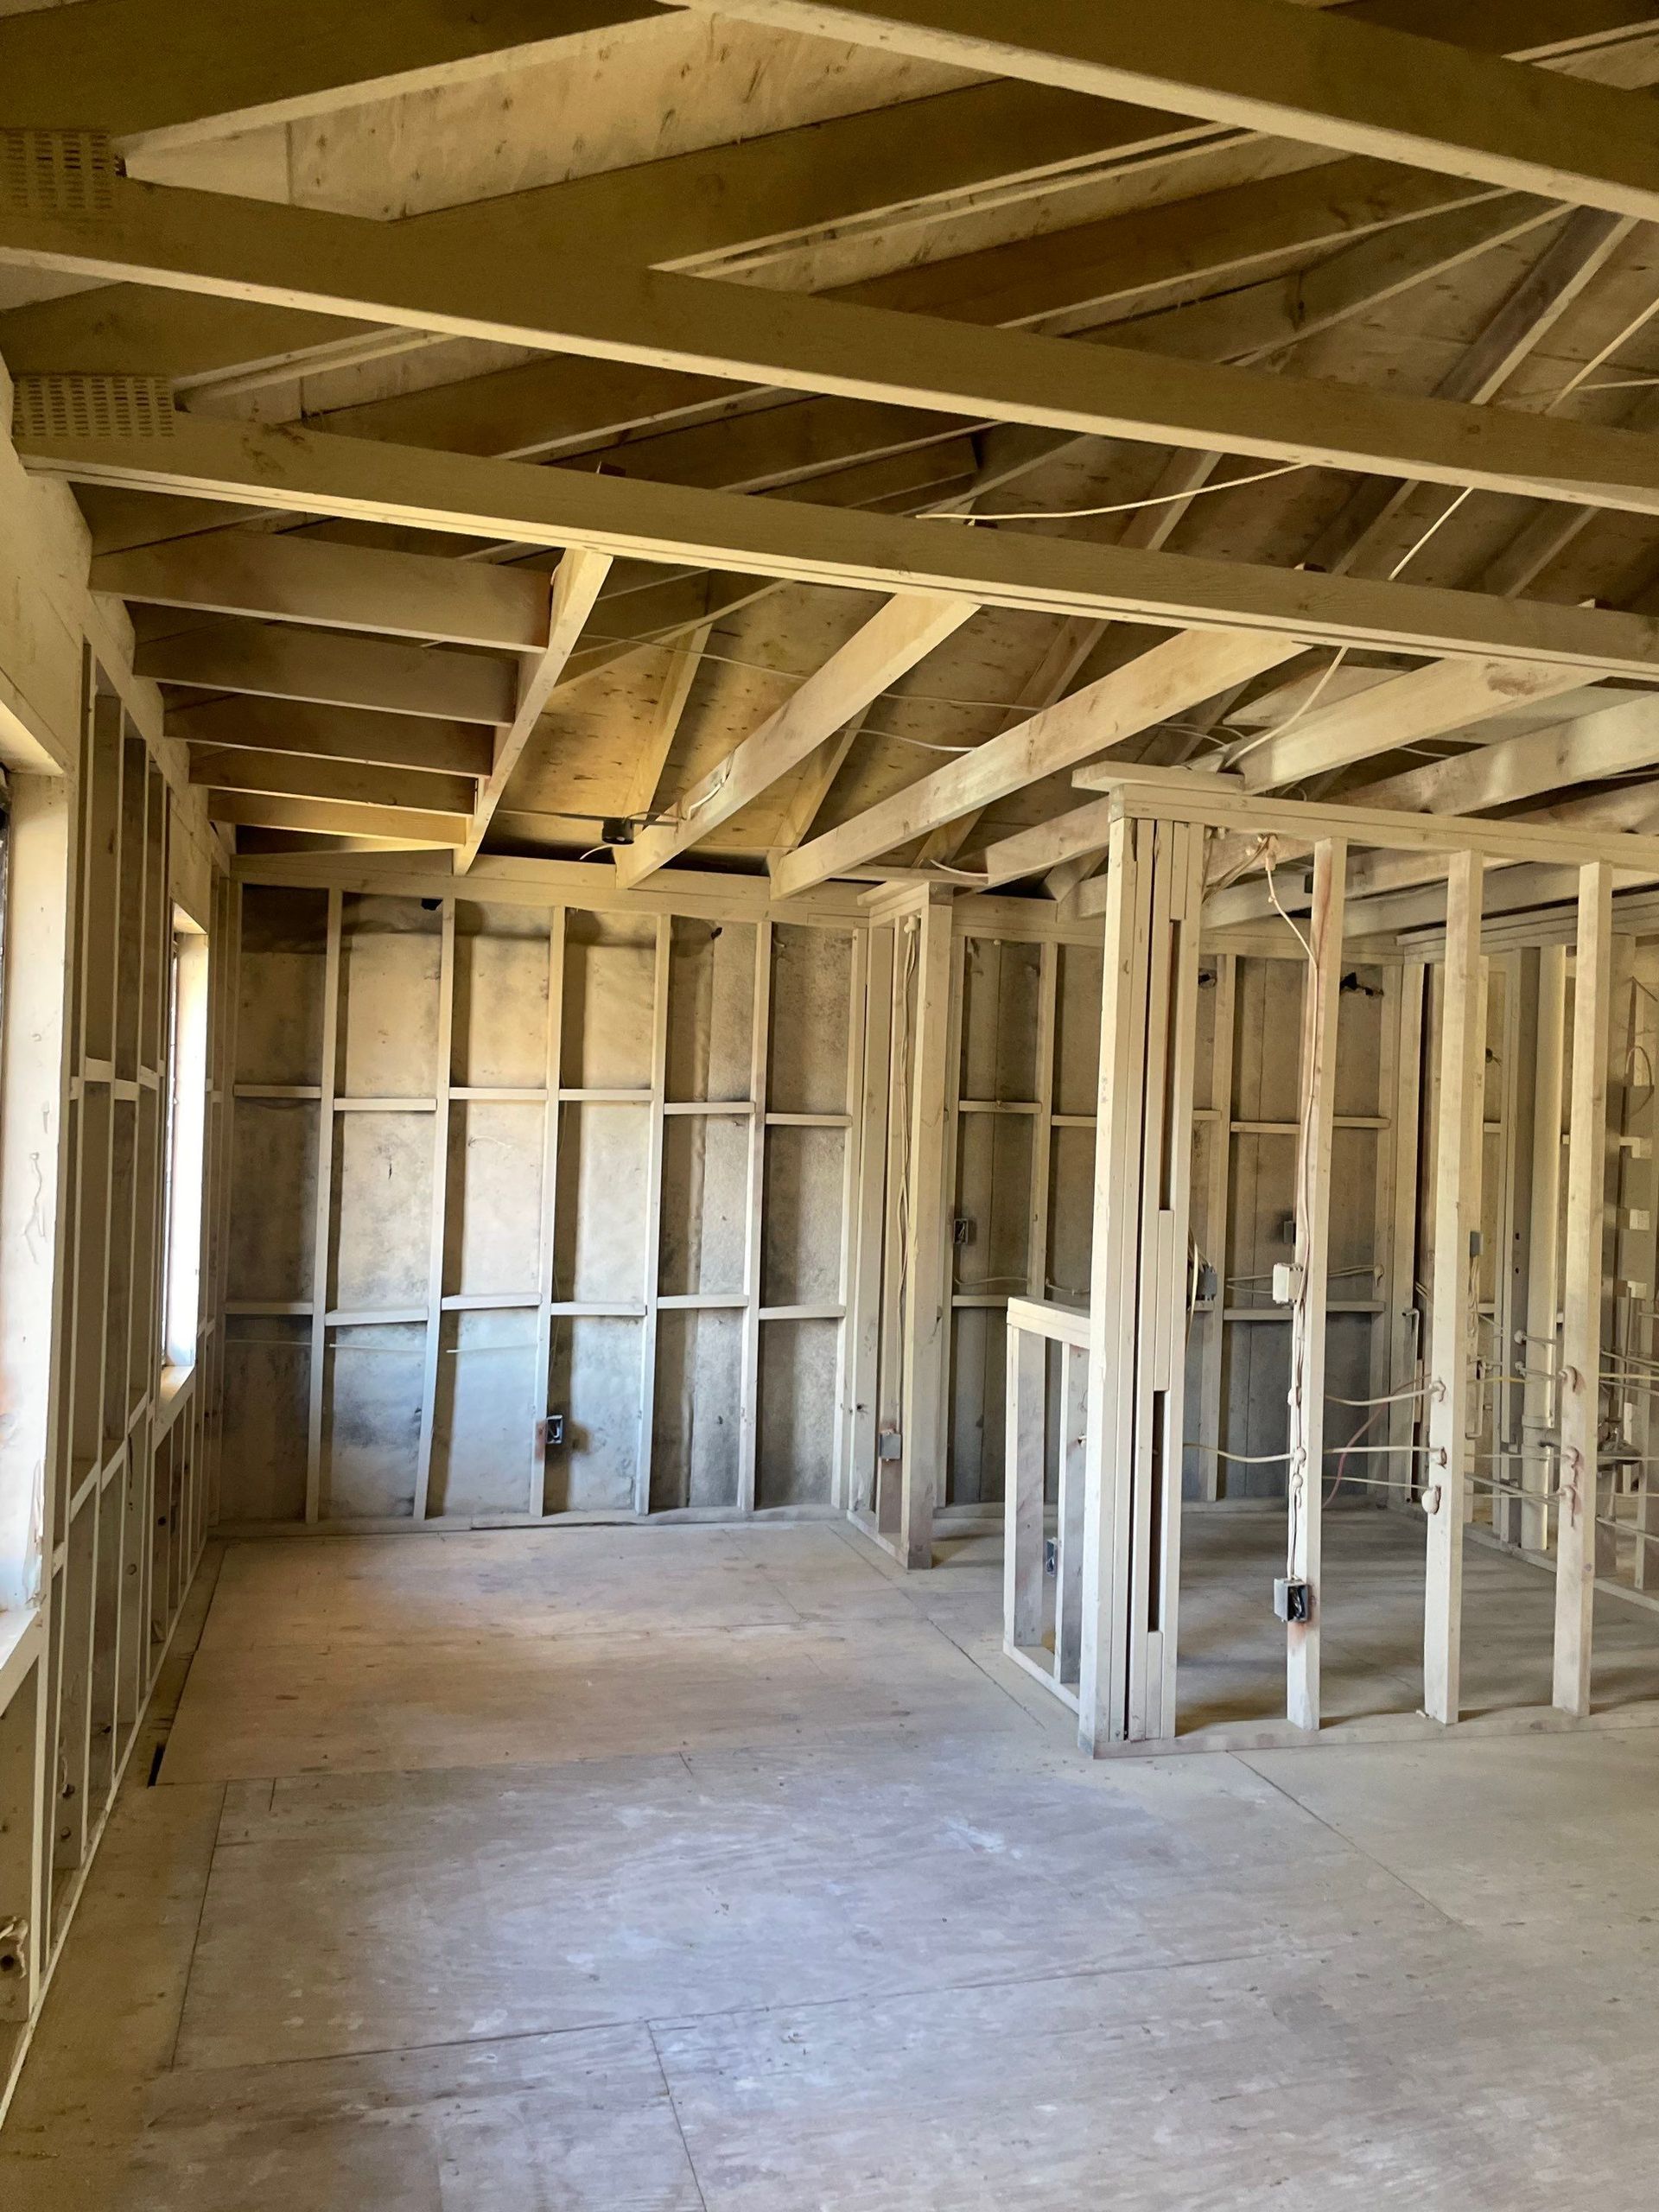
This step ensures your property is not only restored but also certified safe for occupants. Once air clearances pass, containment can be broken down. After containment was broken down, EASE applied shellac on all studs, sheathing, open cavities, and exposed framing, which provided a permanent barrier against the lingering smoke odor.
Why Choose EAS Environmental?
From emergency response to final clearance, EAS Environmental is your trusted partner for disaster restoration. We specialize in:
- Water damage restoration
- Fire and smoke odor damage cleanup
- Mold remediation
- Asbestos abatement and hazardous material removal
With certified technicians, industry-standard protocols, and a commitment to integrity, we don’t just restore properties—we restore confidence and peace of mind!
Call us at 843-977-3273 Or visit easenvironmental.com to schedule a consultation.
Contact EAS Environmental Today!
EAS Environmental will do everything we can to ensure your experience with us is excellent.
Request A FREE Estimate
Request a Free Estimate Form
Checkout Recent Post
Got a Question? We’re Here to Help.
You can arrange an appointment or make an enquiry by phone or email, orget in touch to us via our contact form.