When it comes to protecting your crawl space from moisture, choosing the right vapor barrier material is crucial. With a variety of options available, it can be challenging to determine which one is best suited for your needs. In this blog, we will compare the best crawl space vapor barrier materials, providing you with valuable insights to help you make an informed decision and select the material that offers the optimal balance of durability, effectiveness, and ease of installation for your crawl space.
Install a Vapor Barrier in Your Crawl Space Like a Pro
Installing a vapor barrier in your crawl space is a proactive step towards controlling moisture and protecting your home. While it may seem like a daunting task, with the right approach and guidance, you can install a vapor barrier like a pro and reap the benefits of a drier and healthier crawl space environment.
To install a vapor barrier like a professional, start by properly preparing the crawl space. This involves cleaning out debris, addressing any existing moisture or mold issues, and ensuring a clean and dry environment. Next, measure and cut the vapor barrier accurately to fit the dimensions of your crawl space, leaving some extra material for overlapping and sealing. Secure the barrier to the walls and floor using a staple gun or adhesive, ensuring a tight fit and sealing any seams or edges. Finally, anchor the vapor barrier properly to prevent shifting and periodically inspect it for any damage or wear.
By following these steps and taking a meticulous approach, you can install a vapor barrier in your crawl space with the precision and effectiveness of a professional. This will help control moisture levels, prevent mold growth, and protect the structural integrity of your home. Enjoy the satisfaction of a job well done while reaping the benefits of a well-installed vapor barrier.
Properly Install a Vapor Barrier in Your Crawl Space
Installing a vapor barrier in your crawl space is a crucial step in protecting your home from moisture-related issues. To ensure its effectiveness, it is important to properly install the vapor barrier, following a few key steps for a successful installation.
First, prepare the crawl space by cleaning out debris and addressing any existing moisture problems or mold growth. Next, measure the dimensions of your crawl space accurately and cut the vapor barrier to fit, leaving some extra material for overlapping and sealing. Properly secure the vapor barrier to the walls and floor using a staple gun or adhesive, ensuring a tight fit and sealing any seams or edges. Anchor the barrier to prevent shifting, and consider adding additional measures such as insulation or a dehumidifier for enhanced moisture control. By properly installing the vapor barrier, you can create a moisture-resistant barrier that helps protect your home from the damaging effects of excess moisture and contributes to a healthier living environment.
By taking the time and effort to properly install a vapor barrier in your crawl space, you are investing in the long-term health and durability of your home. With the right approach, you can effectively control moisture, prevent mold growth, and minimize the risk of structural damage caused by excessive humidity. Follow these proper installation steps and enjoy the peace of mind that comes with a well-protected crawl space.
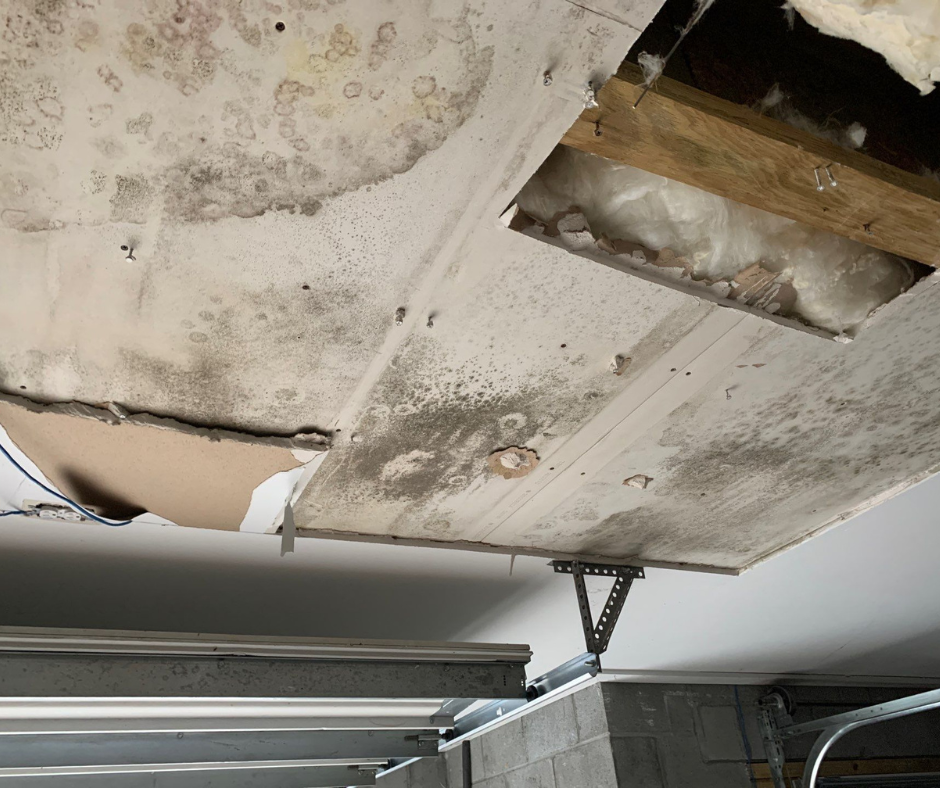
Protecting Your Home from Moisture and Mold
Moisture and mold can pose significant risks to the health of your home and its occupants. From structural damage to respiratory issues, these problems can be both costly and harmful. However, with proper measures in place, you can protect your home from moisture and mold, creating a safer and healthier living environment.
One key aspect of this protection is addressing moisture control, and one effective tool in this regard is installing a vapor barrier. A vapor barrier creates a barrier between the ground and your home, preventing moisture from infiltrating through the crawl space. By properly installing a vapor barrier, you can reduce the risk of mold growth, wood rot, and other moisture-related issues, preserving the structural integrity of your home.
Additionally, it's essential to address any existing moisture problems promptly. This may involve fixing leaks, improving ventilation, or installing a dehumidifier in areas prone to excess moisture. Regular inspections and maintenance are also crucial in identifying and addressing moisture-related issues before they escalate into more significant problems.
By taking proactive steps to protect your home from moisture and mold, you can safeguard your investment and the well-being of your family. From installing a vapor barrier to addressing existing issues and implementing ongoing maintenance, you can create a healthier living environment free from the risks associated with excessive moisture and mold.
FAQs
Contact EAS Environmental Today!
EAS Environmental will do everything we can to ensure your experience with us is excellent.
Request A FREE Estimate
Request a Free Estimate Form
Checkout Recent Post


Got a Question? We’re Here to Help.
You can arrange an appointment or make an enquiry by phone or email, orget in touch to us via our contact form.